Connecting your Shopify store to Emmerced is the first step to transforming your online shopping experience with immersive 3D models. This seamless integration makes managing your products effortless while unlocking the full potential of 3D visualization. Simply follow the steps below to link your store to Emmerced in minutes:
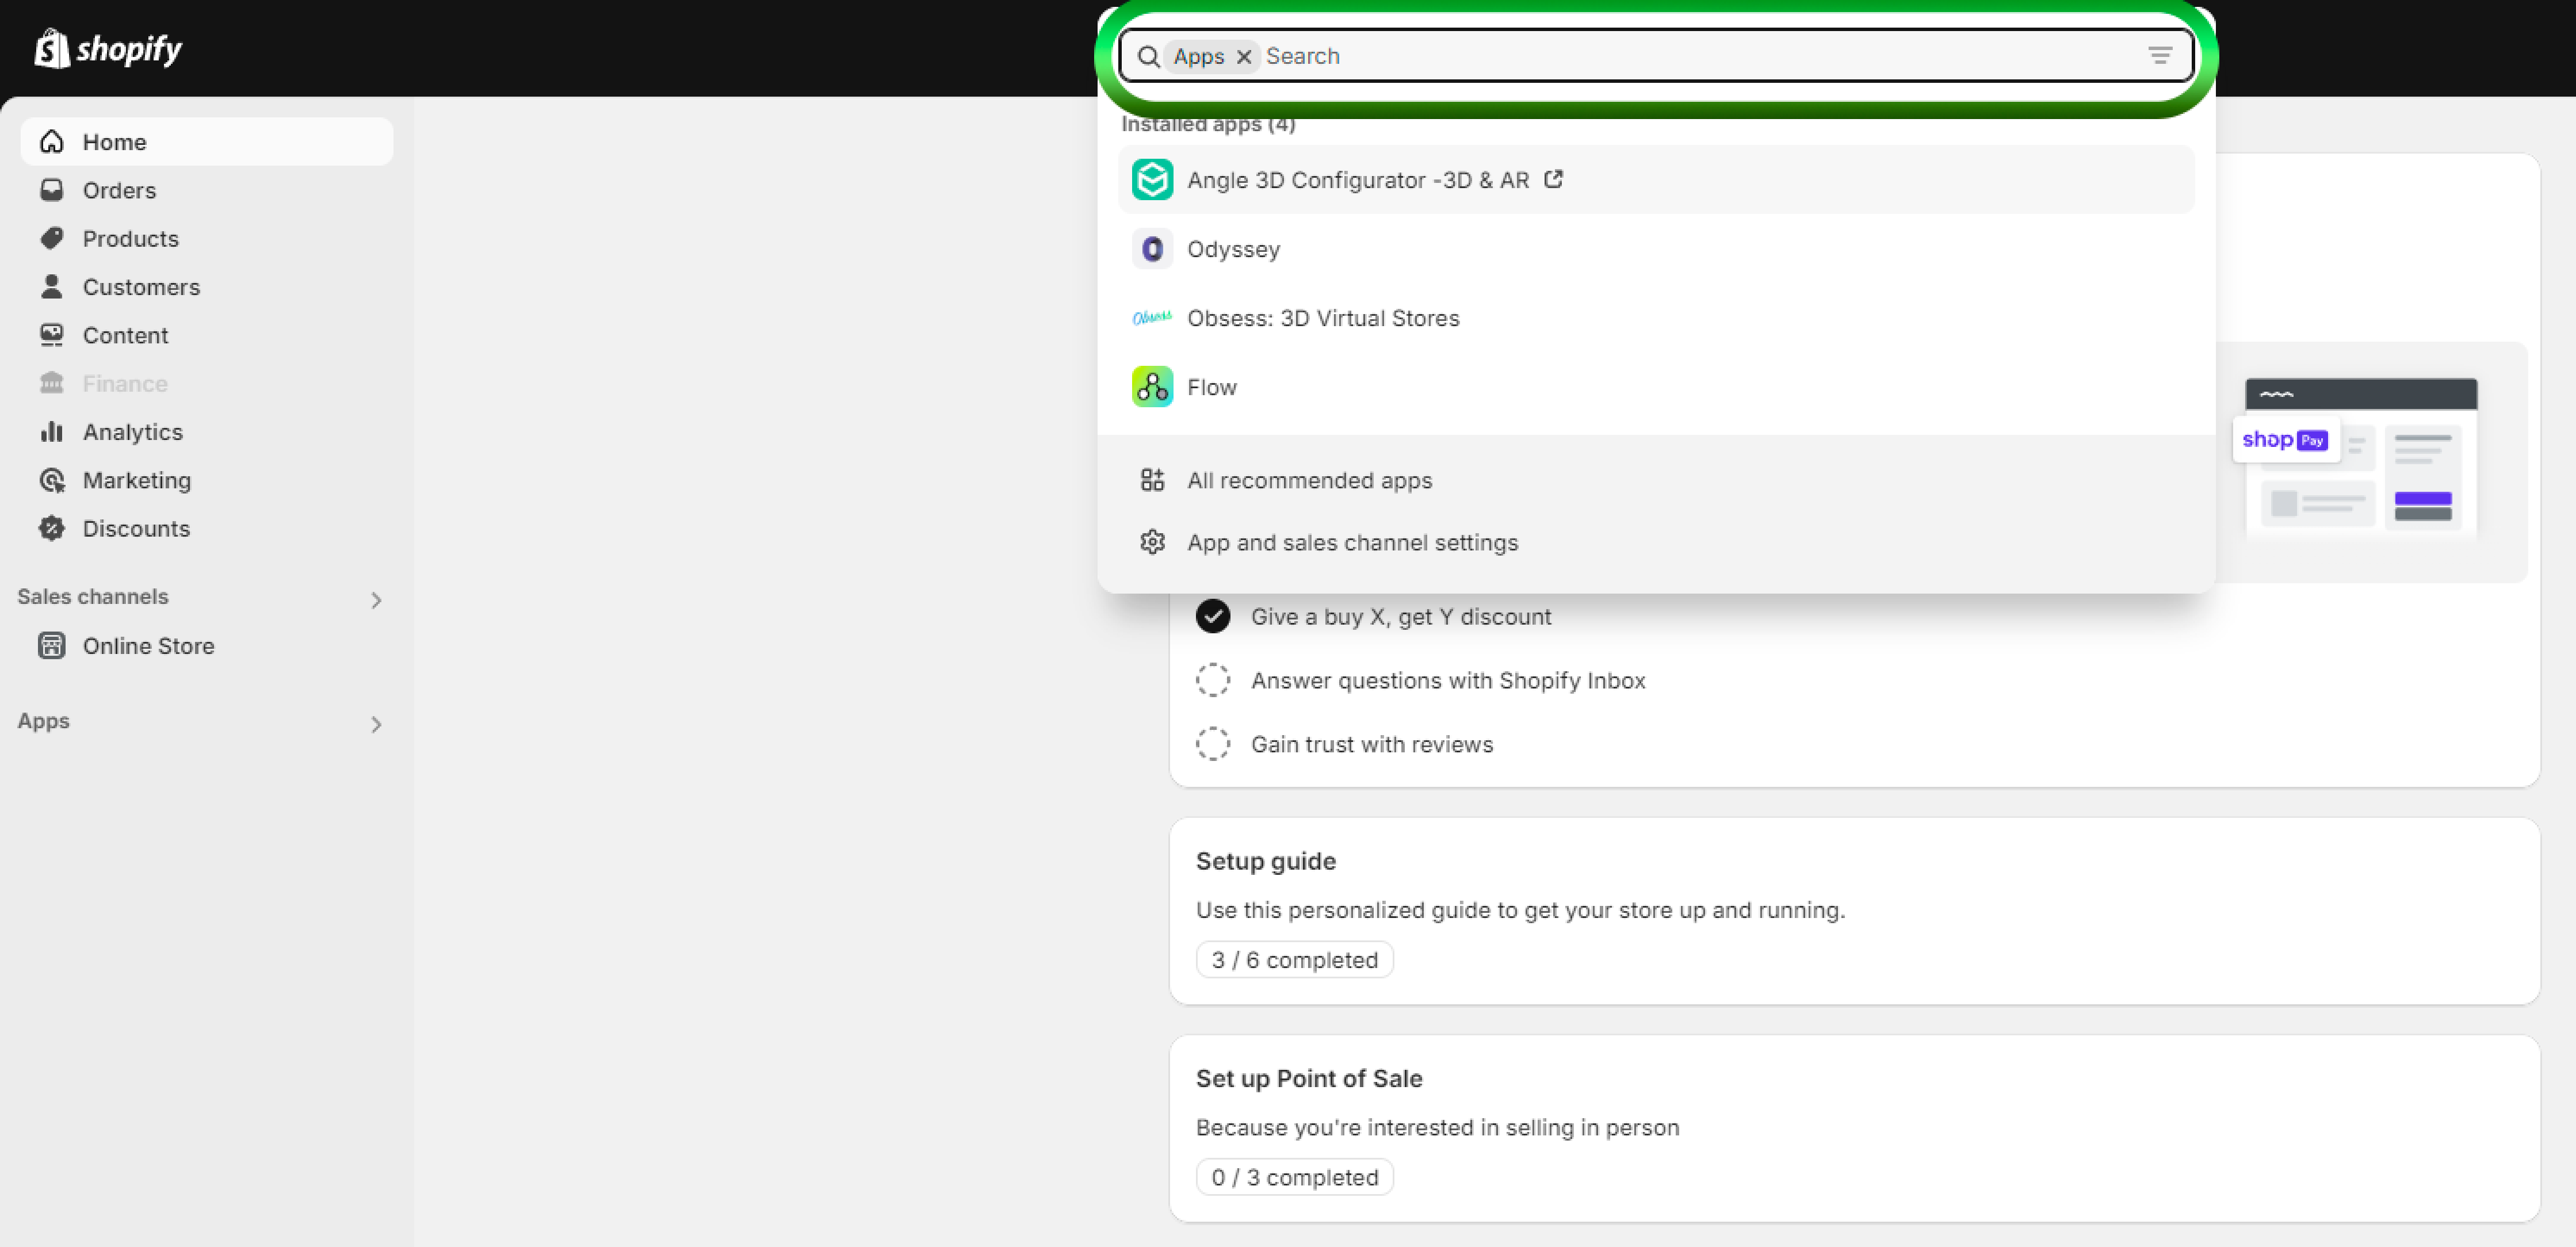
- On Shopify, use the search bar to find Emmerced.

- Choose “Emmerced” application.
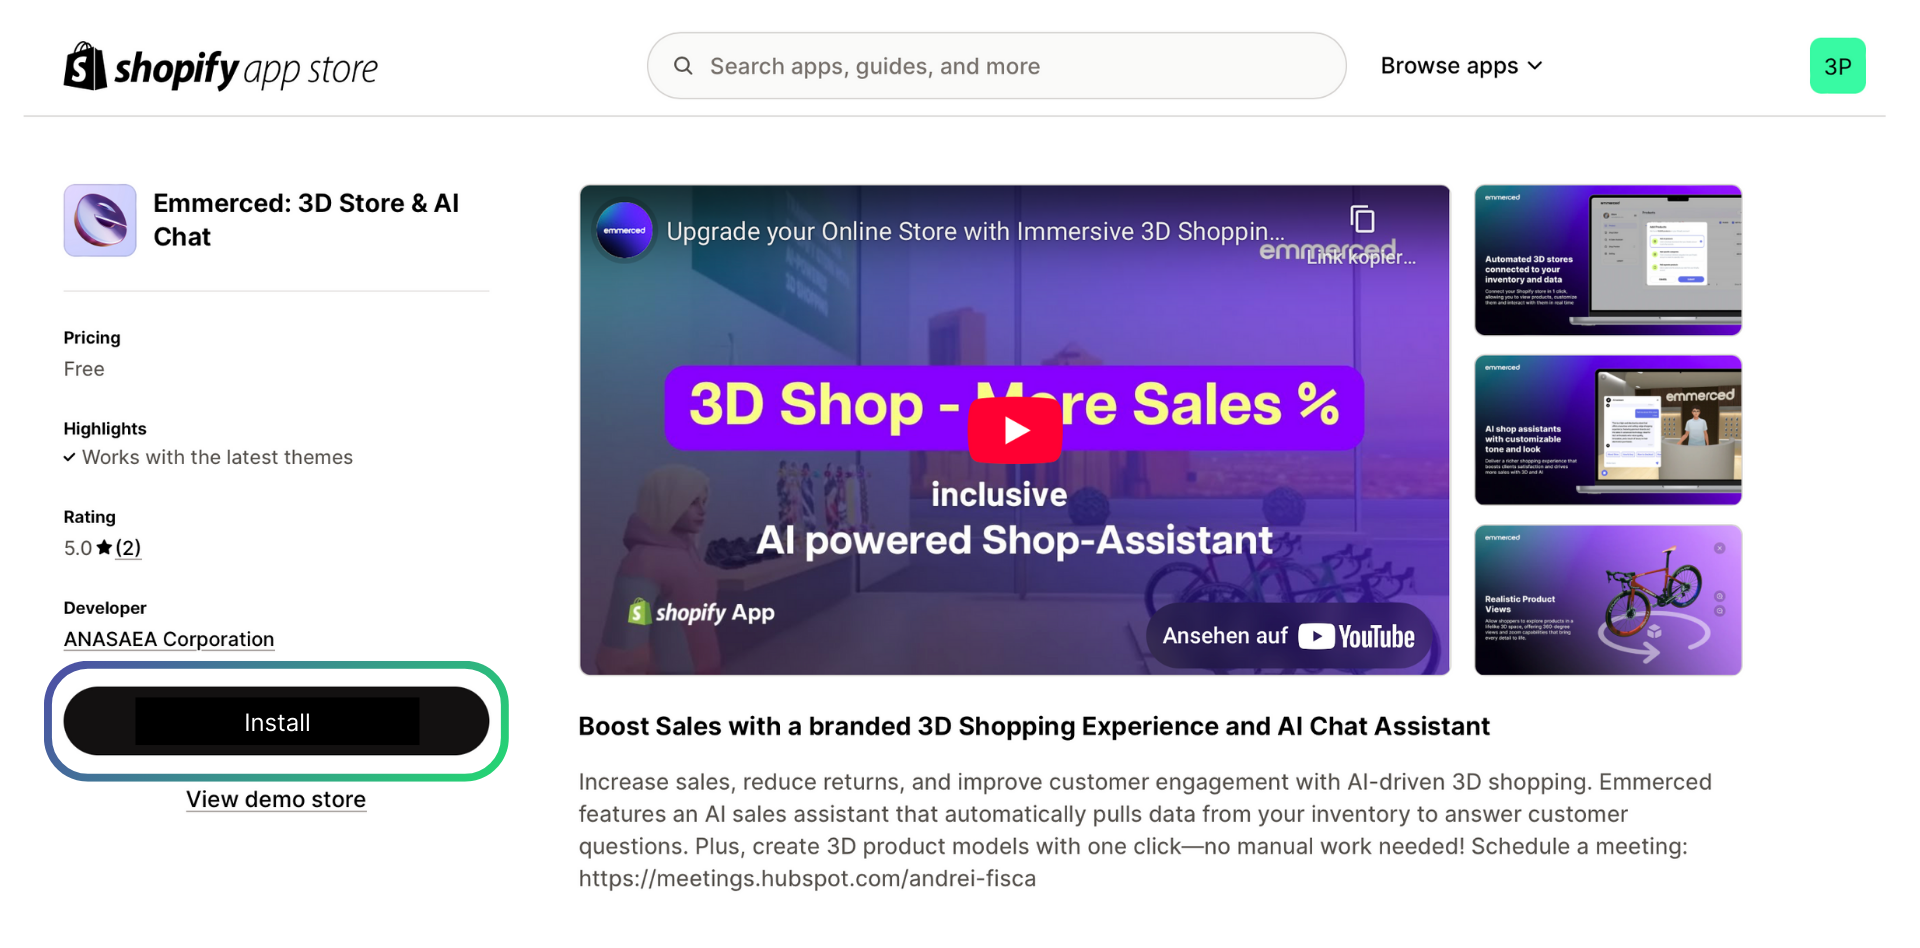
- Click “Install” button on the Emmerced App page.
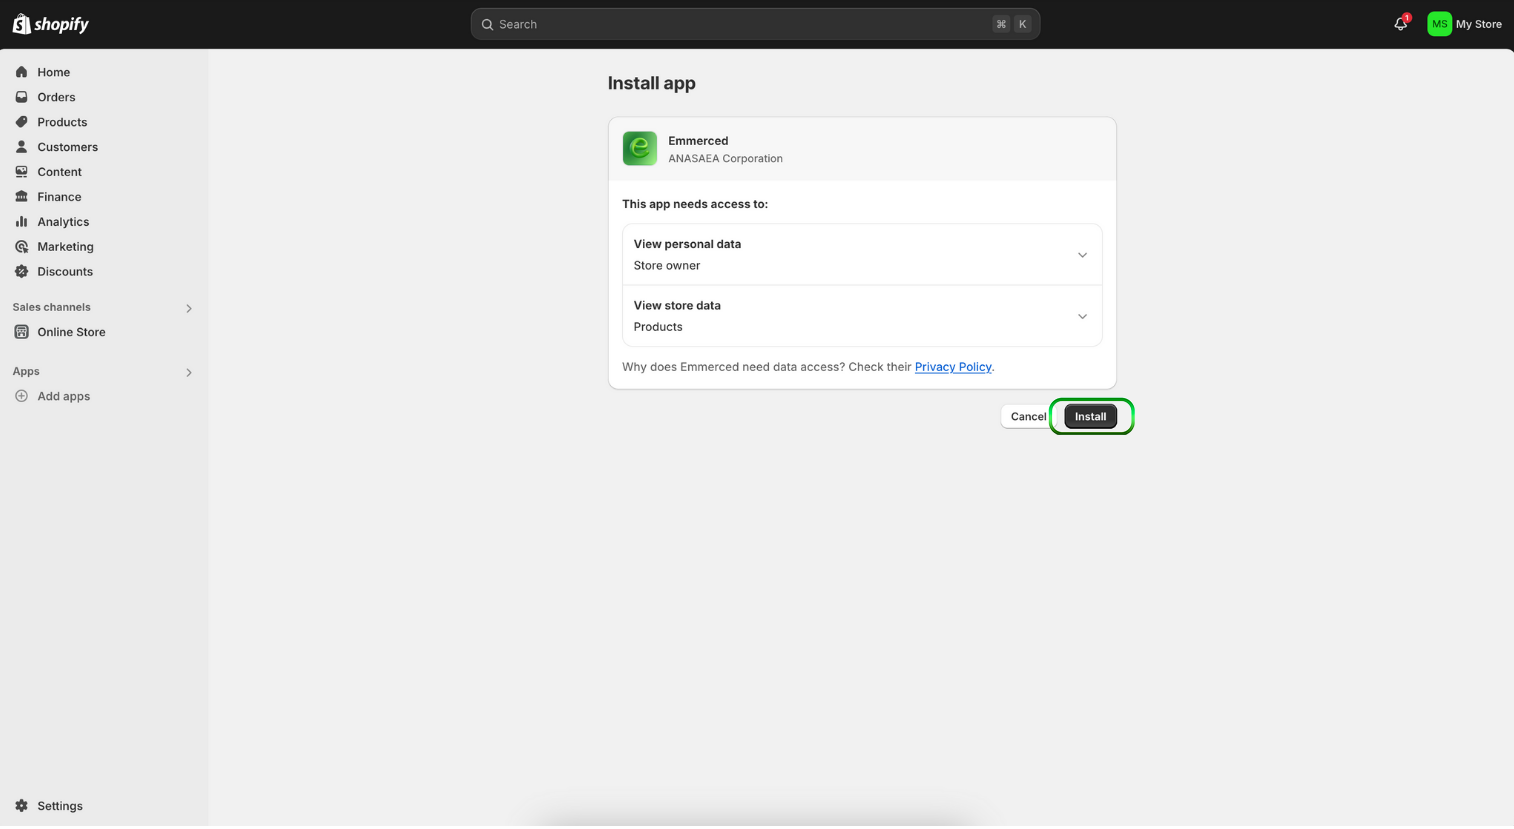
- Click “Install” button once again on the Shopify account page.

Once your Shopify account is connected to Emmerced, uploading 3D models of your products is quick and simple. This feature allows you to present your products in an engaging and interactive way. Below, we outline two easy methods for uploading your 3D models.
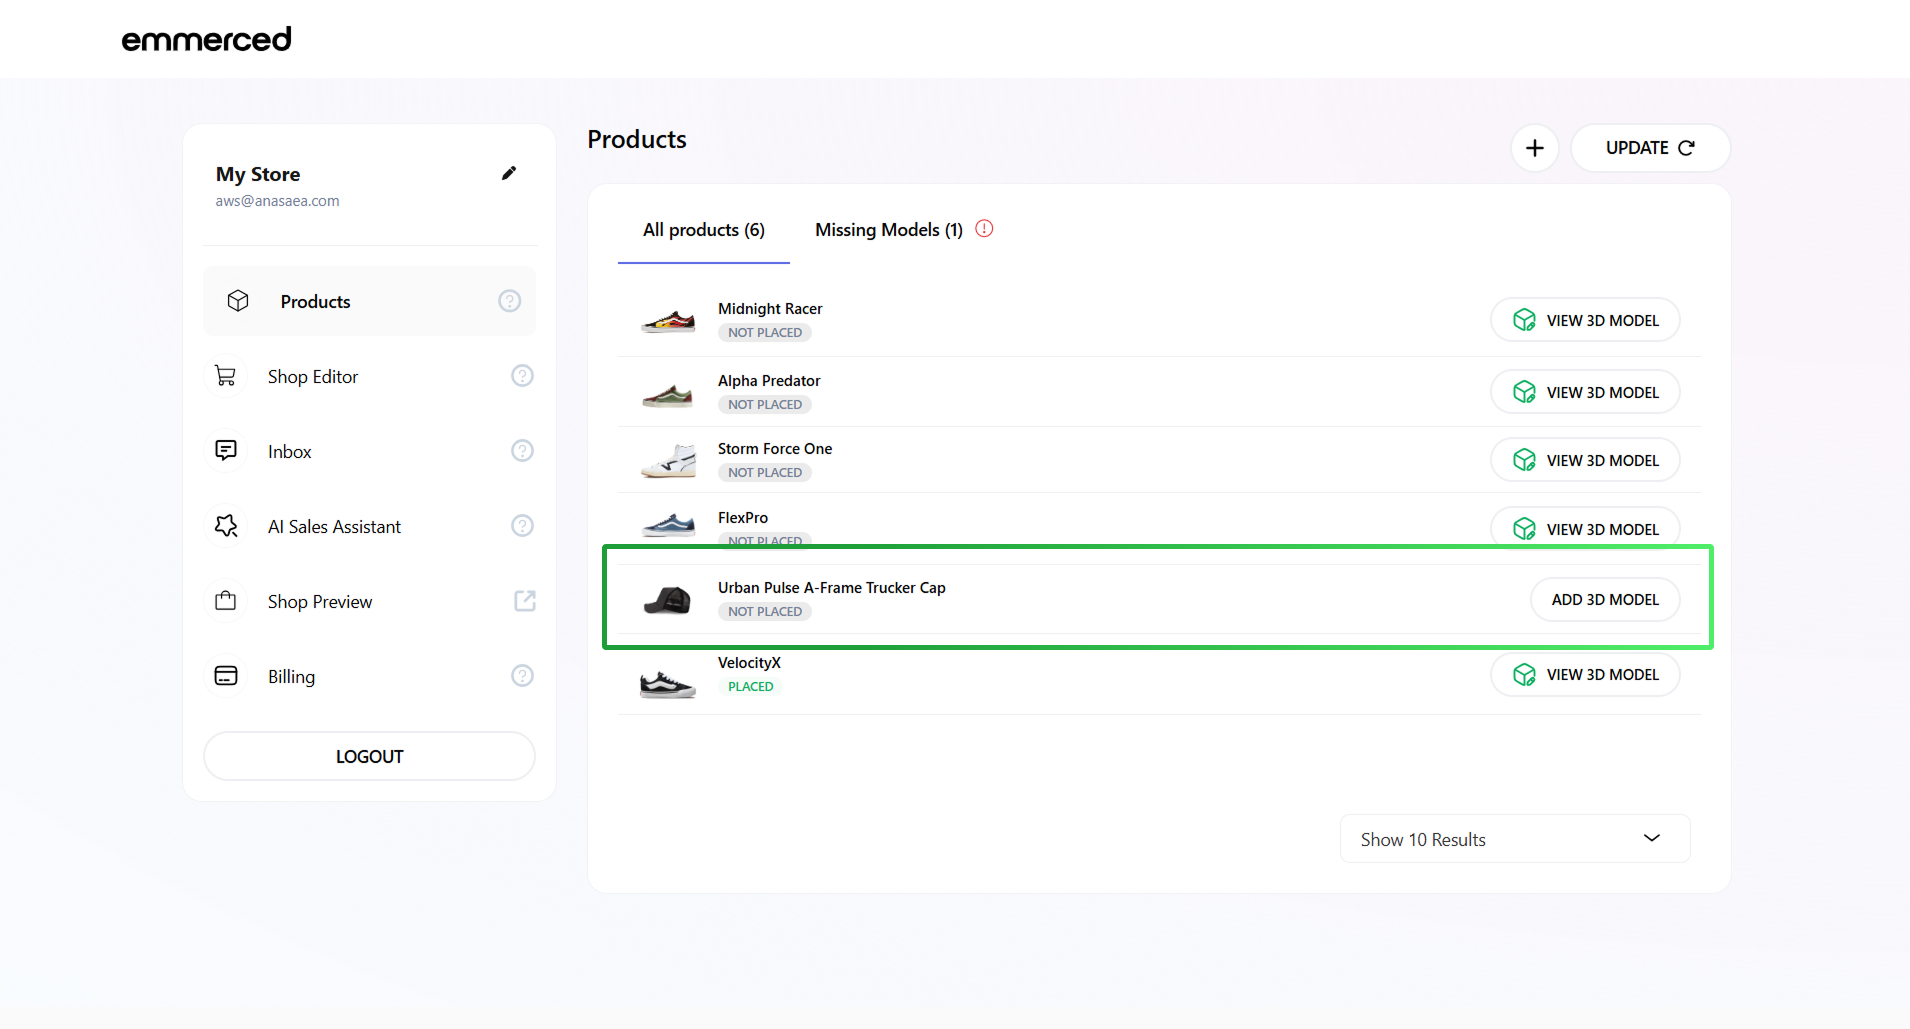
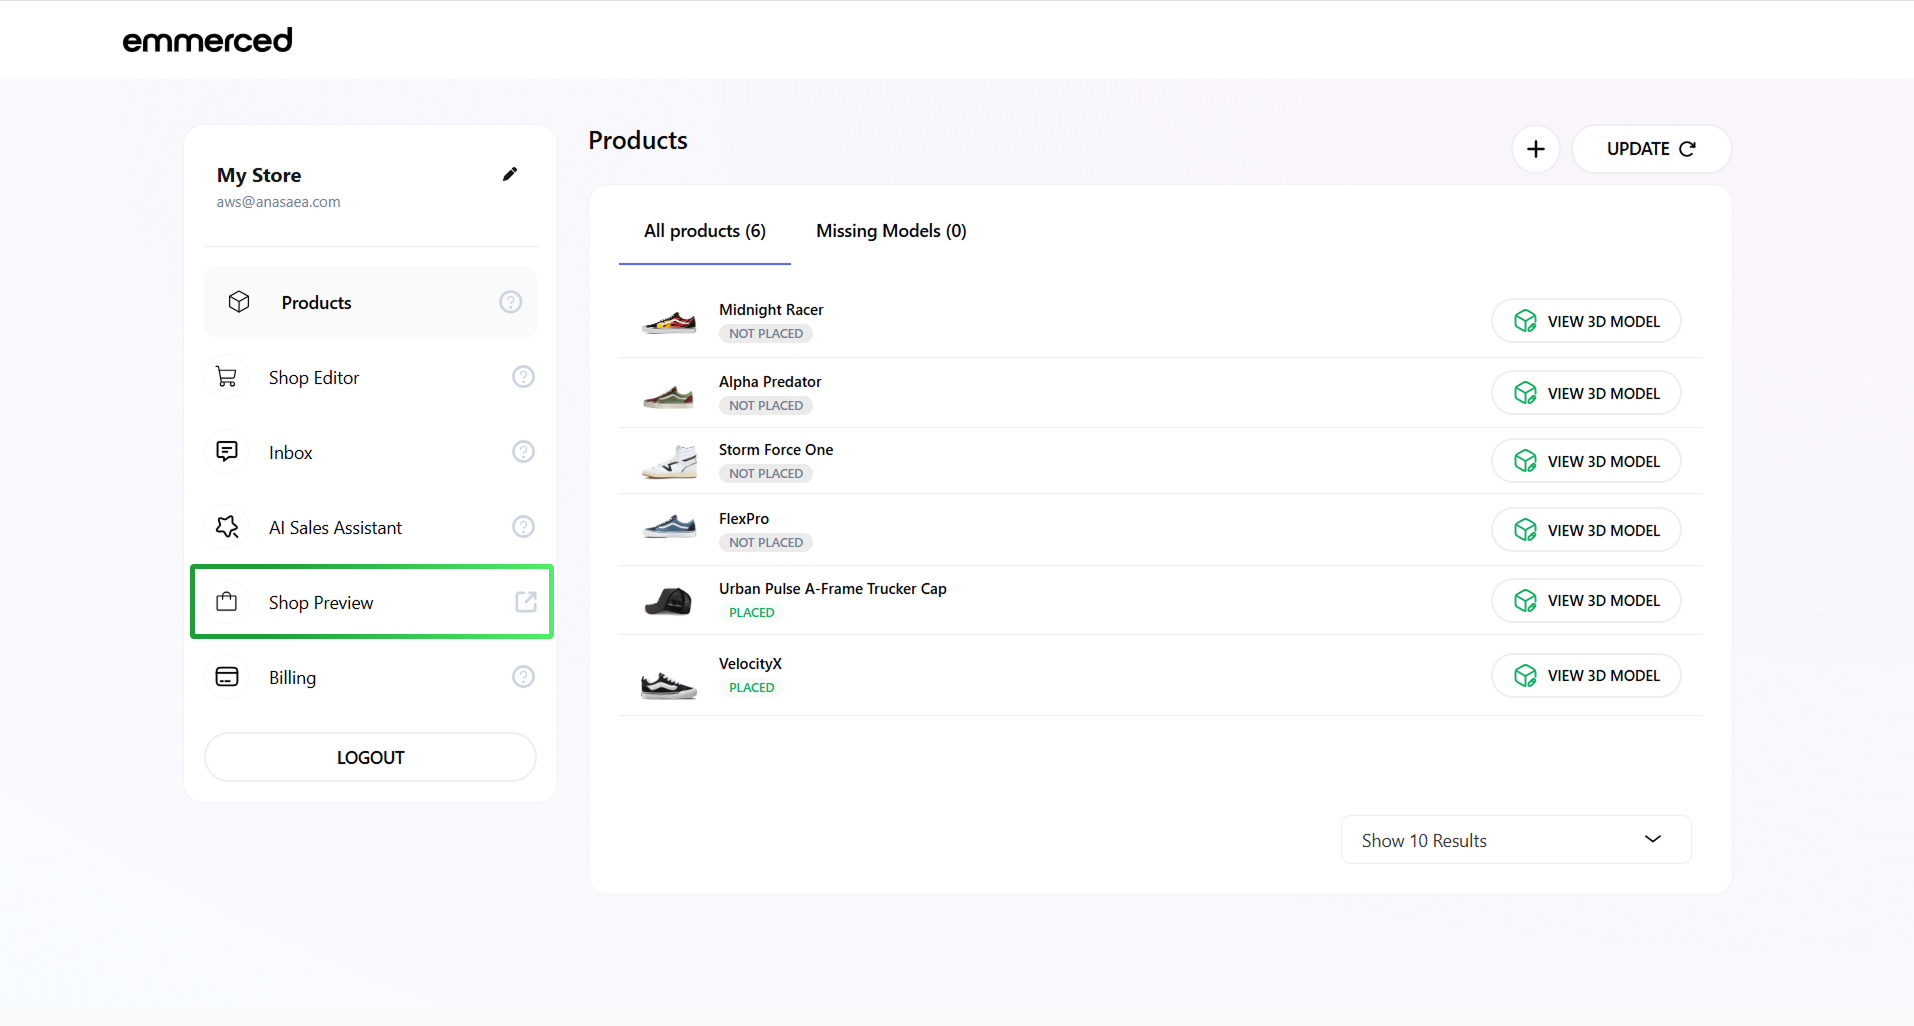
After connecting your Shopify account, you’ll be automatically redirected to the “Products” section.
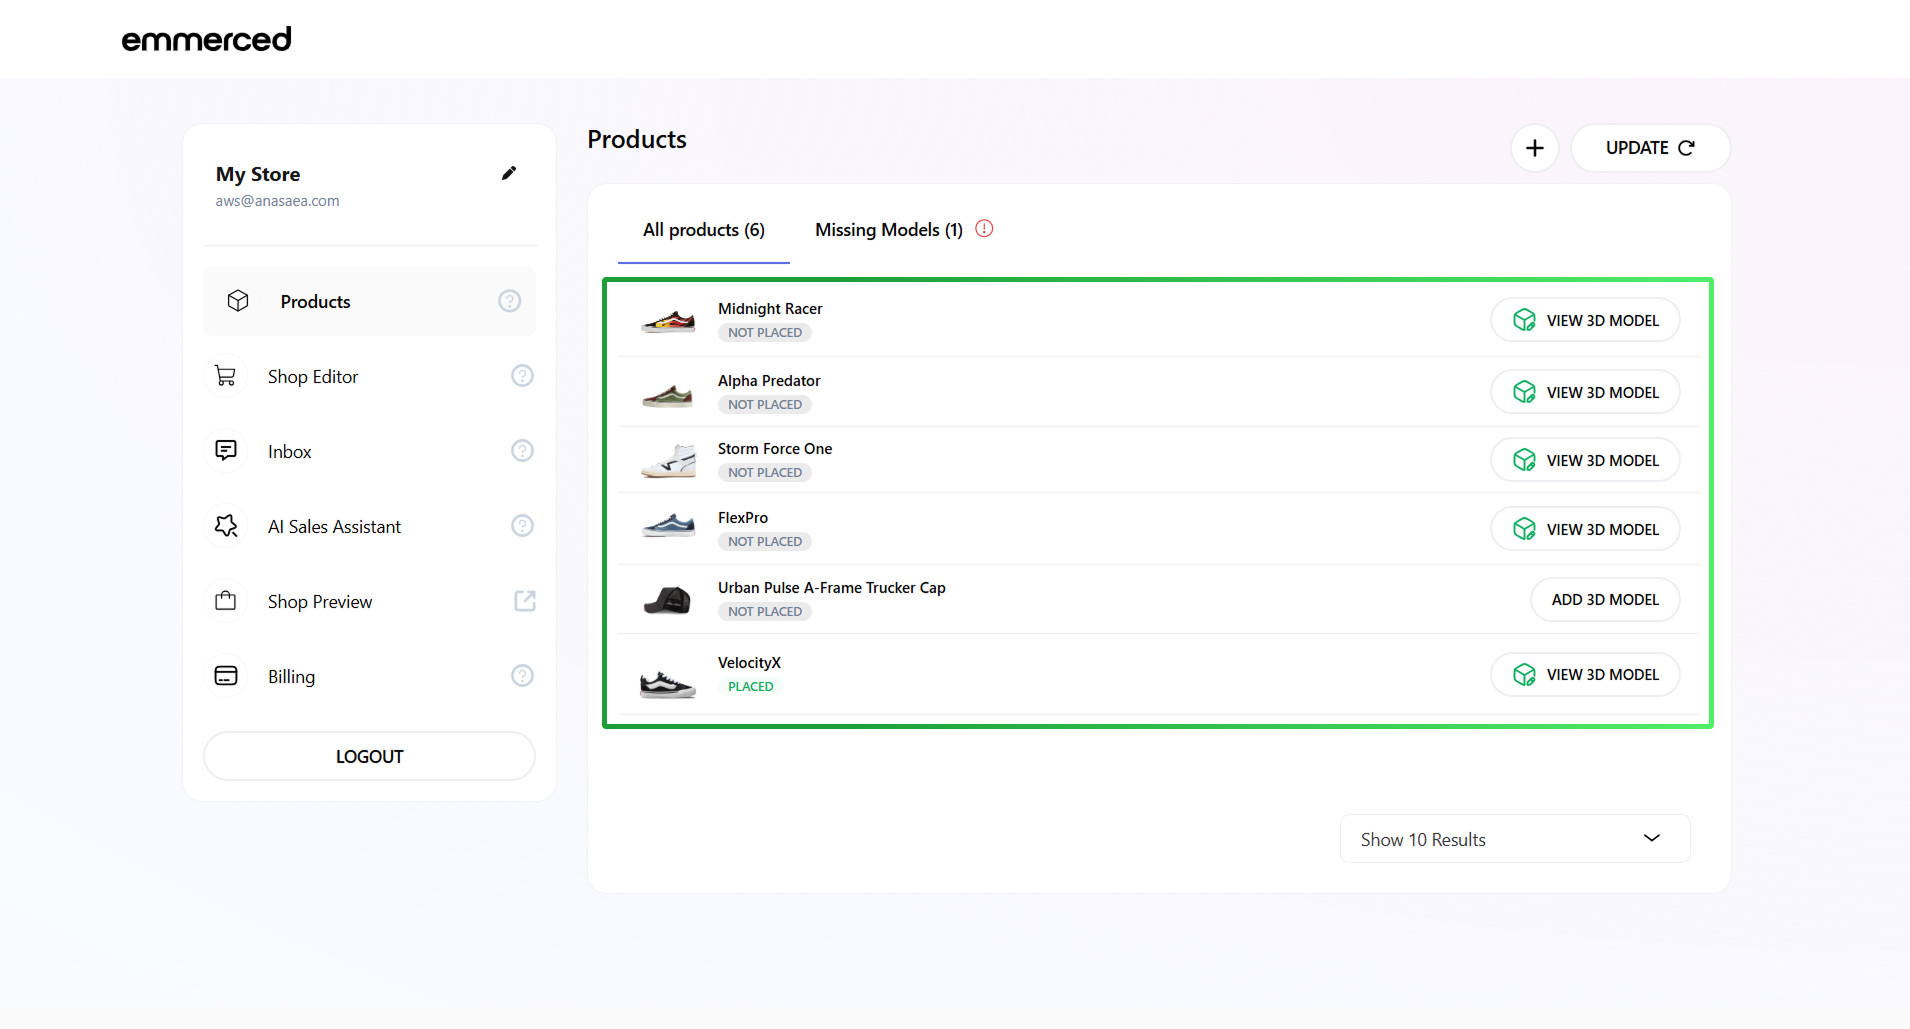
Browse through your products and select the one you’d like to upload.
- Click “ADD 3D MODEL” next to the product for which you want to upload a 3D model.
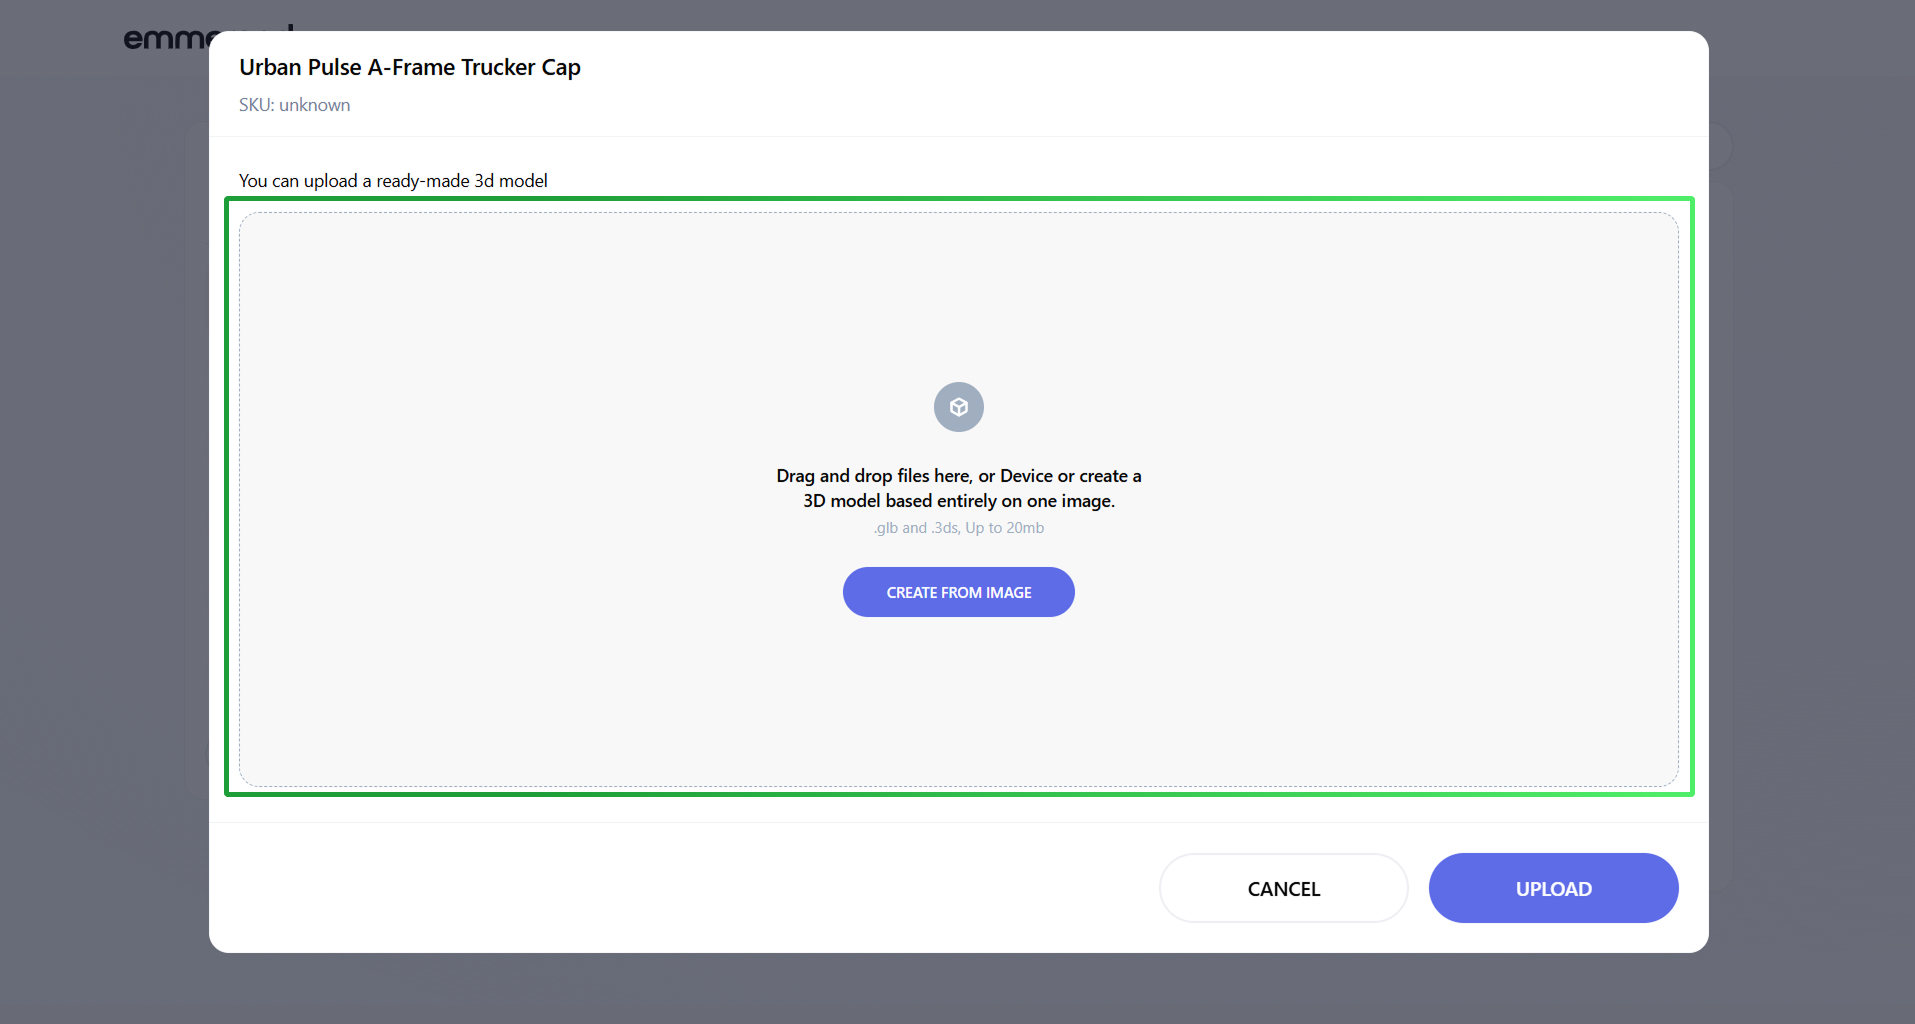
- Select the 3D model from your computer and drag it into the upload field.
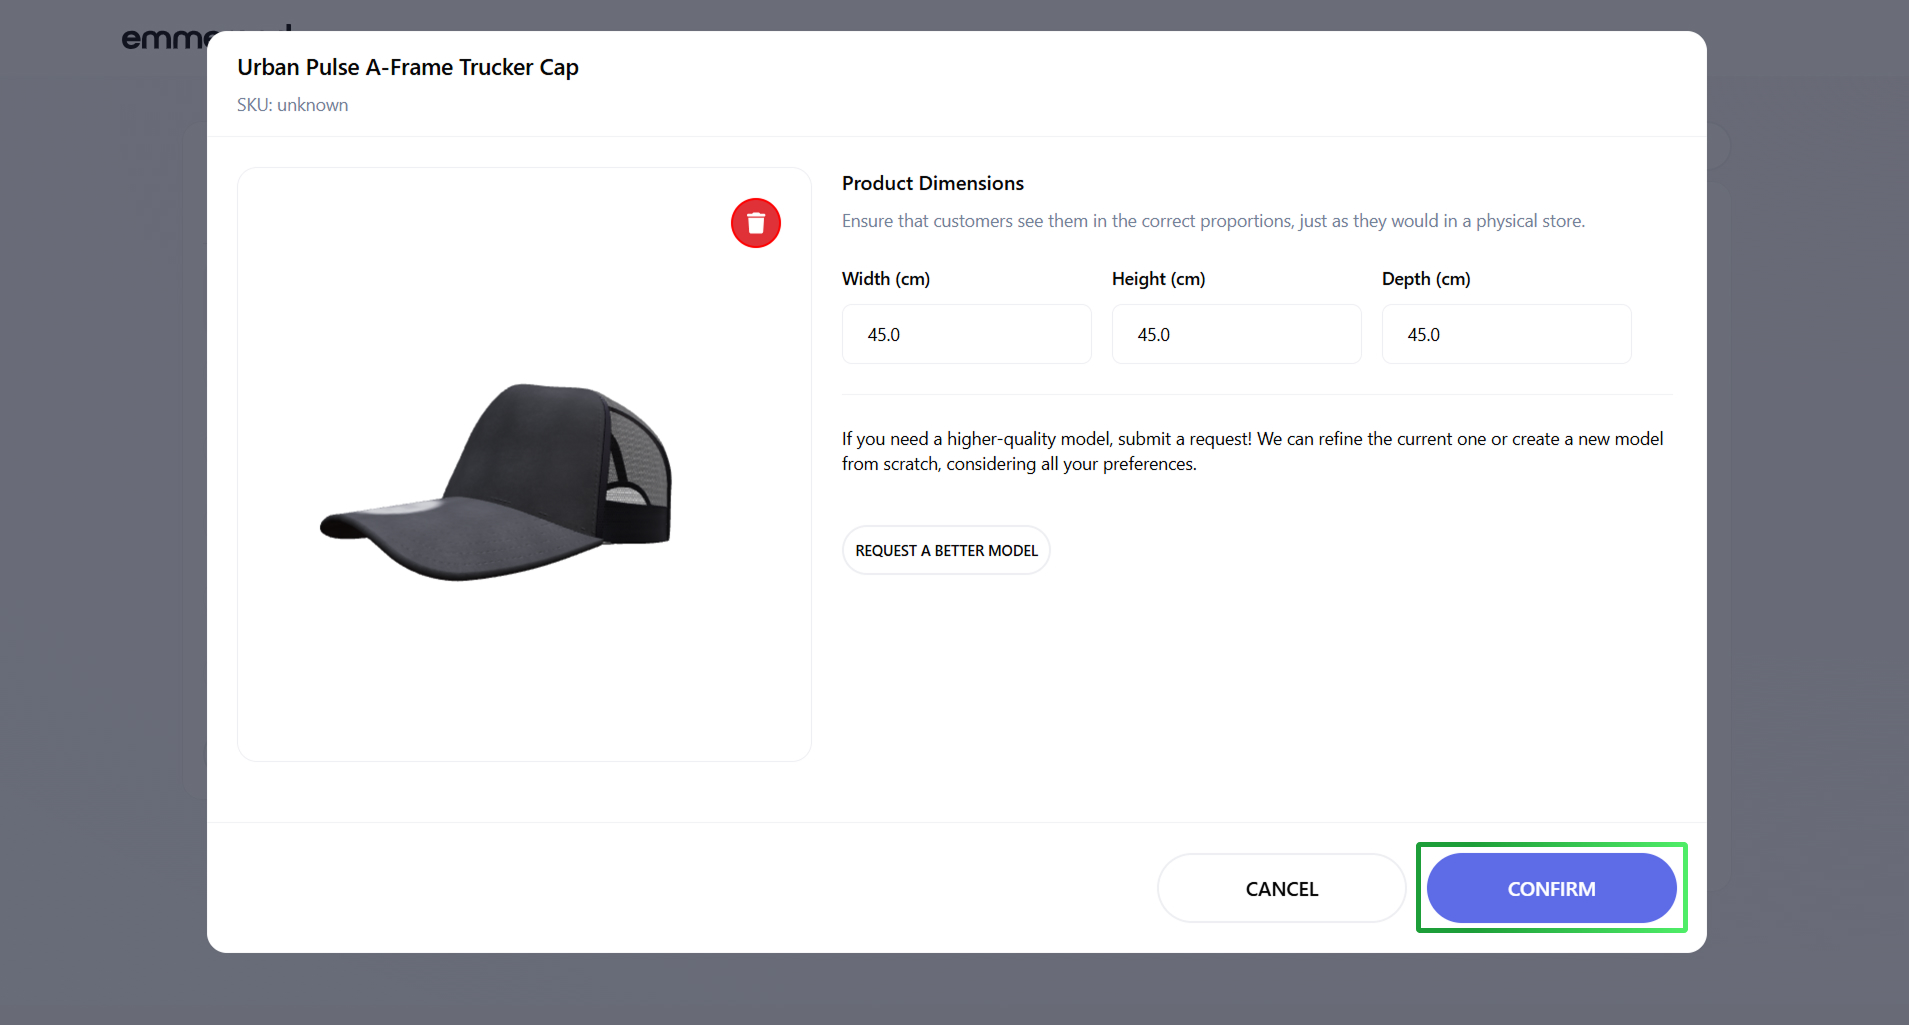
- Change 3D Model’s size in the edit fields and click “Confirm” to save the 3D model for this product.
- Click “ADD 3D MODEL” next to the product for which you want to create a 3D model.
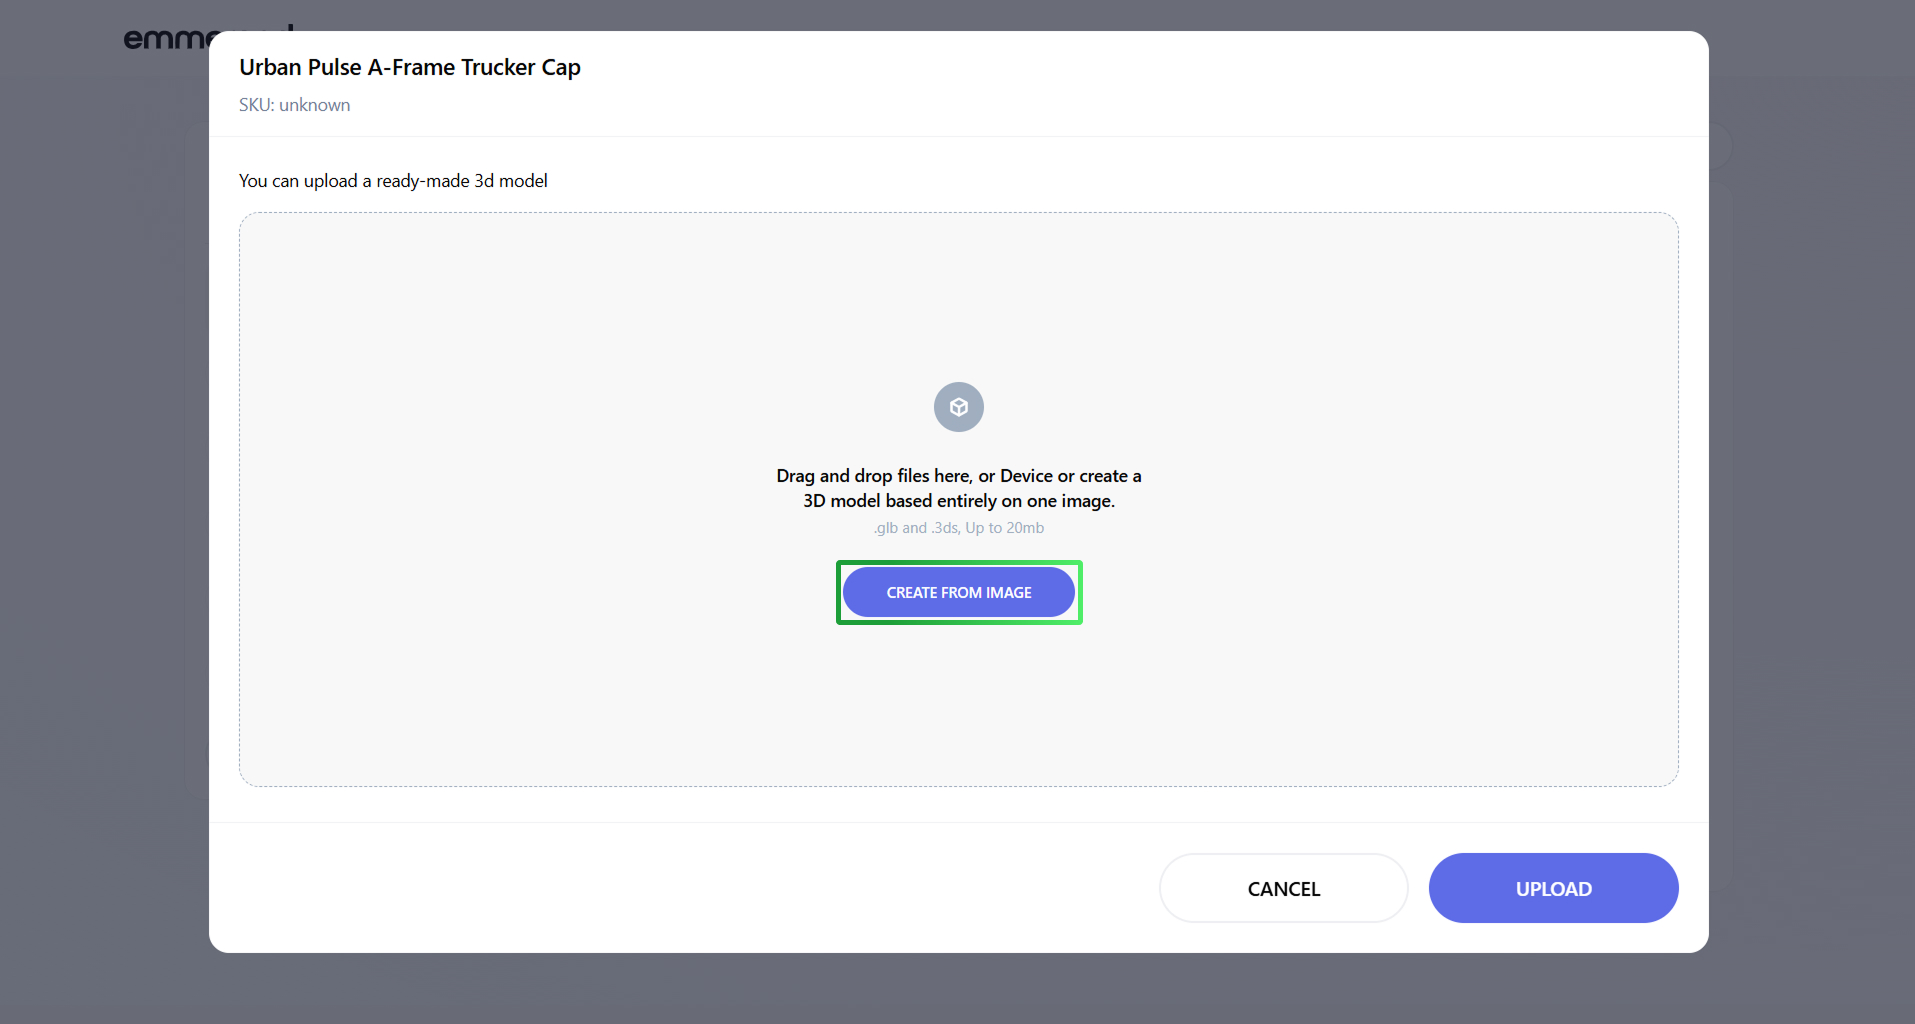
- Click the “OR CREATE FROM IMAGE” button.
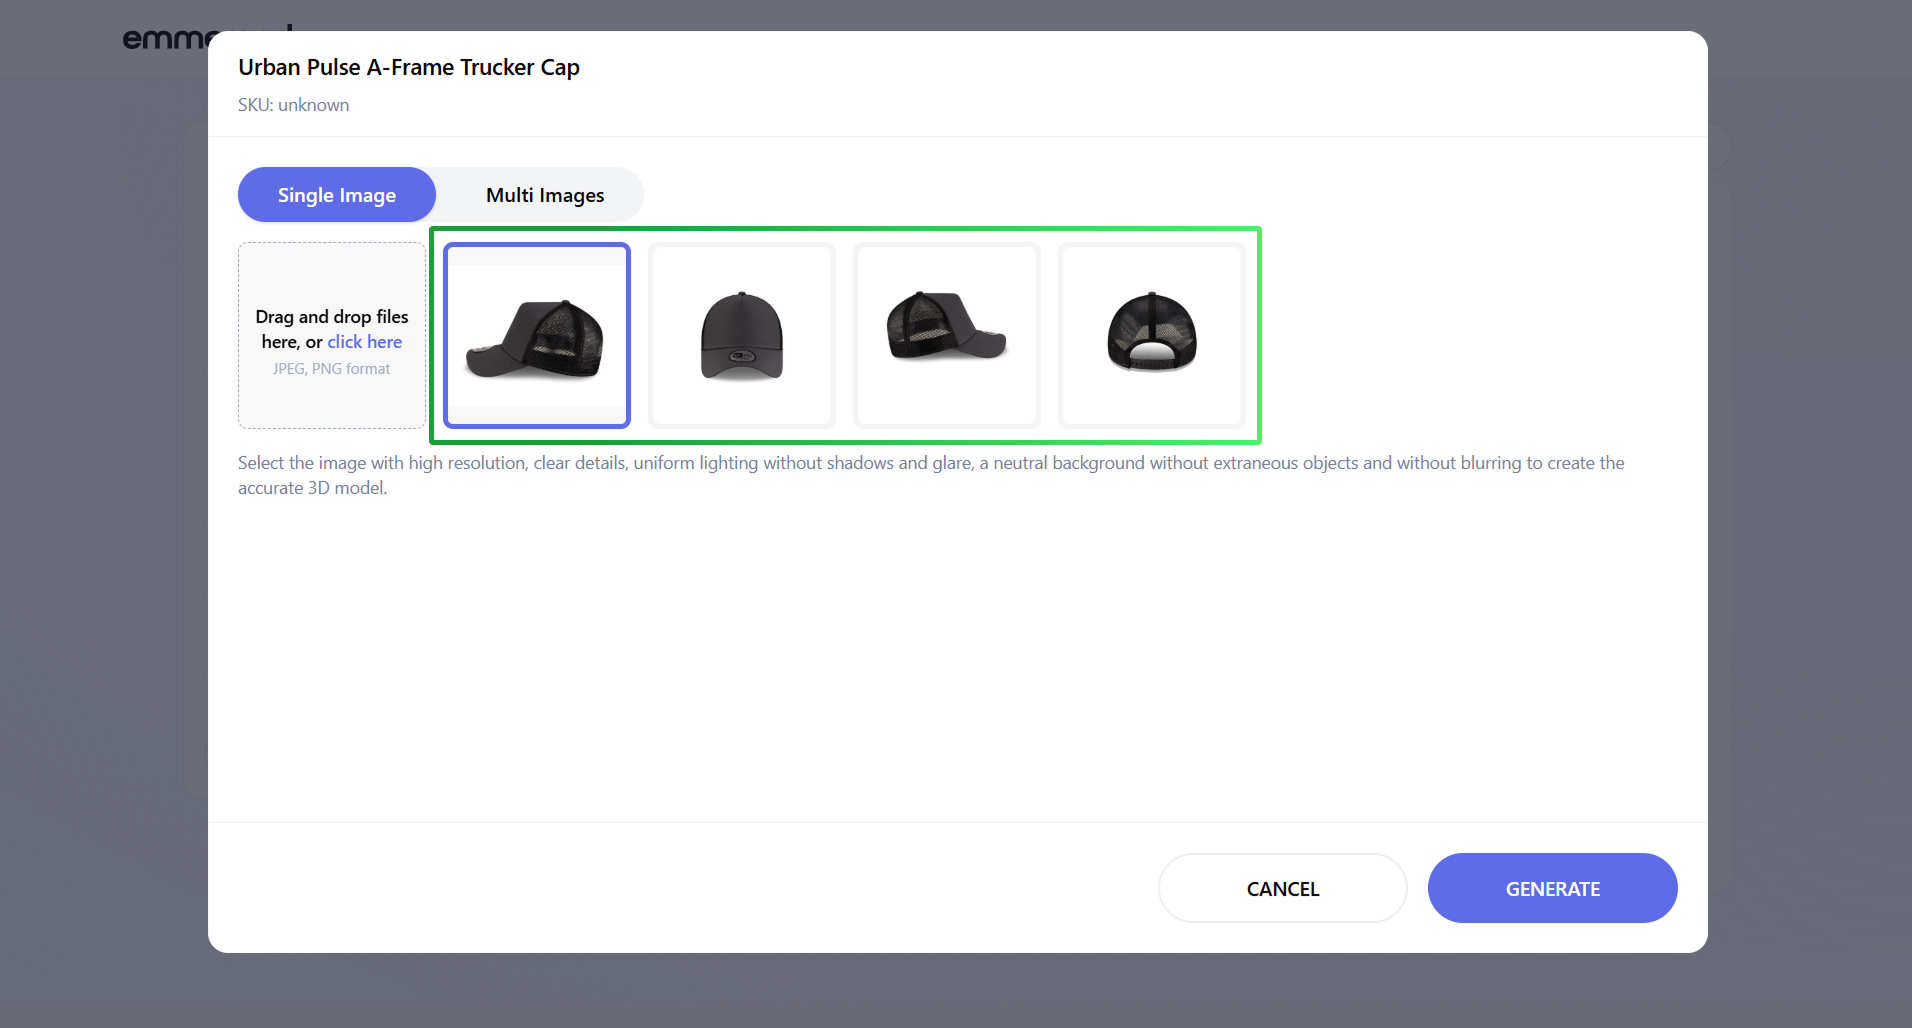
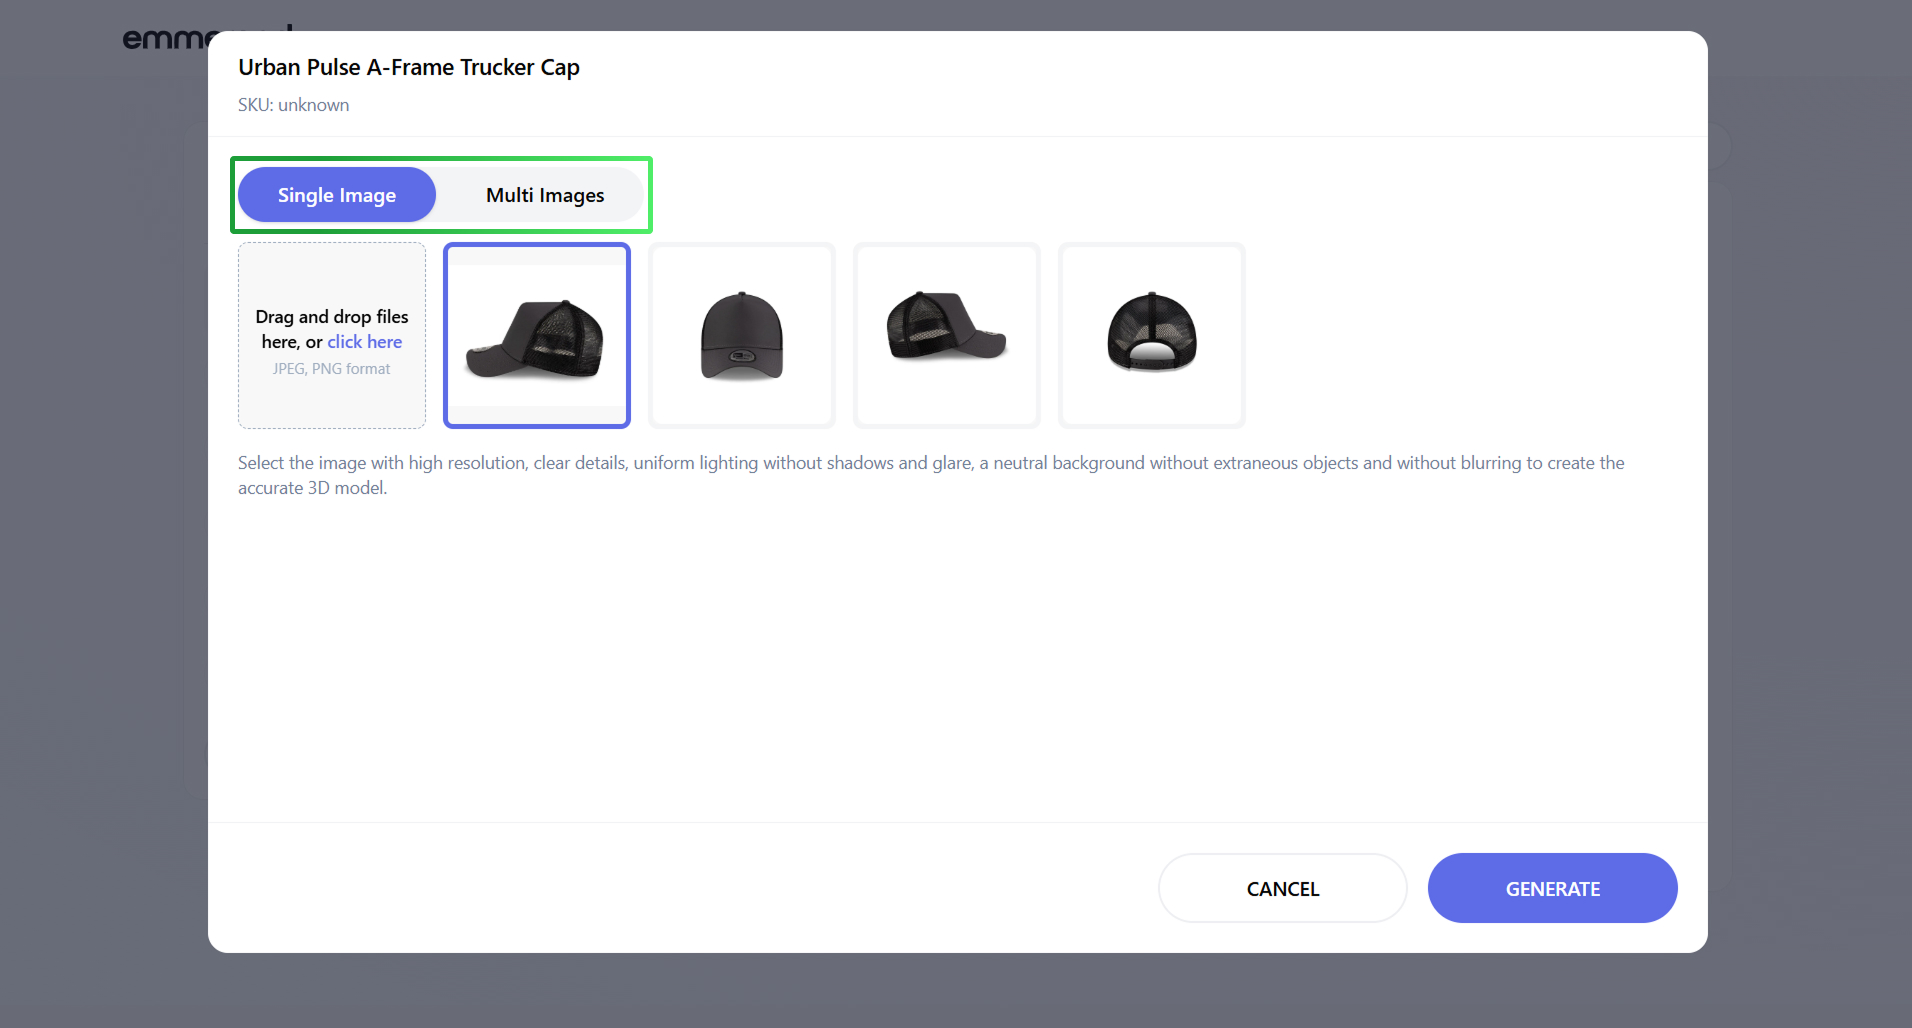
- Select the image from which you want to create the 3D model, if you want to create the 3D model from a single image.
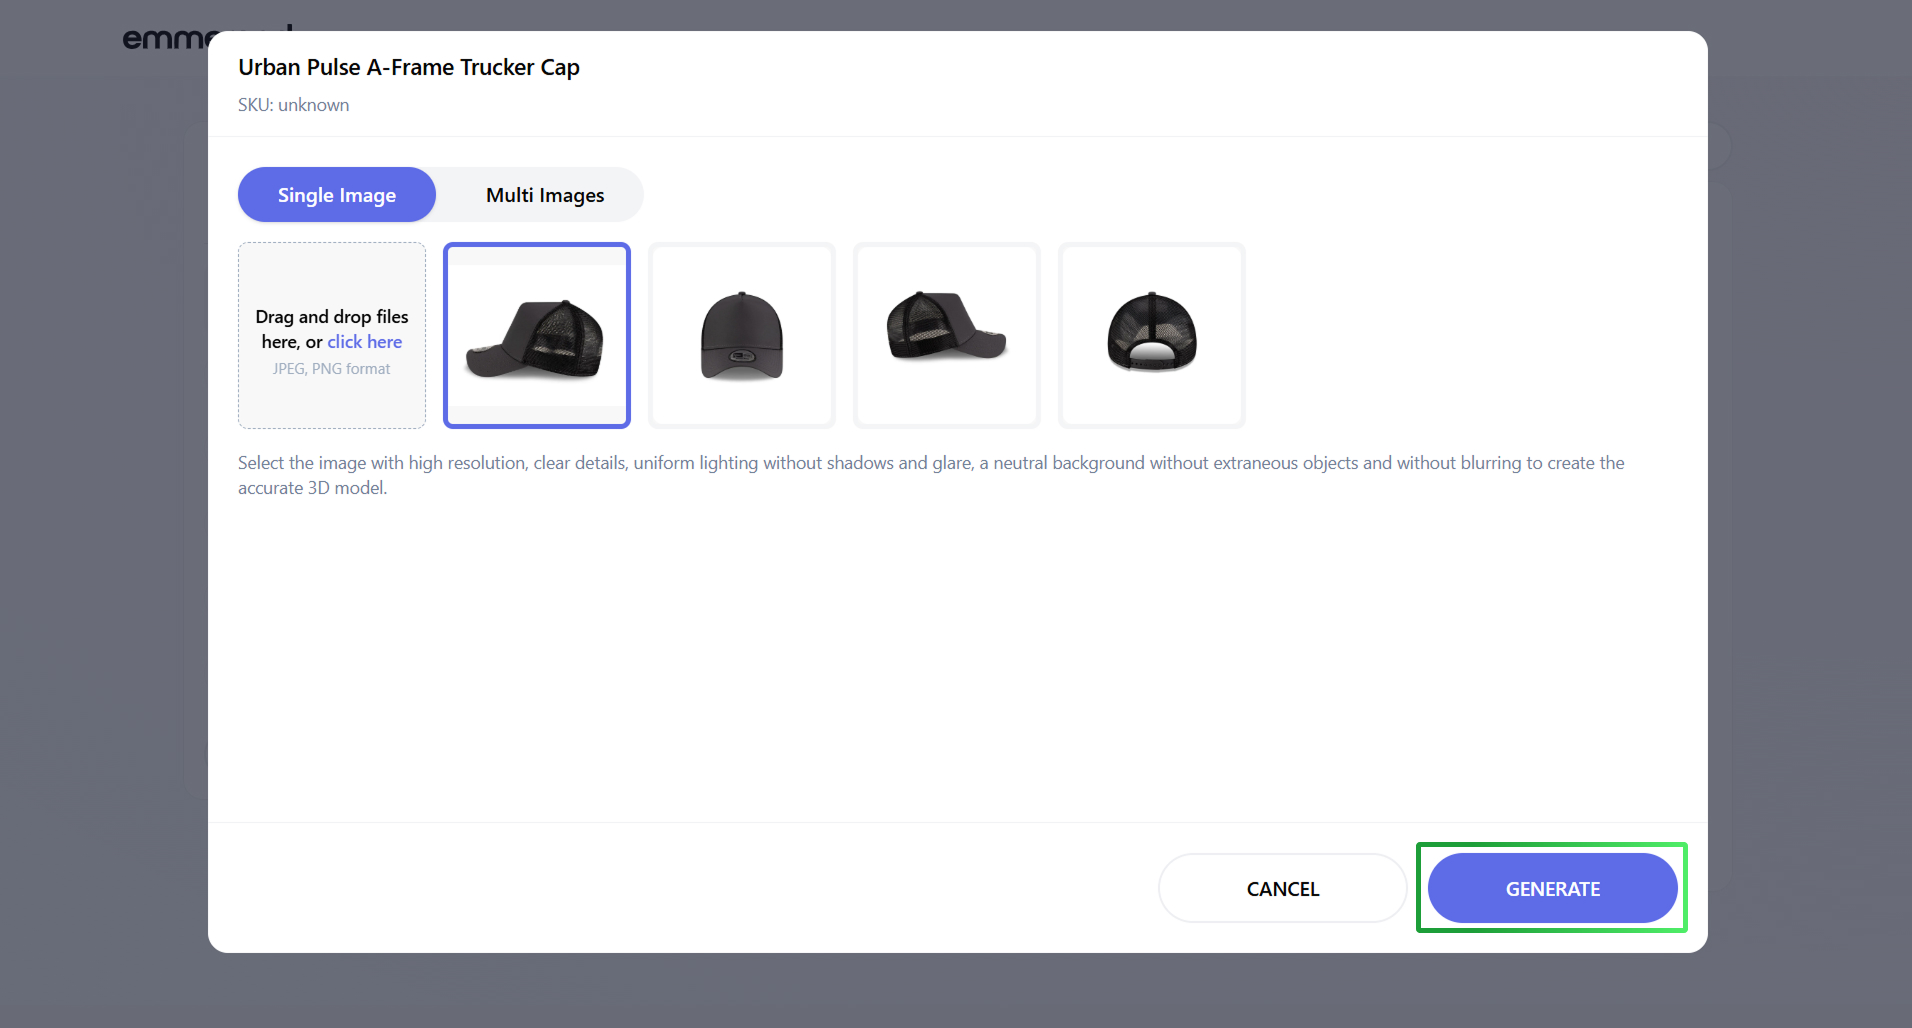
It is recommended to use an image where the product is shown from the front, without any extraneous objects, and on a contrasting background. - Click the “GENERATE” button.
The process of creating the 3D model may take a few minutes.
- Click “ADD 3D MODEL” next to the product for which you want to create a 3D model.
- Click the “OR CREATE FROM IMAGE” button.
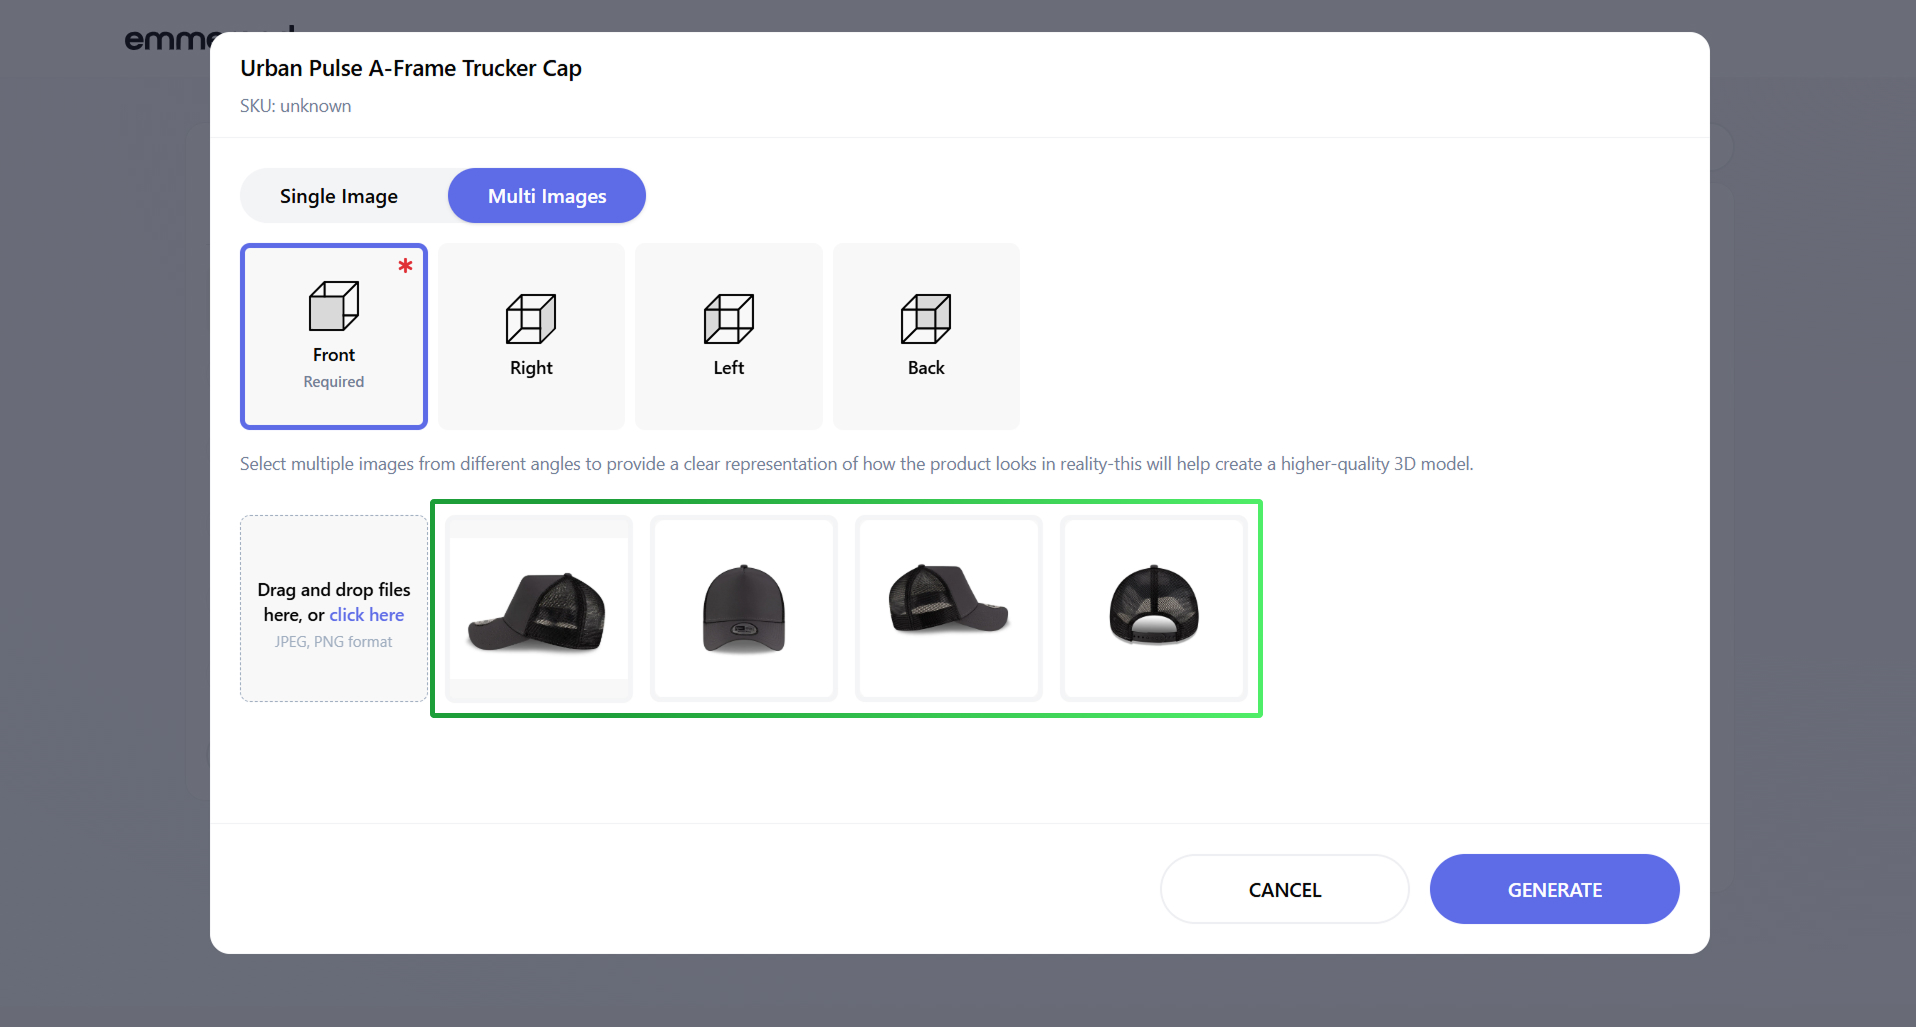
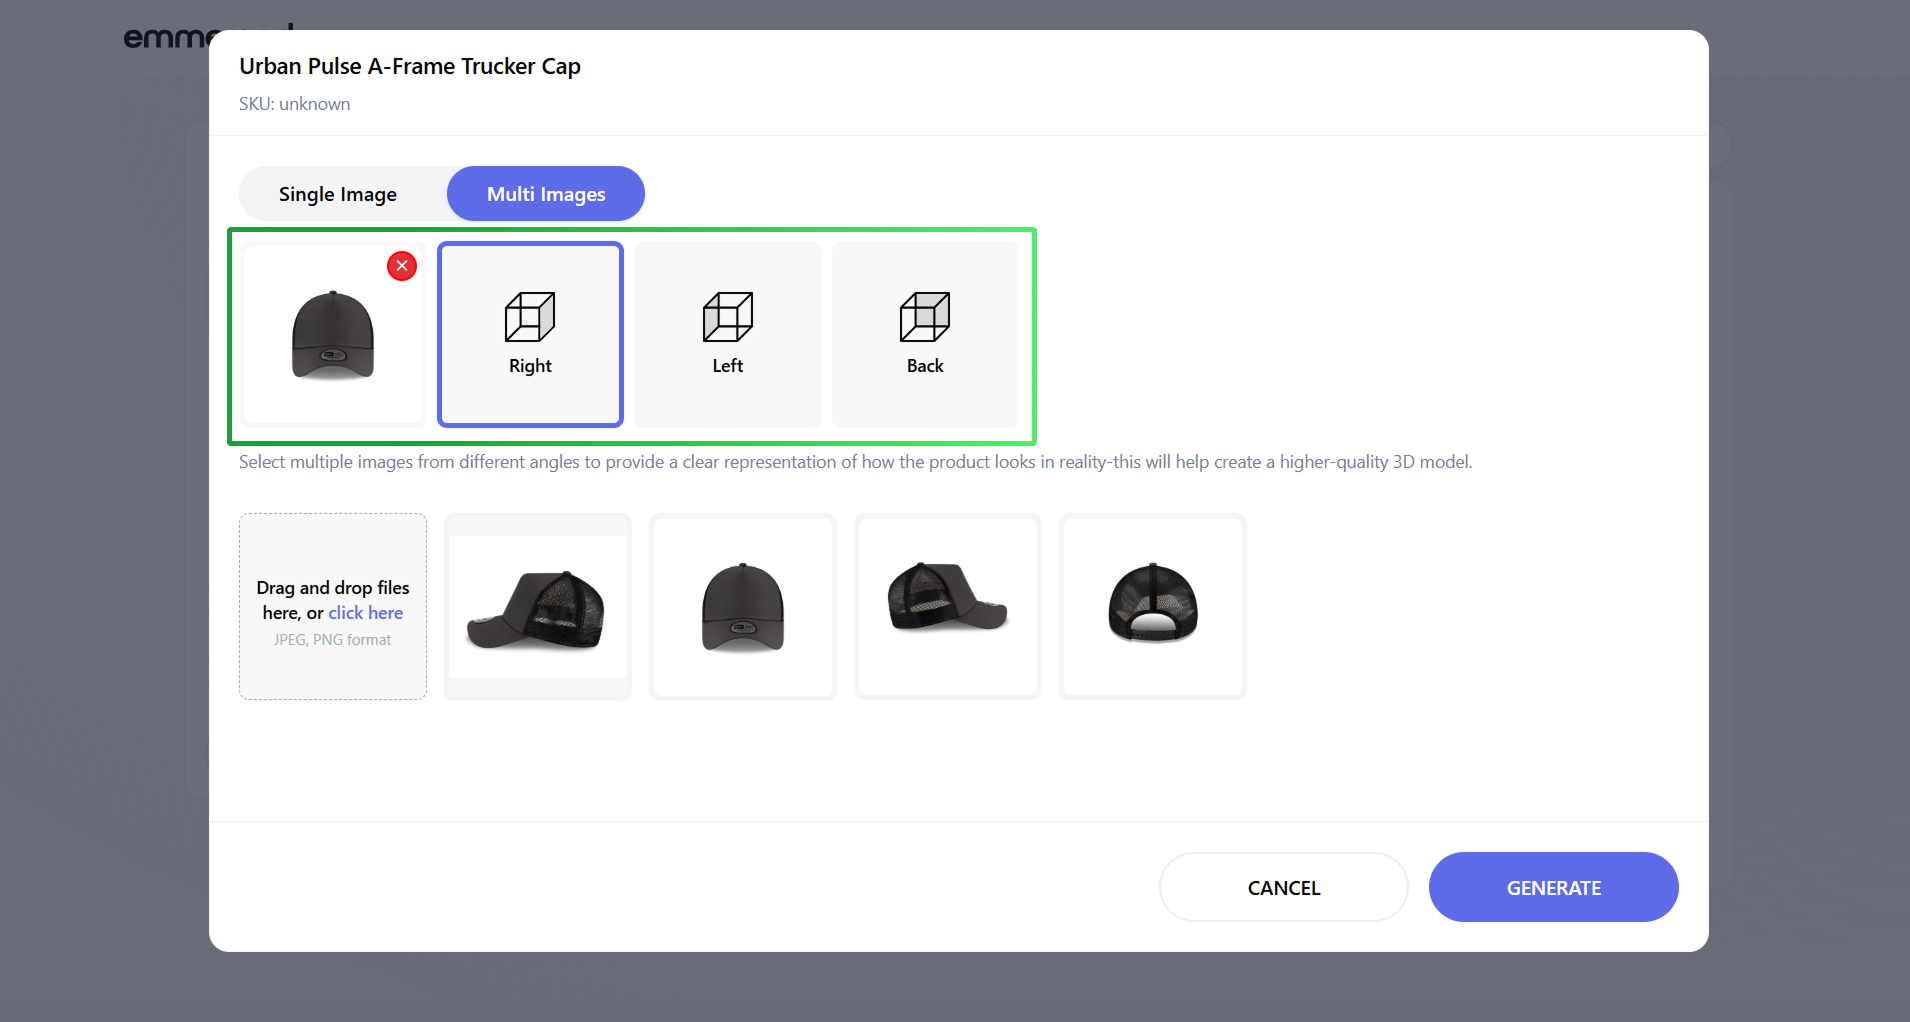
- Click on the “Multi Images” button if you want to create the 3D Model from multiple images.
- Select an image for the frontal angle, without which it is impossible to create the 3D Model.
- Select a different angle for which you want to add an image, then select the image.
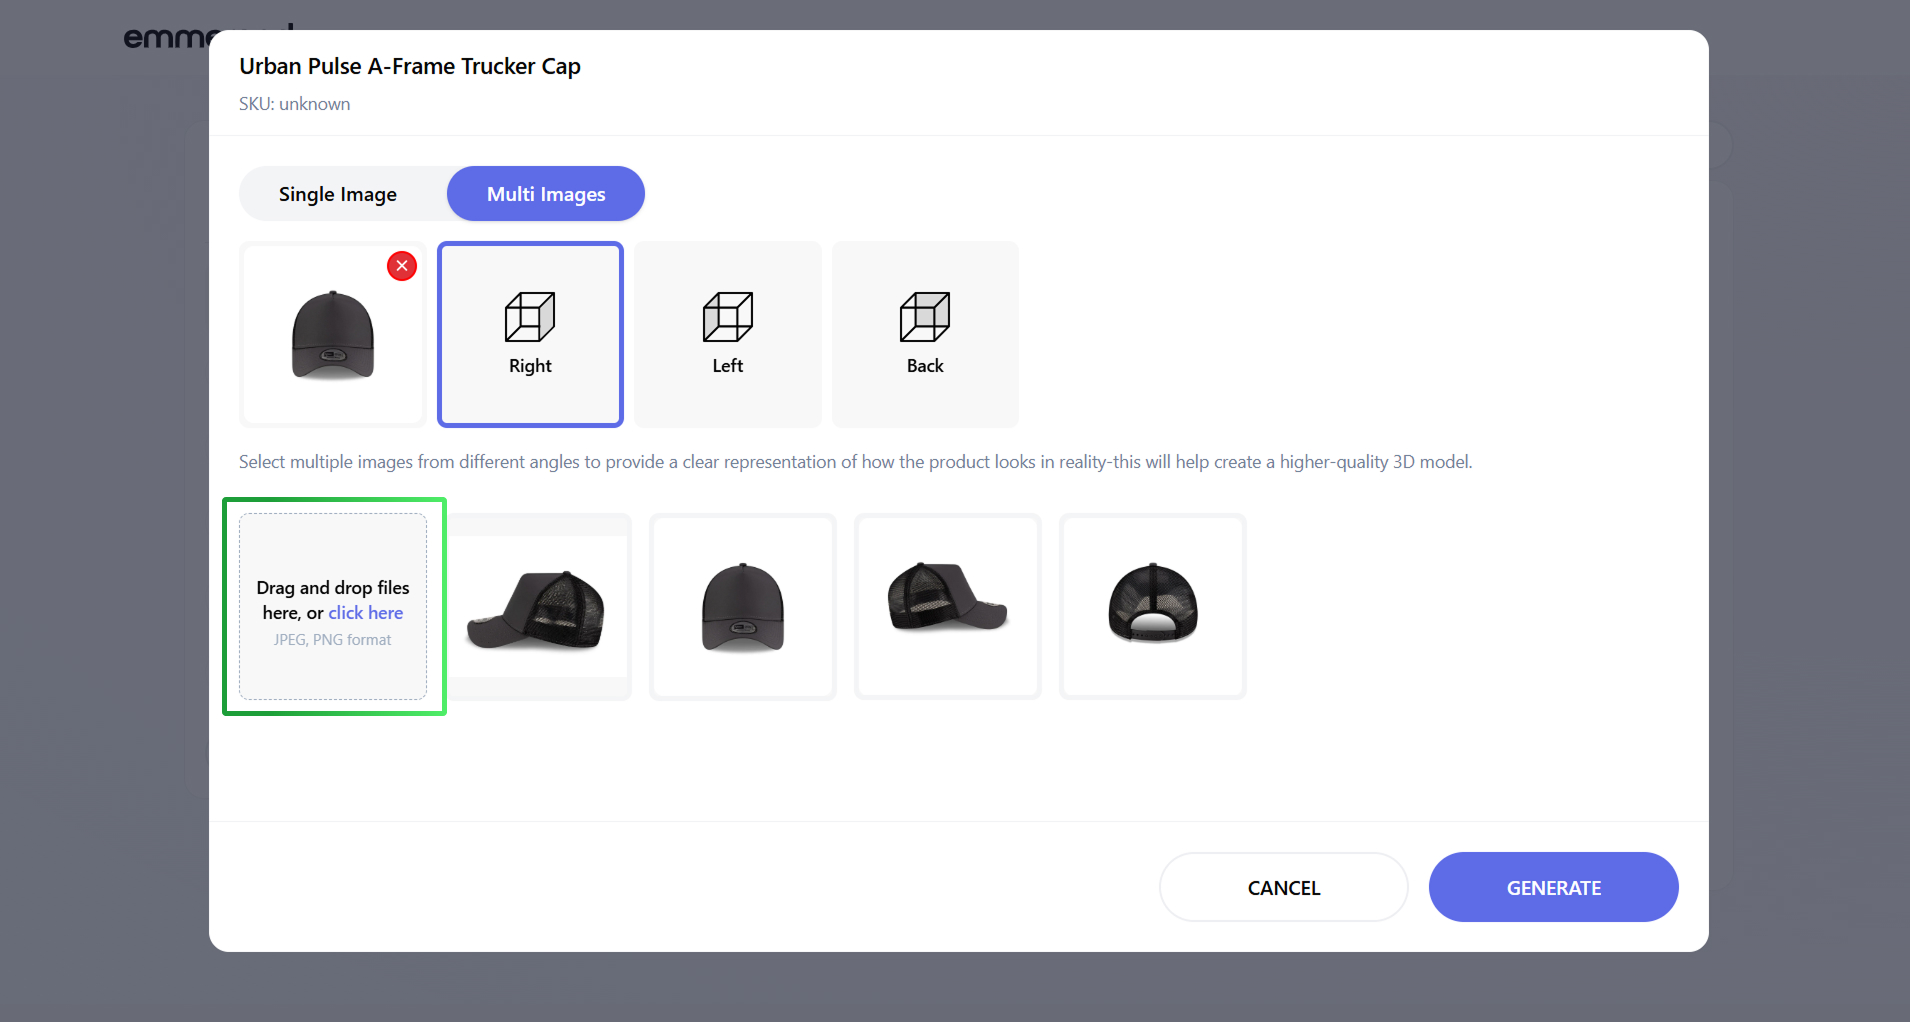
- Click on the image upload area or drag and drop the file, if there is no suitable image.
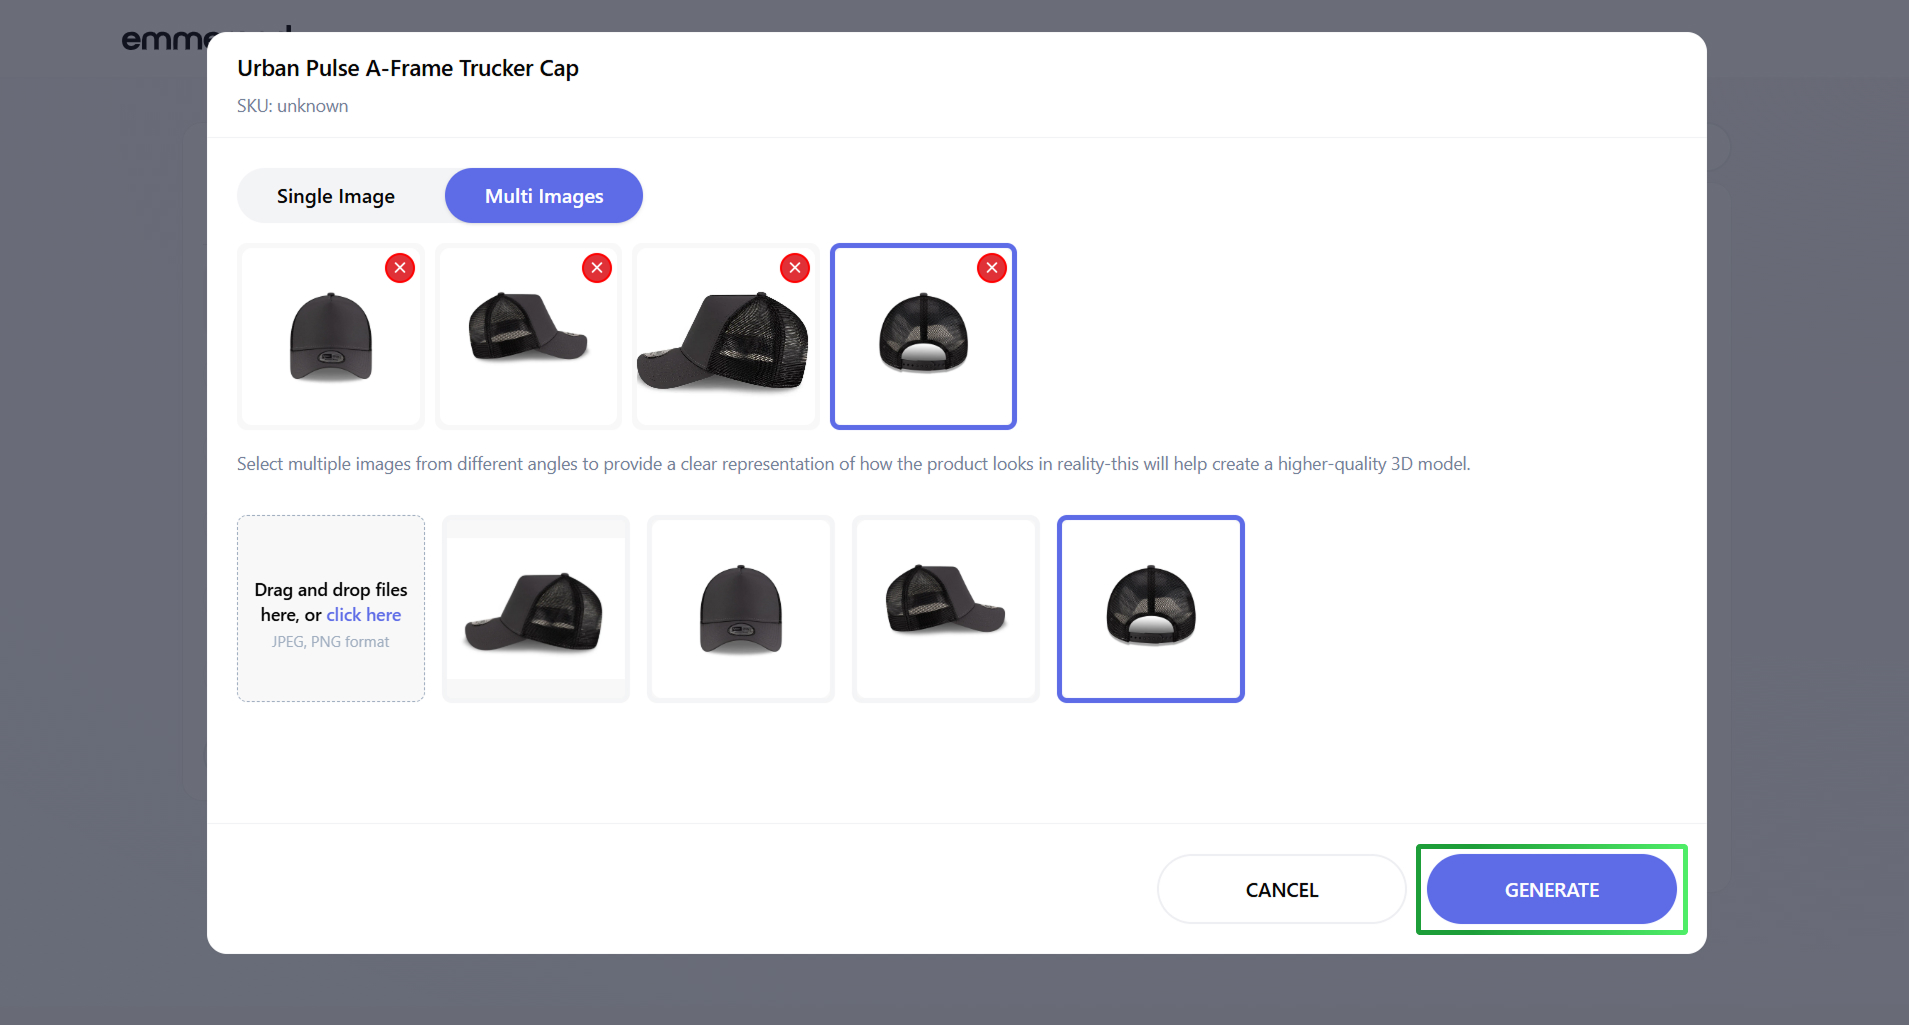
- Click on the “Delete” icon if you want to delete the image.
- Click the “GENERATE” button.
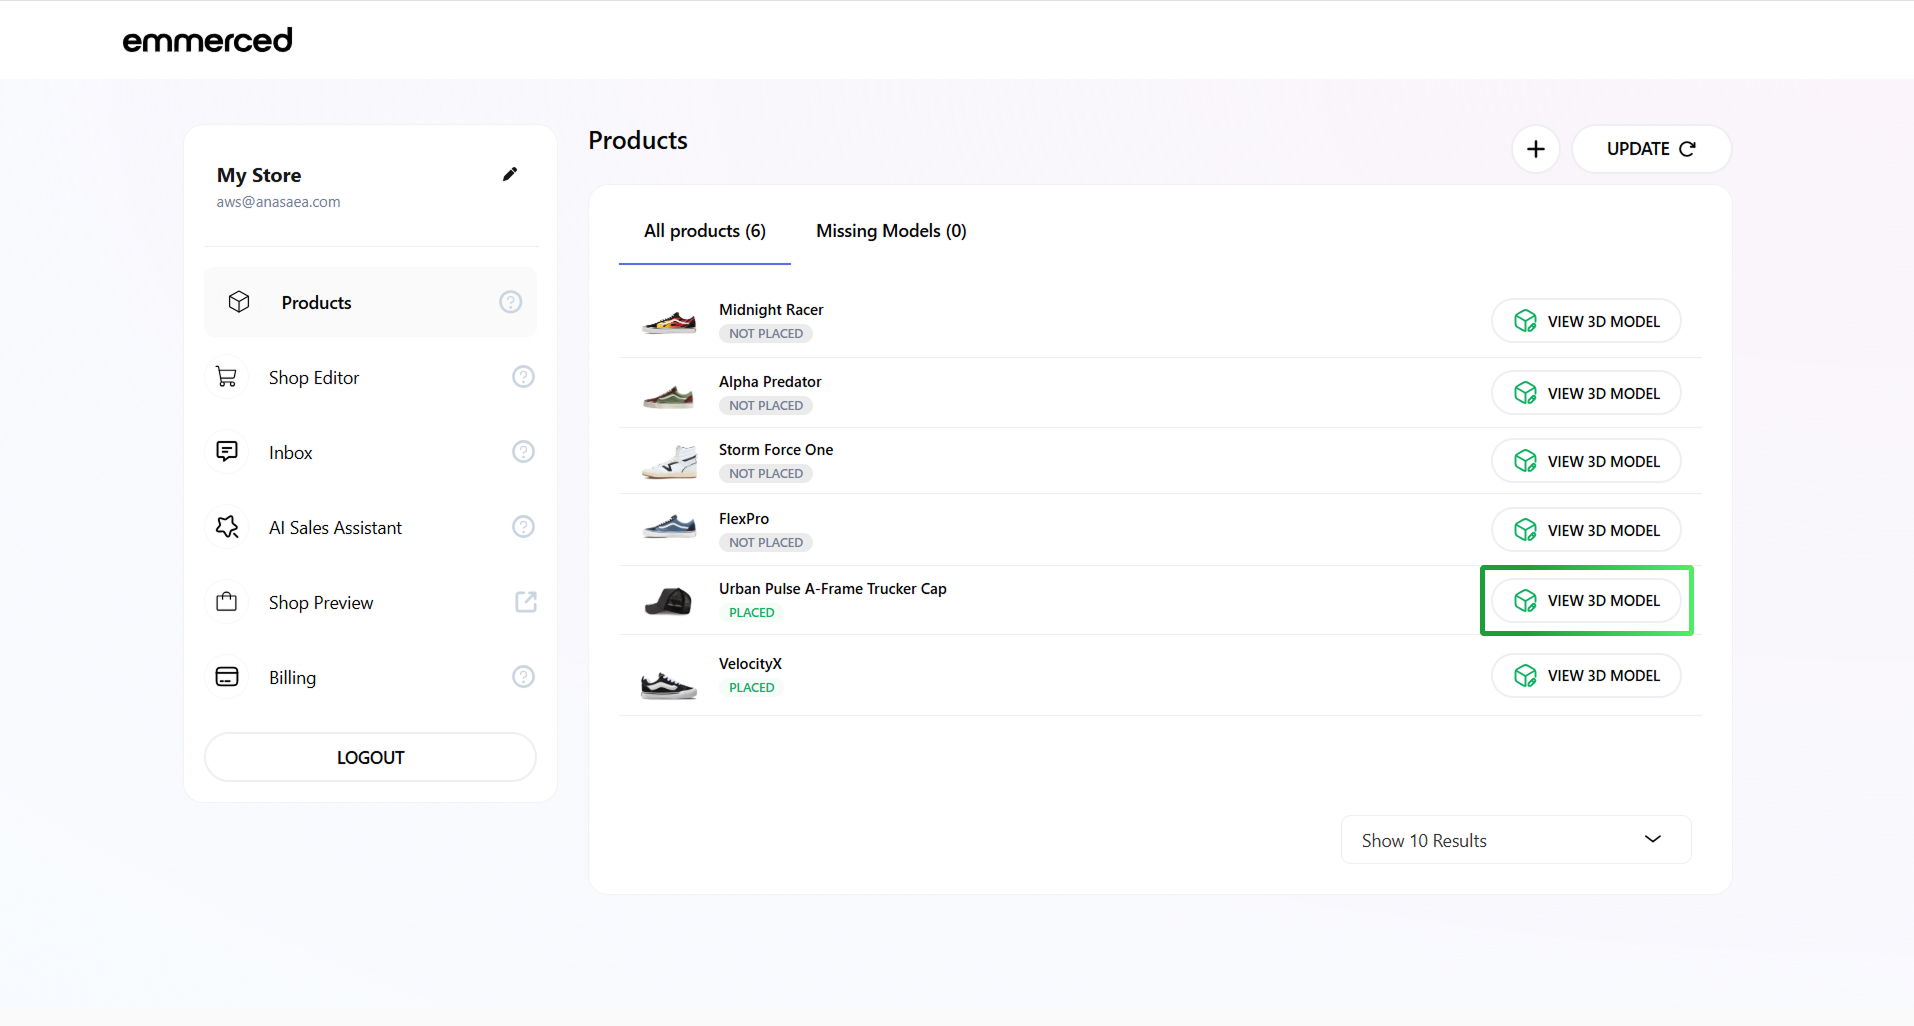
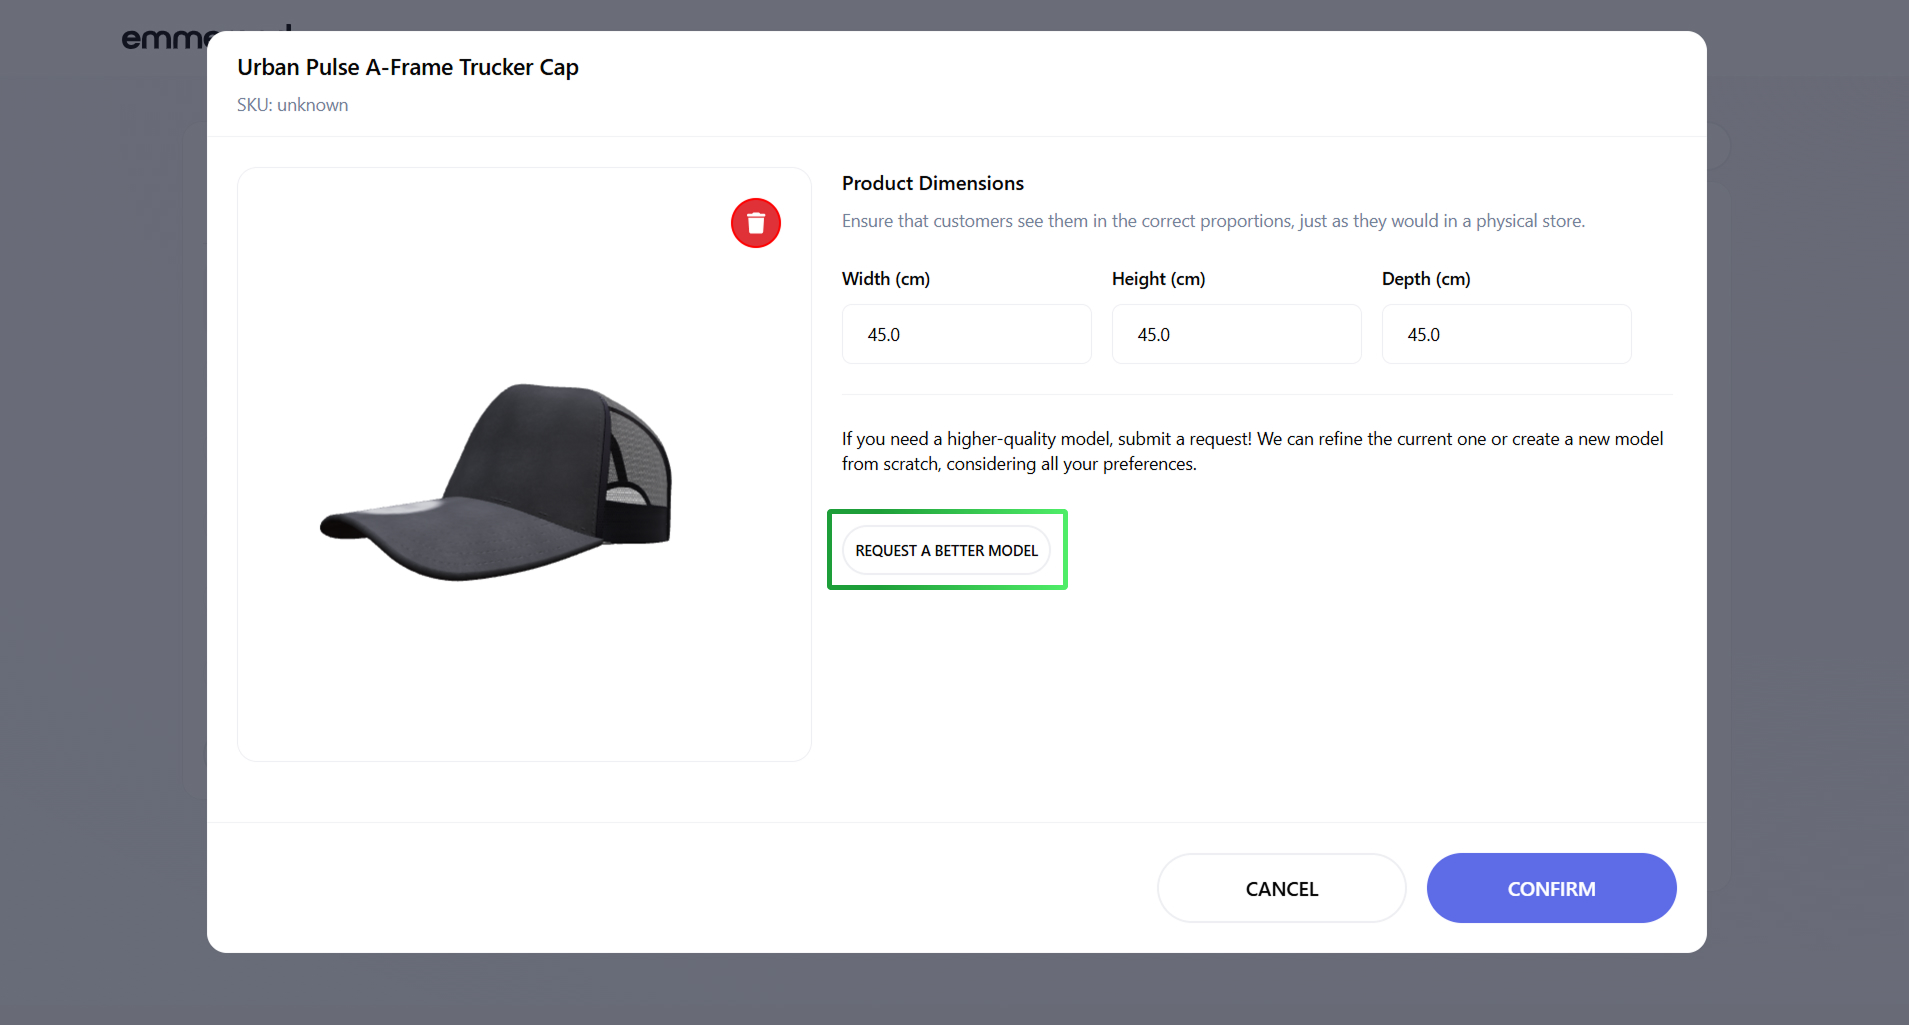
- Click the “VIEW 3D MODEL” button to view the uploaded 3D Model.
- Click the “REQUEST A BETTER MODEL” button if you are unhappy with the result and want the 3D Model to be created by our 3D artists.
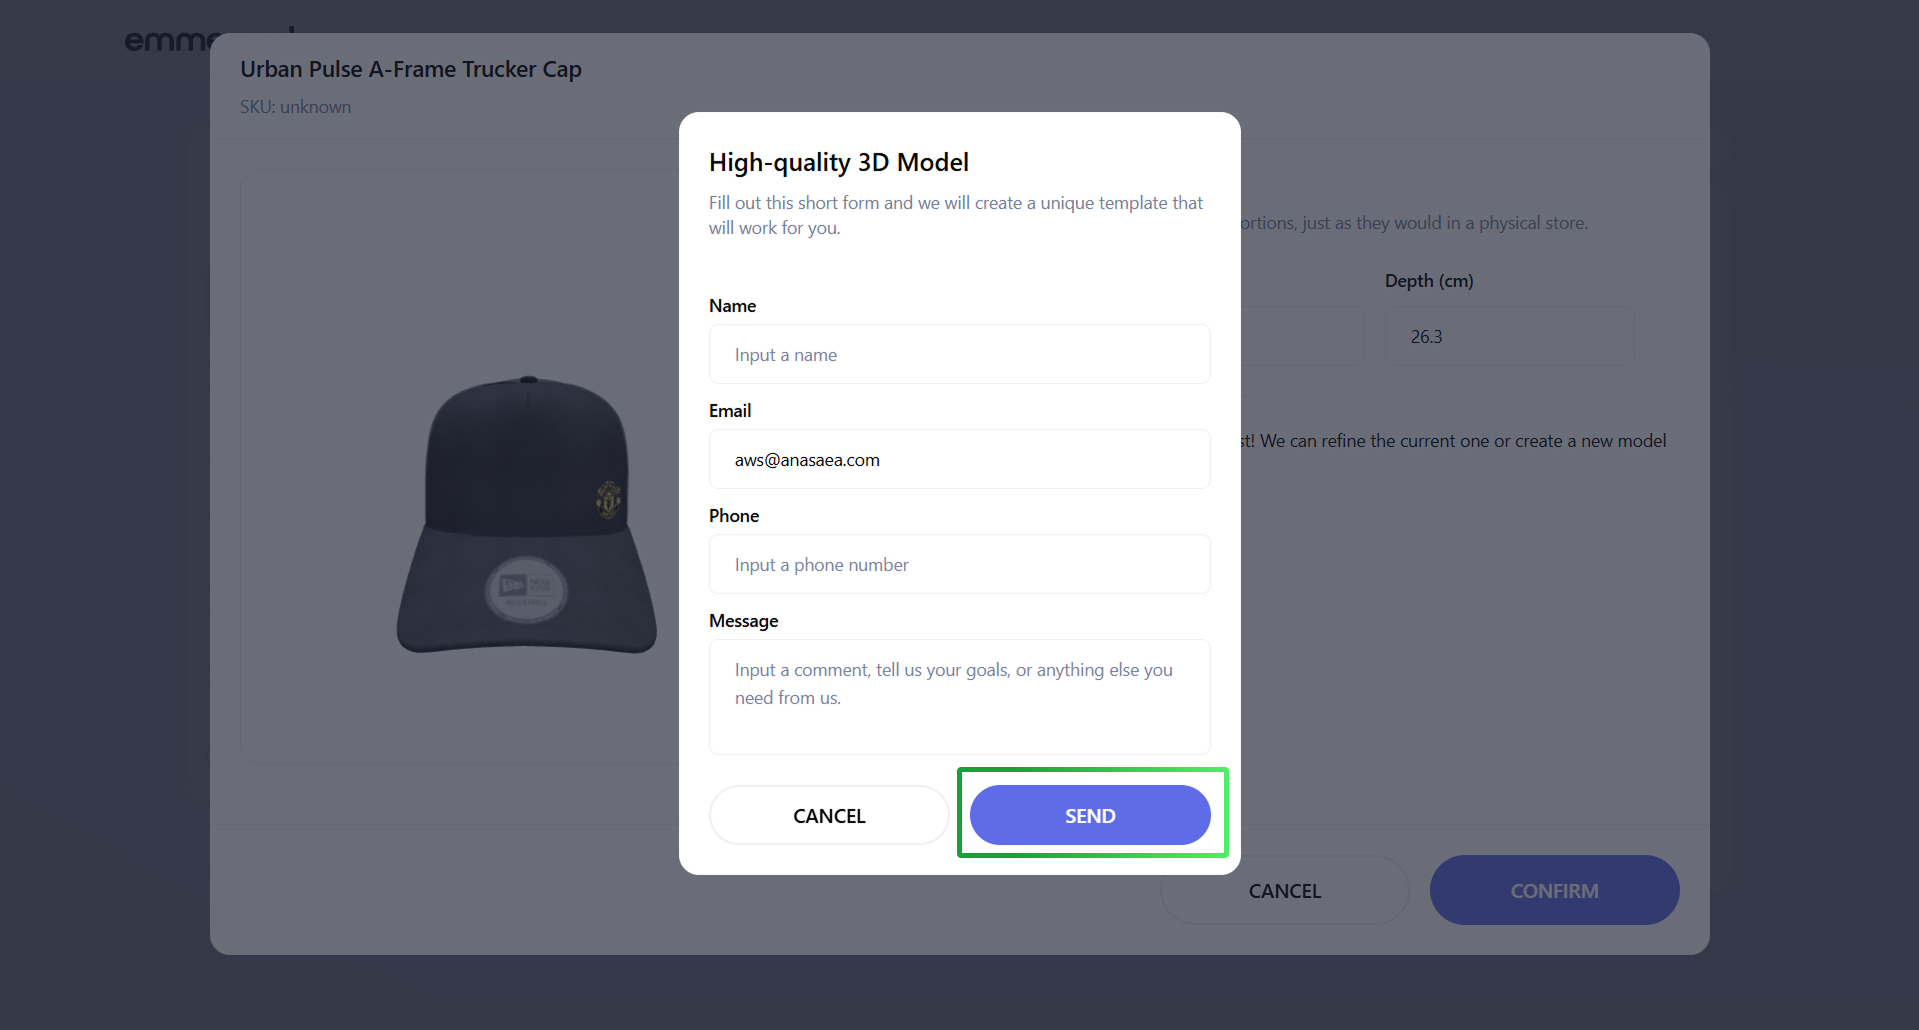
- Fill in the fields and click on the ”SEND” button.
Attention. This service is paid, and the price and time frame for creating a 3D Model depend on its complexity.

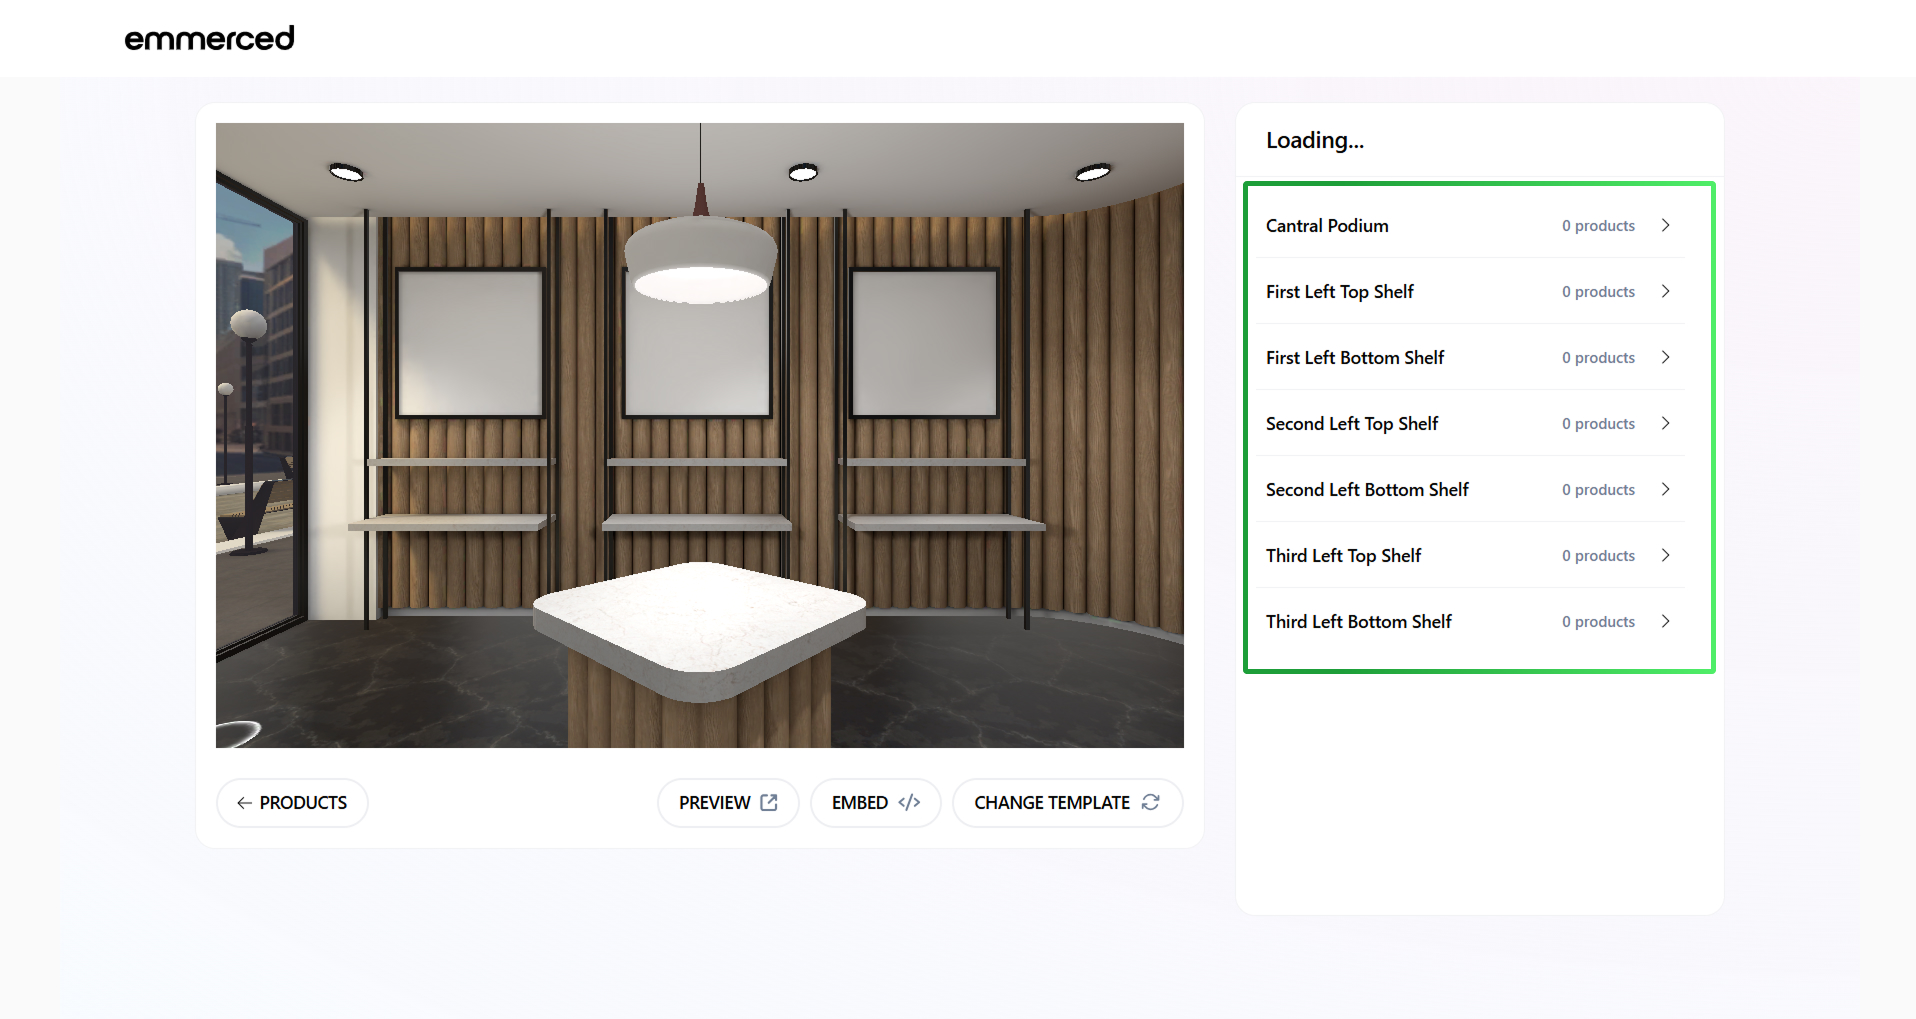
Creating an engaging 3D Store layout is essential for effectively showcasing your products. The Store Editor empowers you to organize your products and craft a visually stunning environment that captivates customers. Follow these steps to personalize your 3D Store and enhance the shopping experience.
- Open the “Shop Editor” section from the left navigation bar.
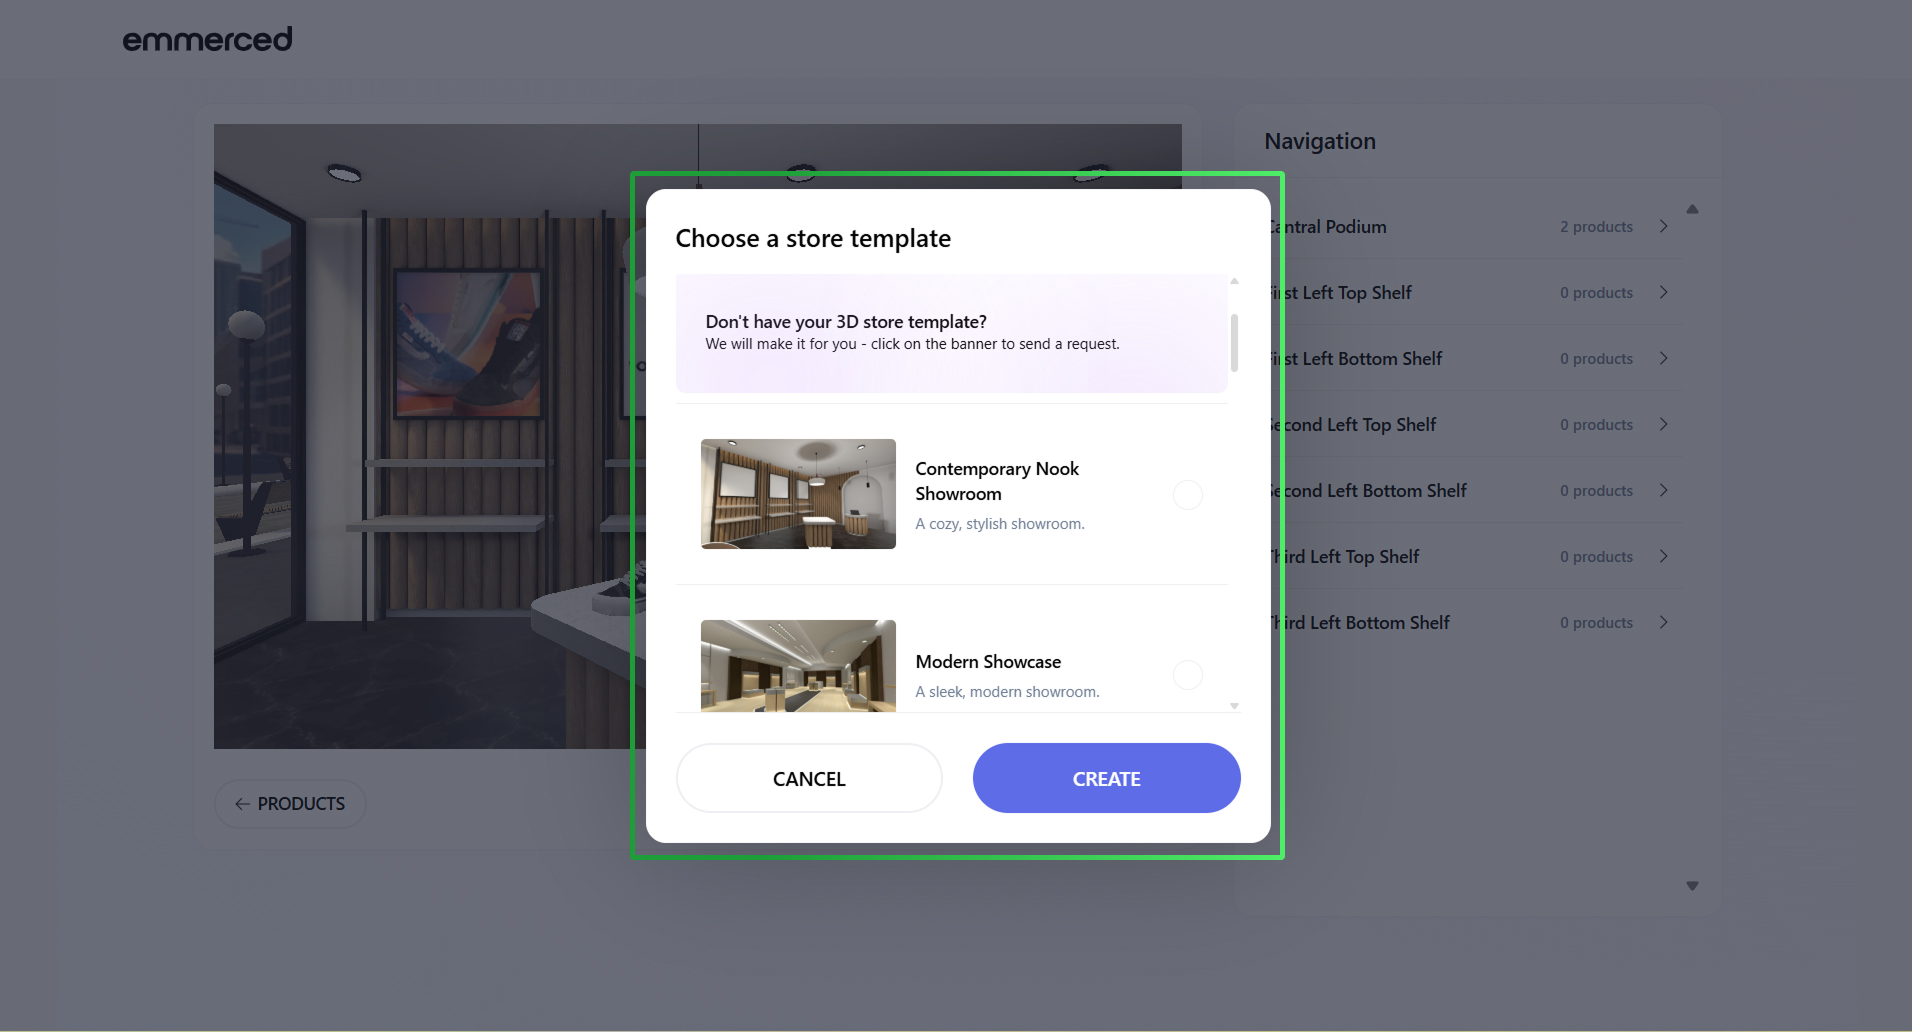
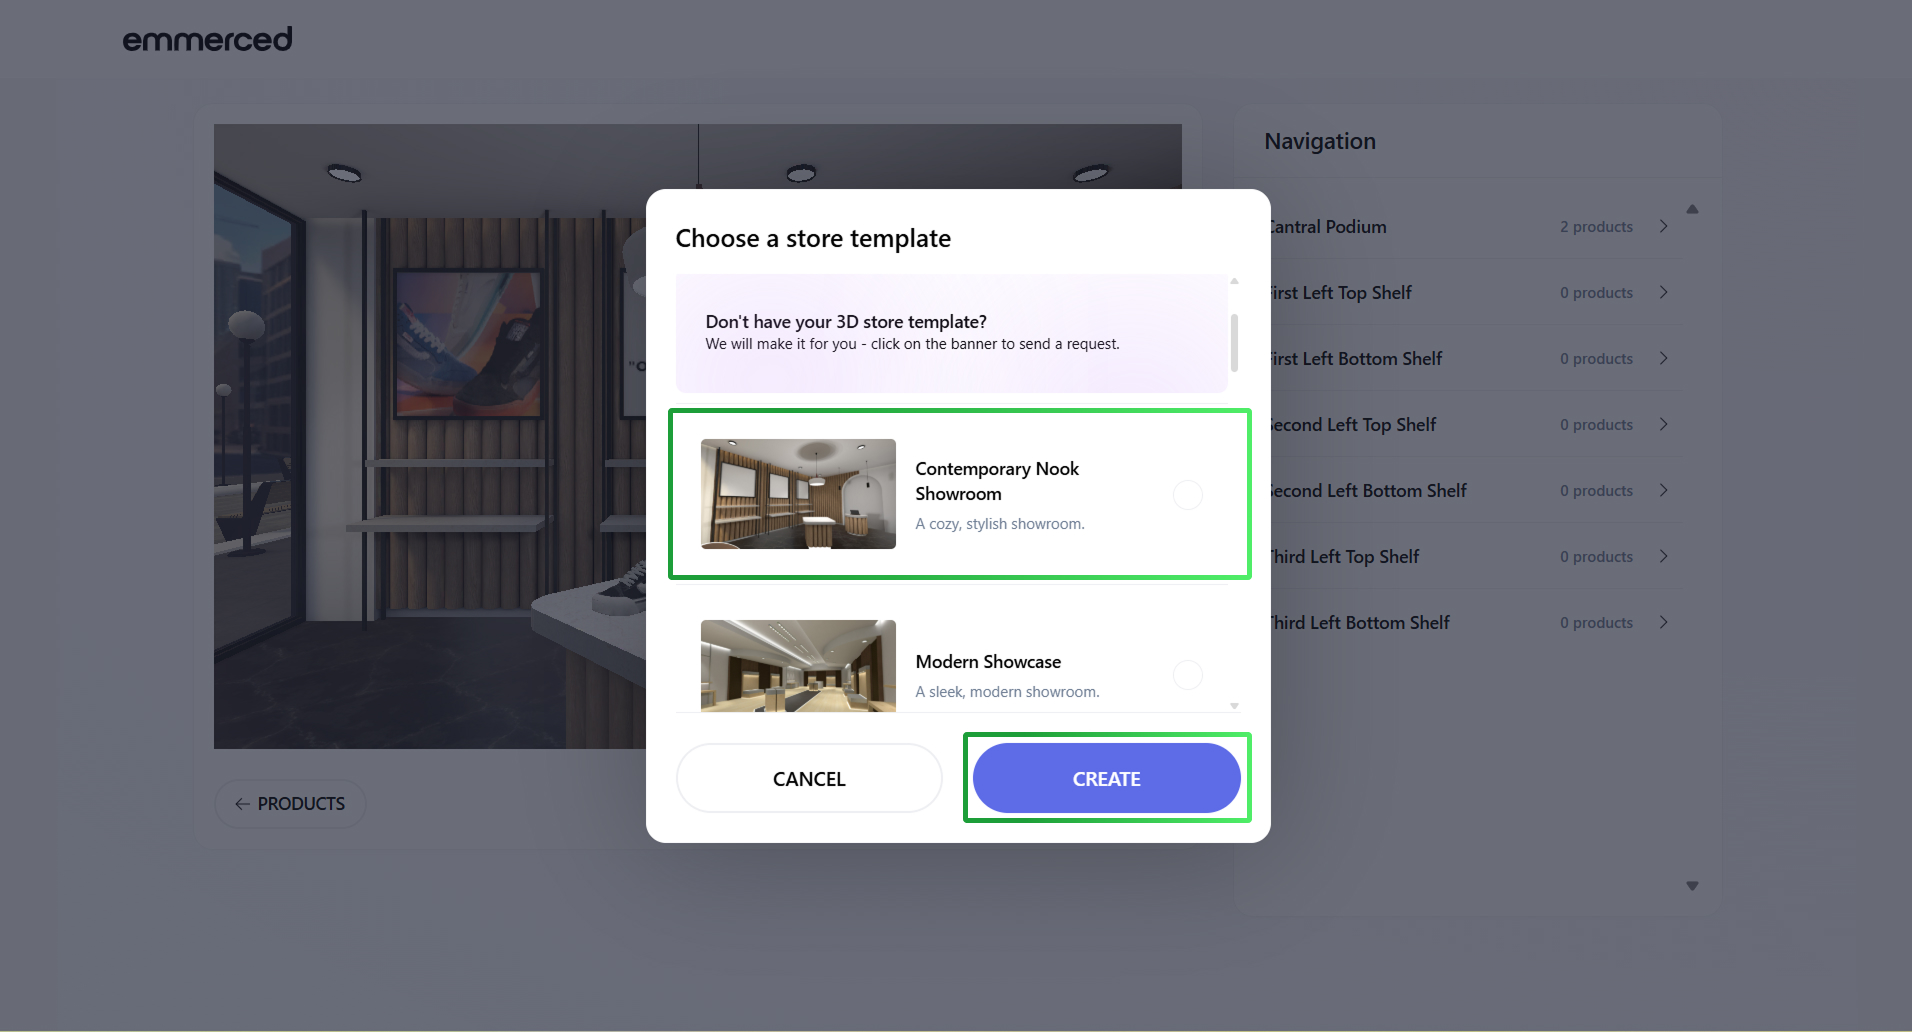
- Select a store template that best suits your style and product offerings.
- Click “CREATE” button.
- Select the desired placement for your product using the right navigation panel. This feature allows you to strategically position your product within the 3D Store layout for optimal visibility and impact.
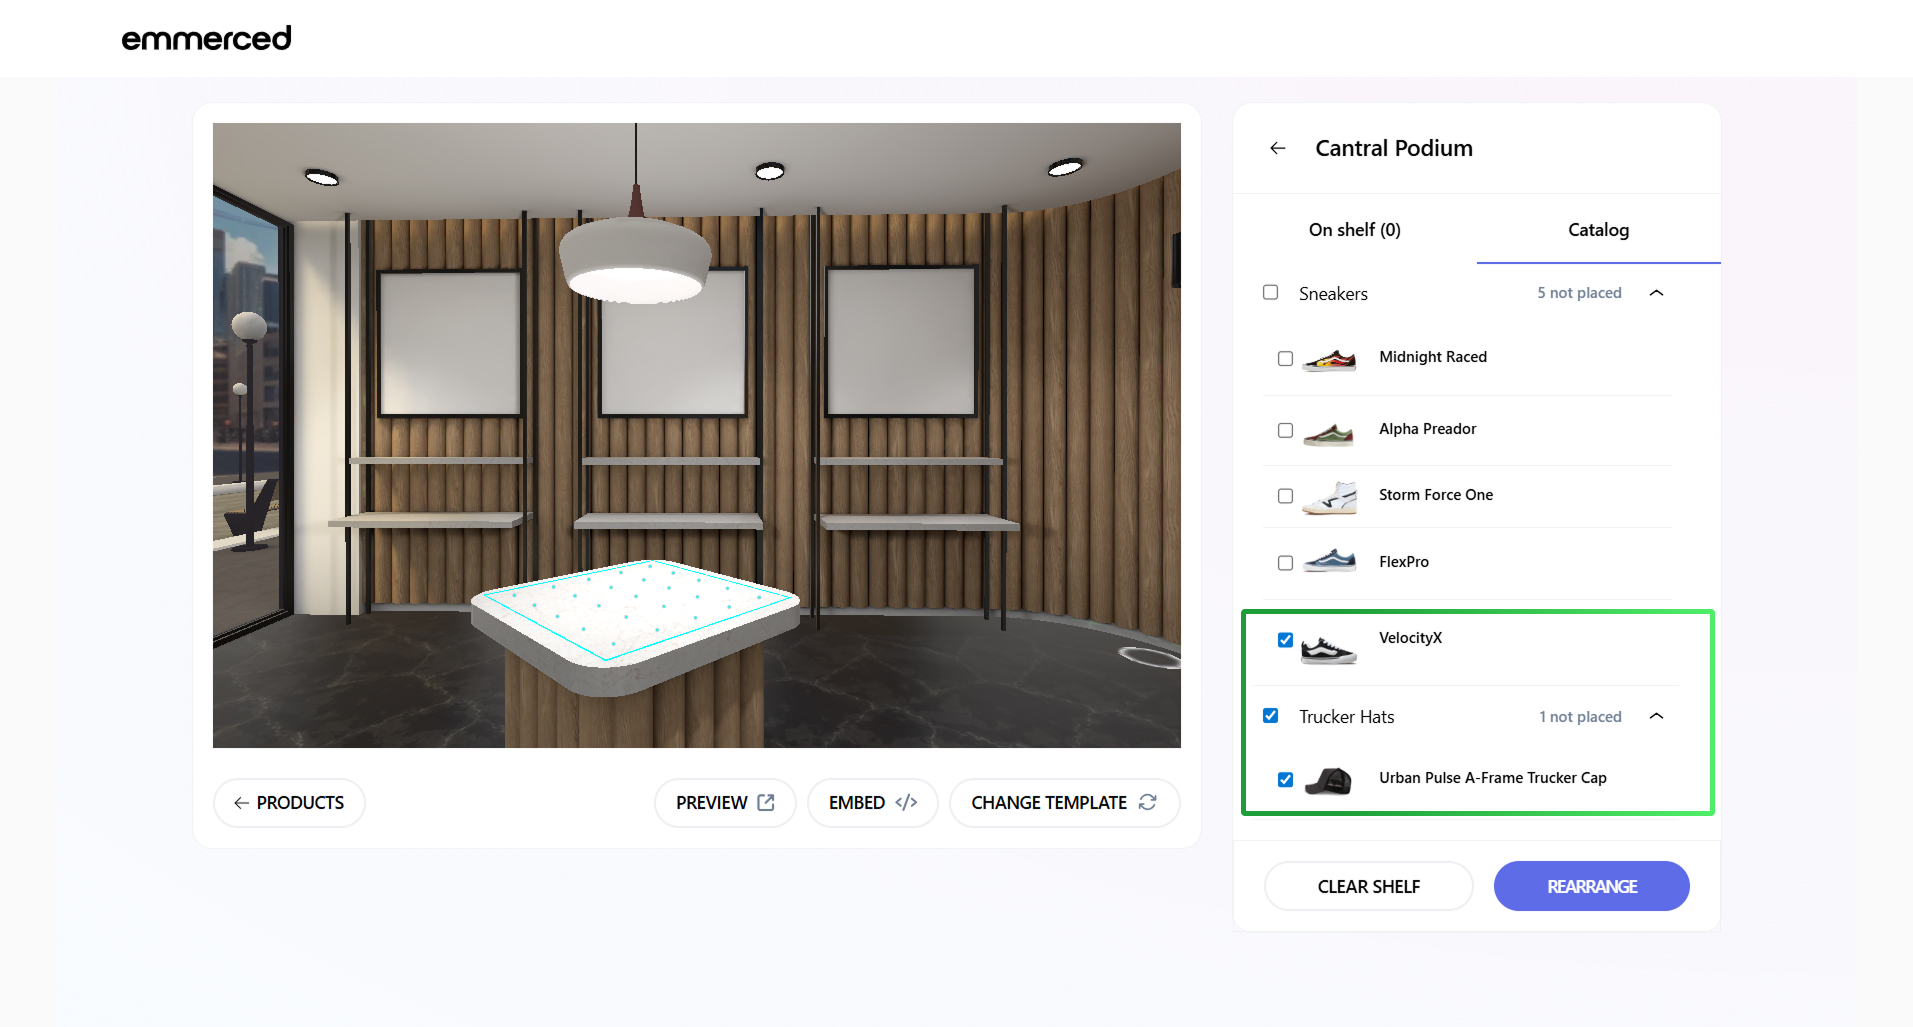
- Select the products you want to display using the right navigation panel. This allows you to customize your 3D store layout by choosing which items to feature in specific locations.
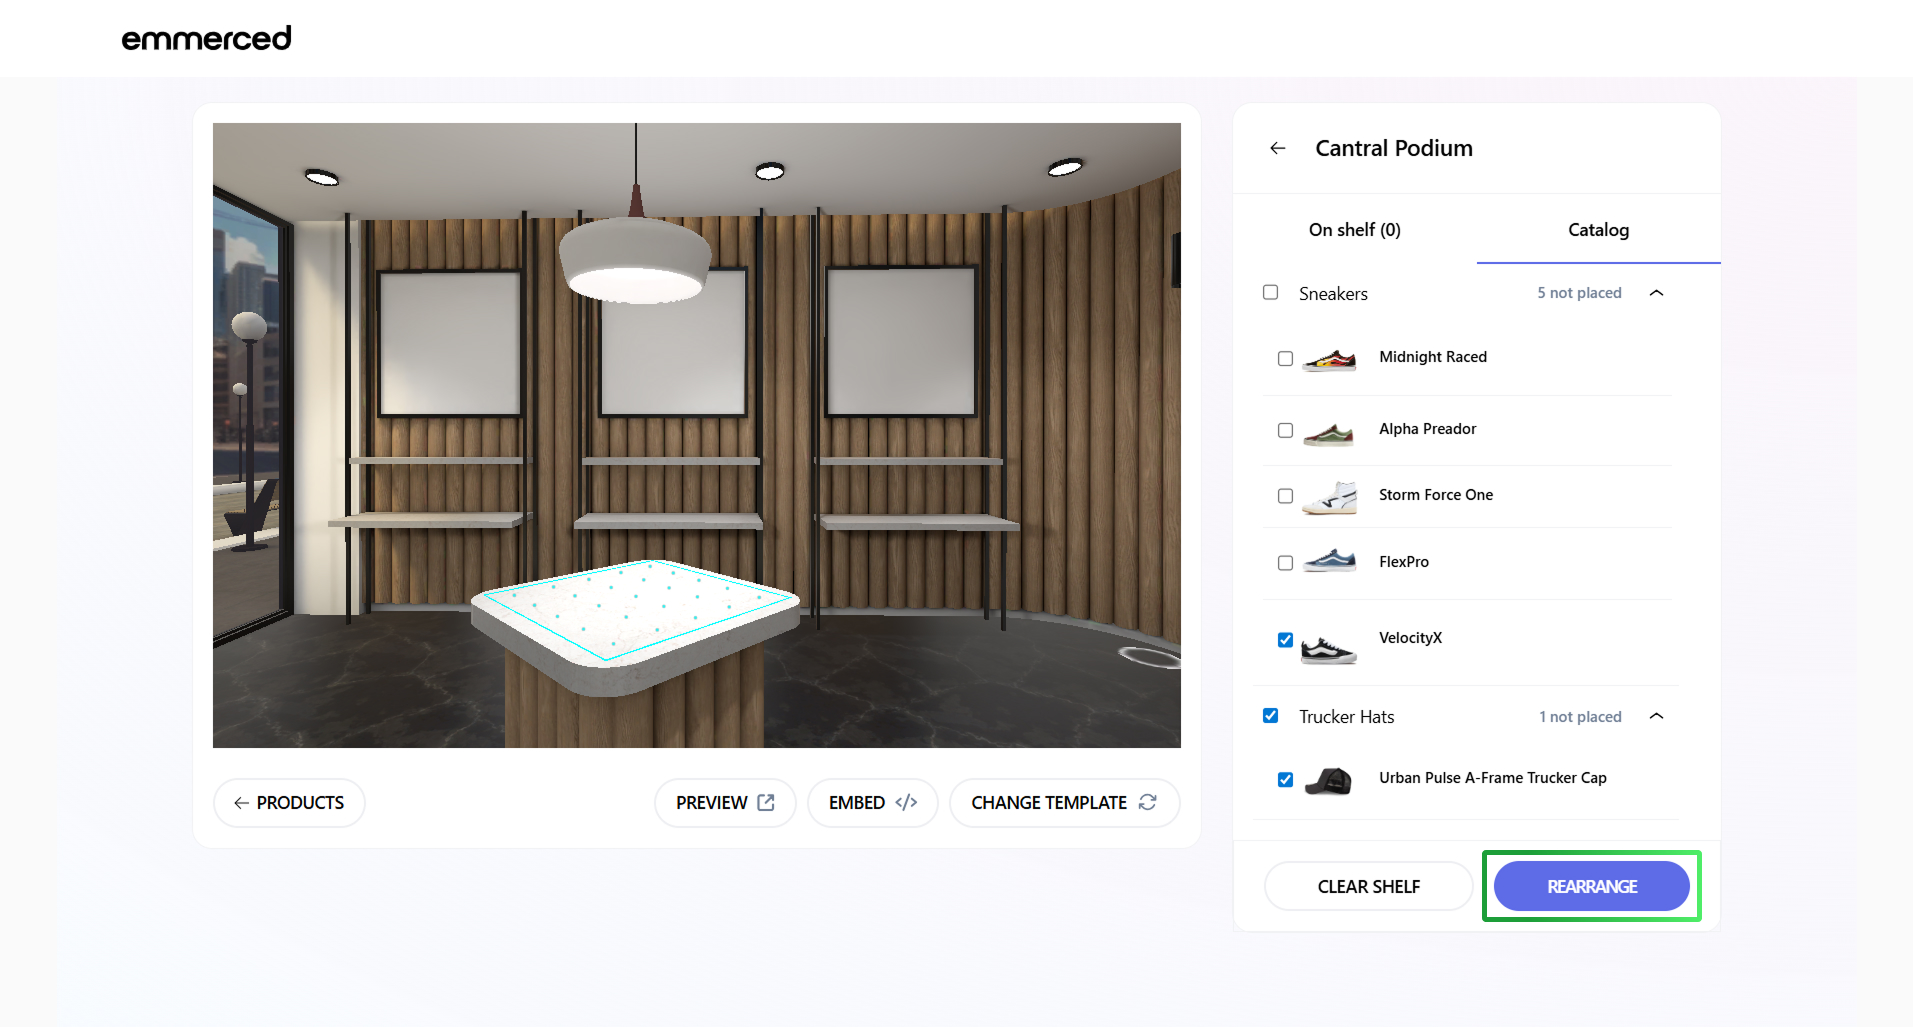
- Click the “REARRANGE” button to confirm your changes and update the 3D store layout.
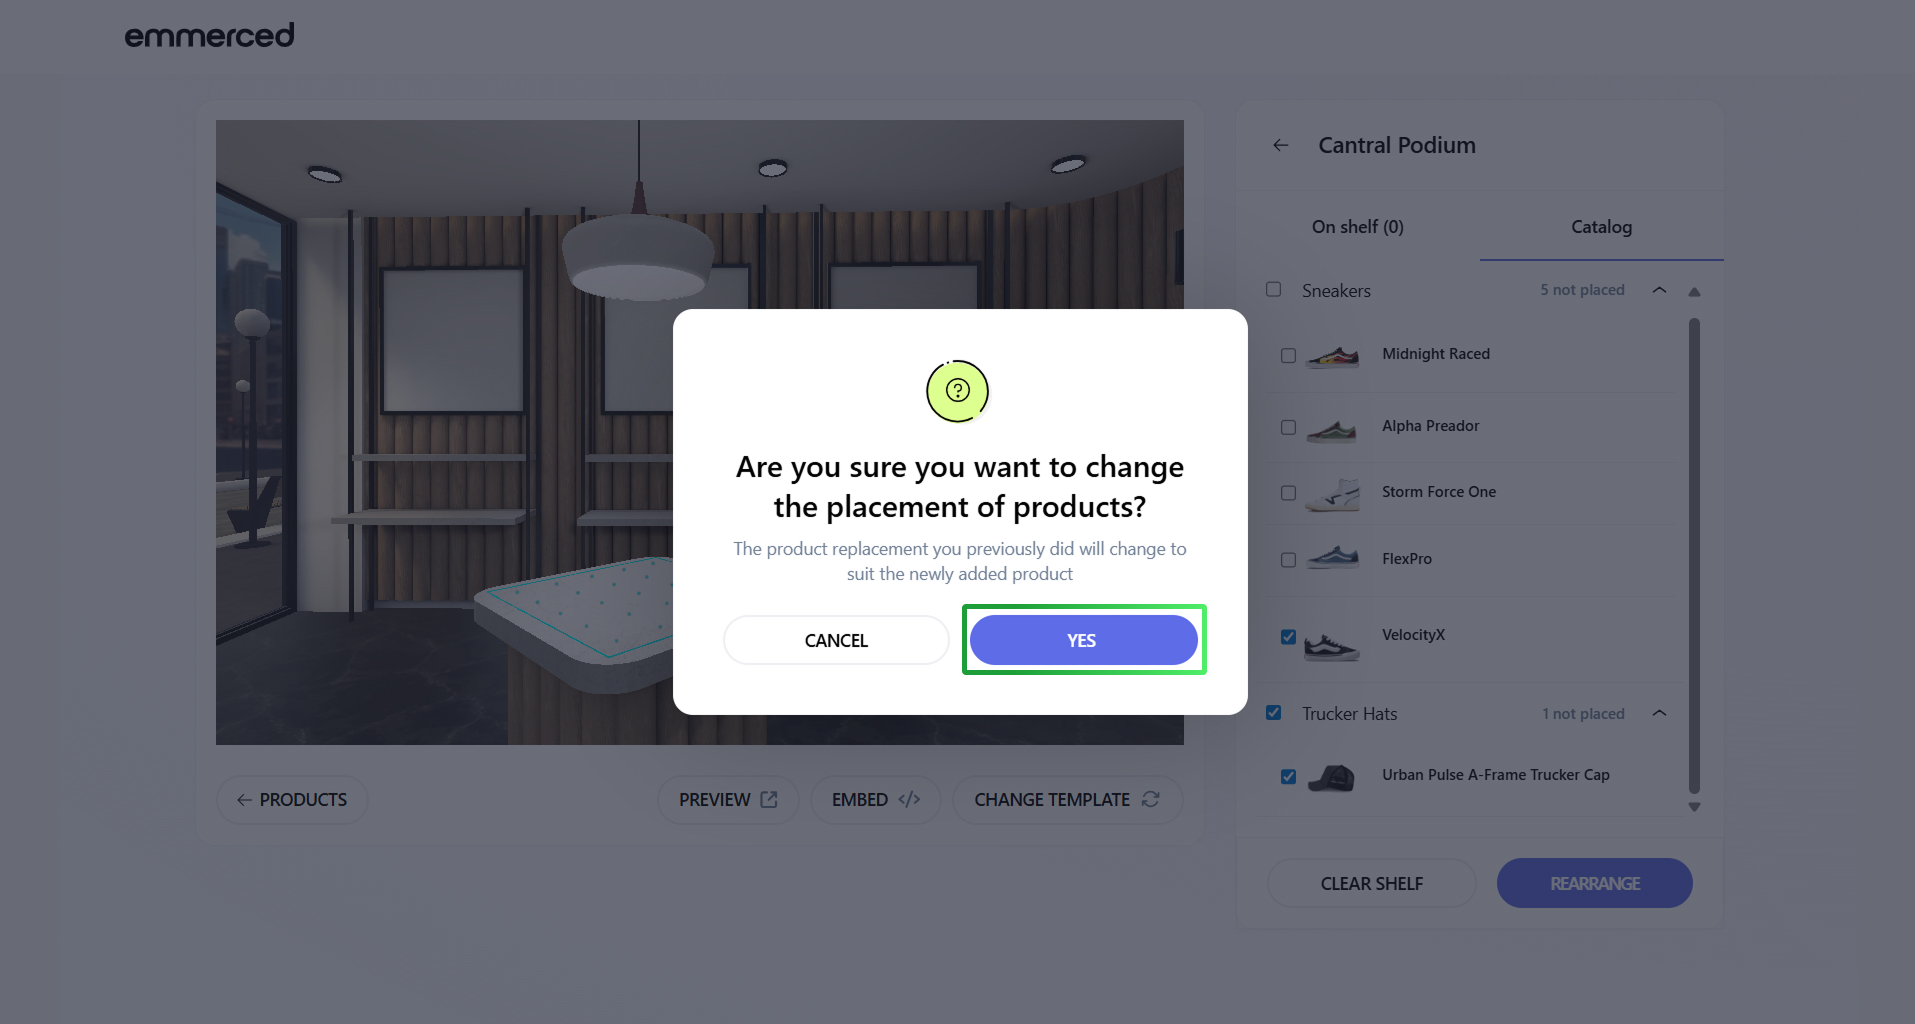
- Click “Yes” button to confirm.
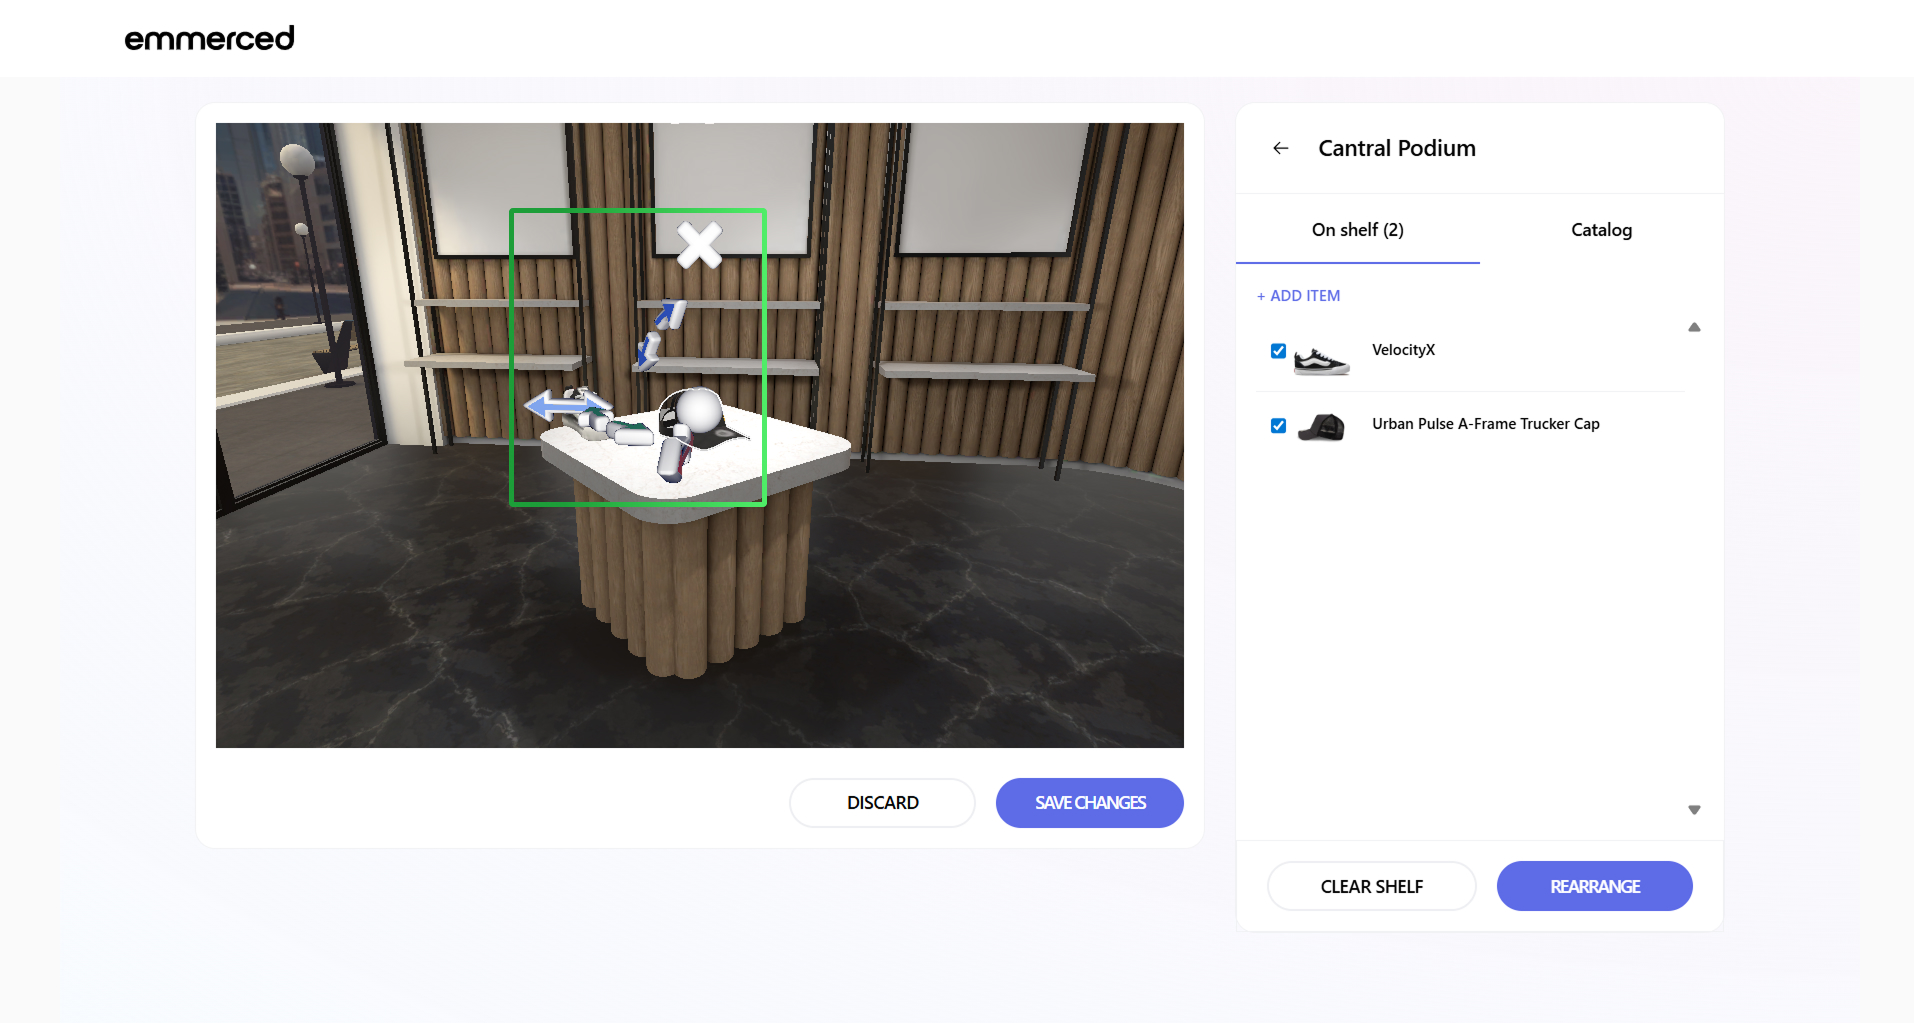
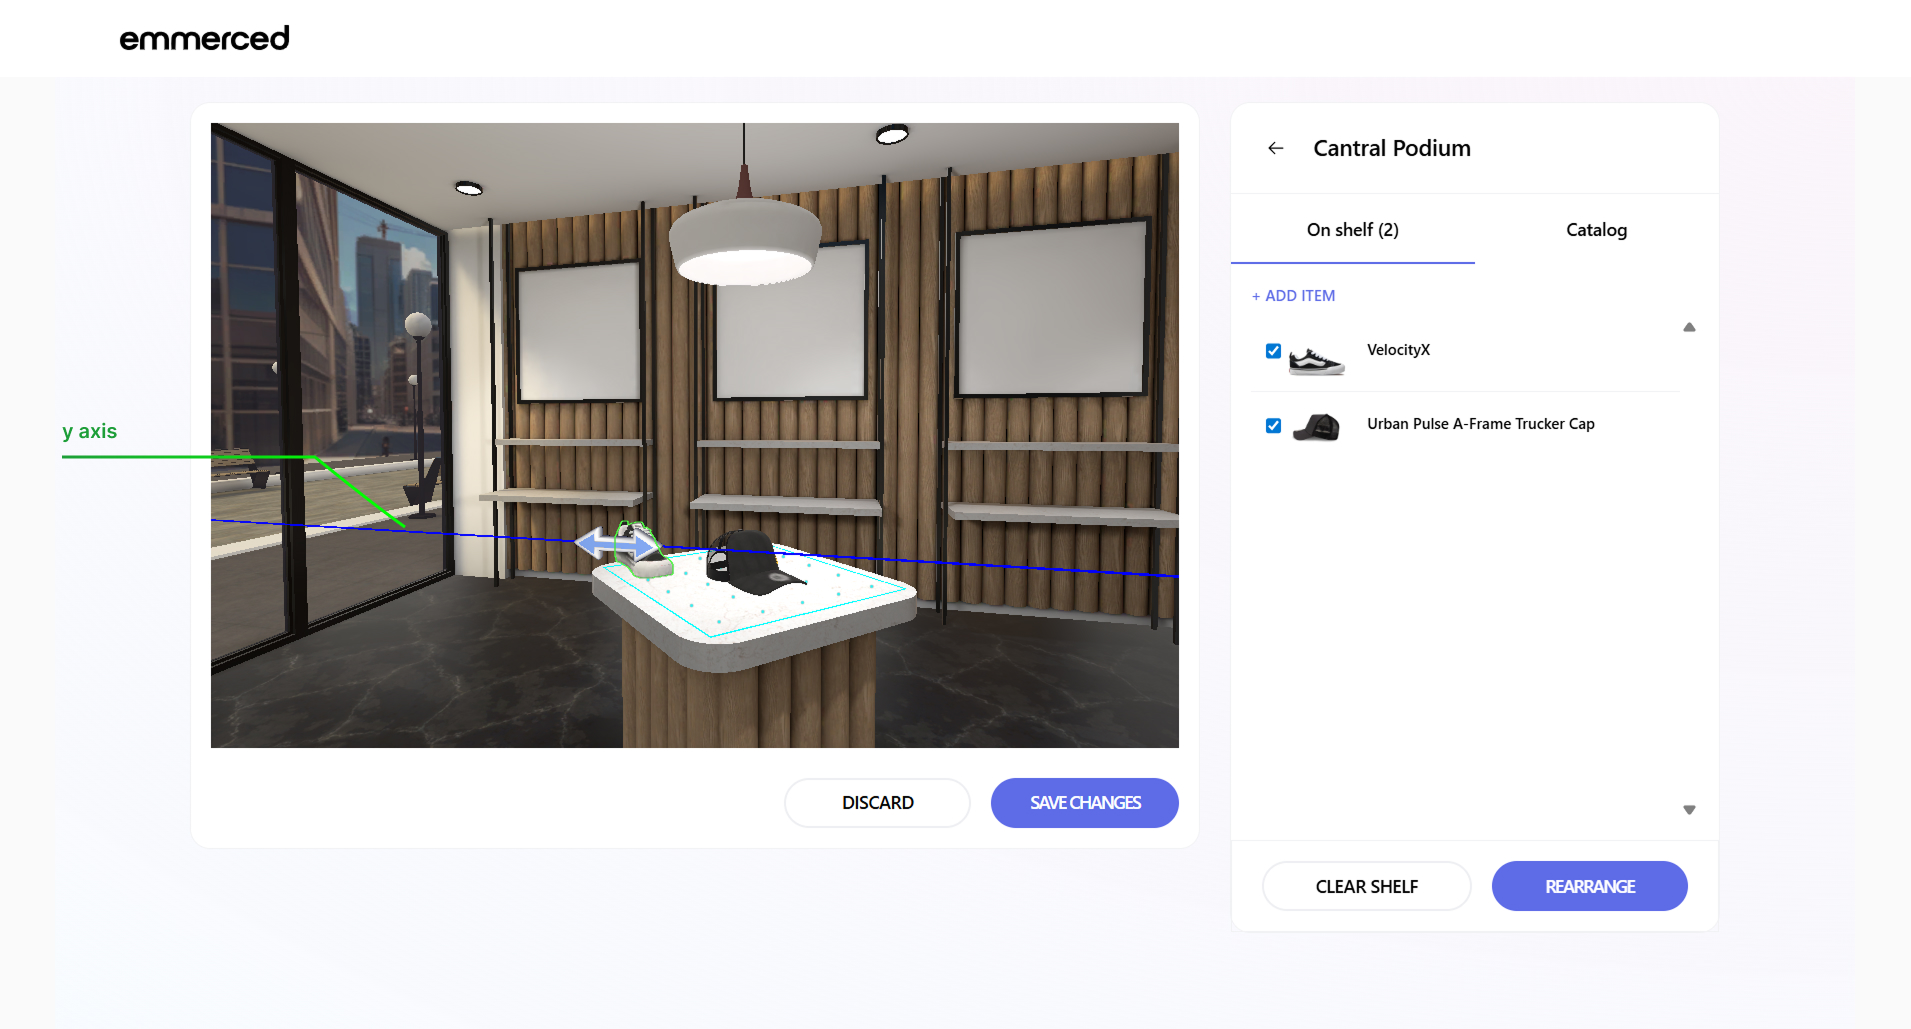
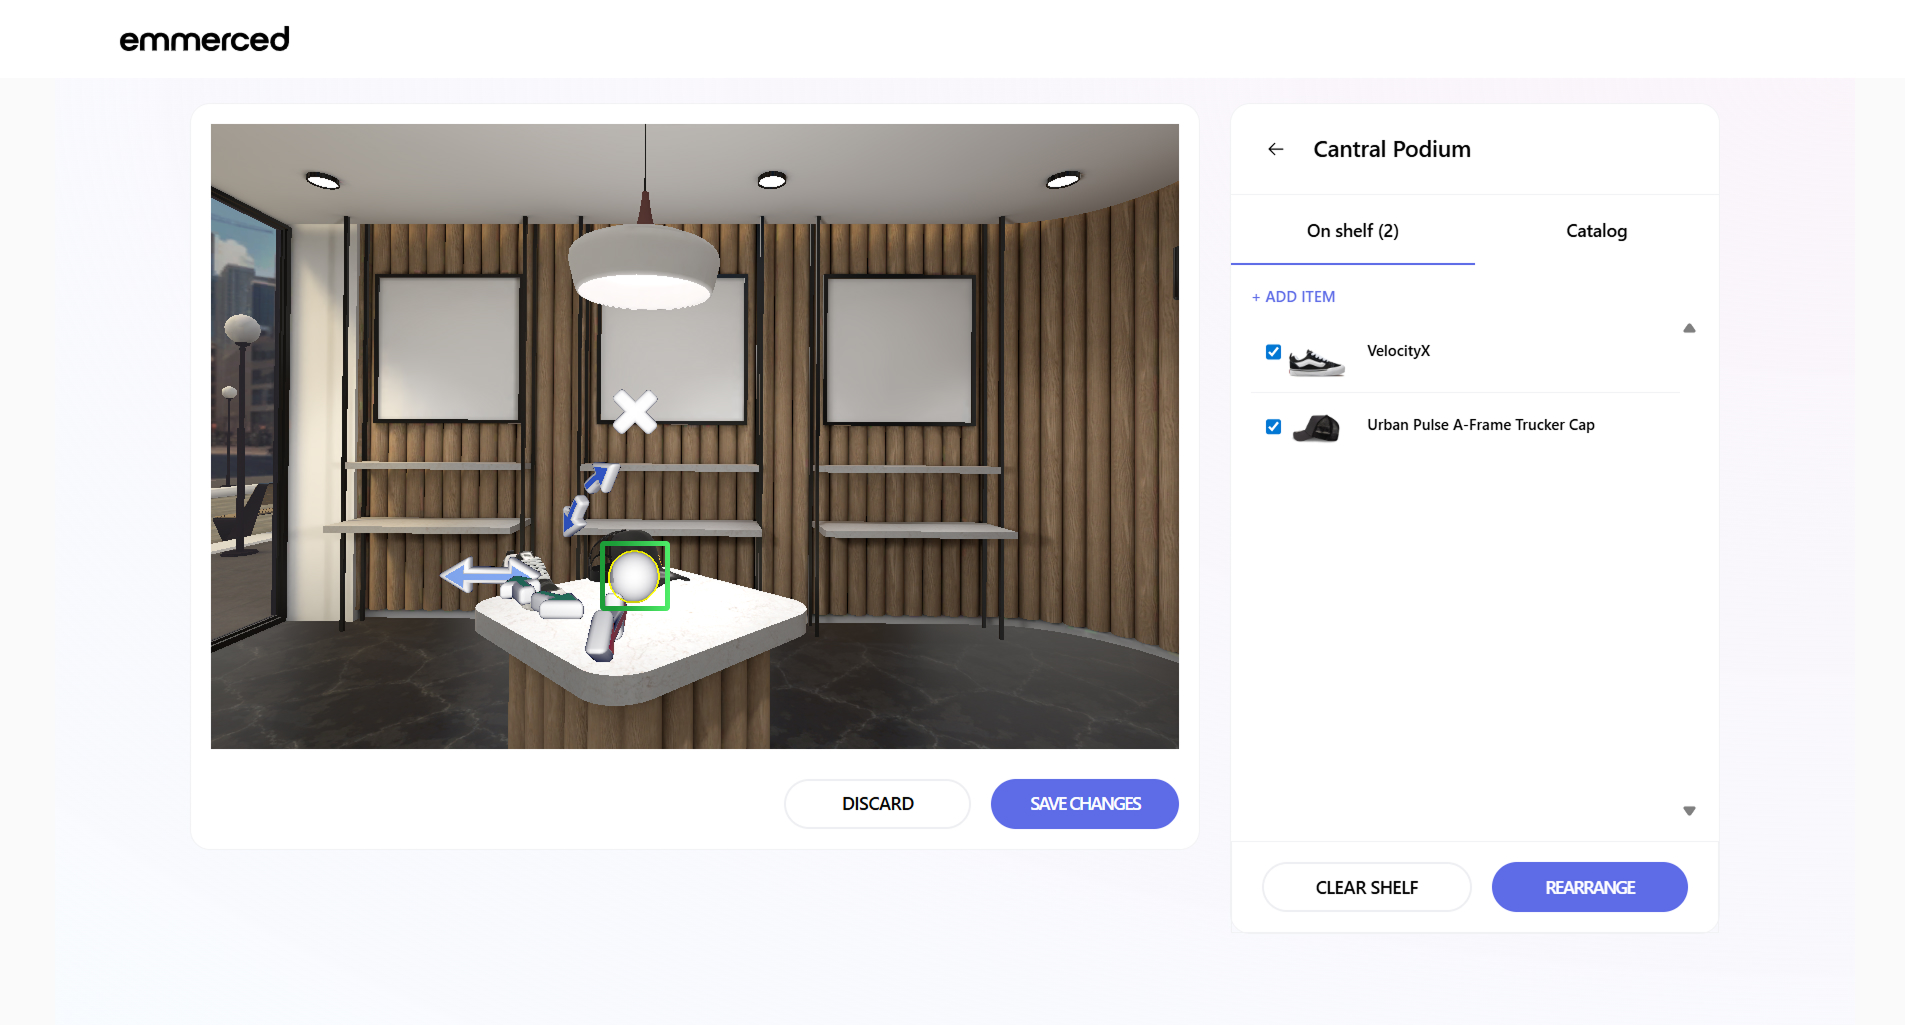
- Click on the product displayed on the shelf to select it for further customization or viewing.
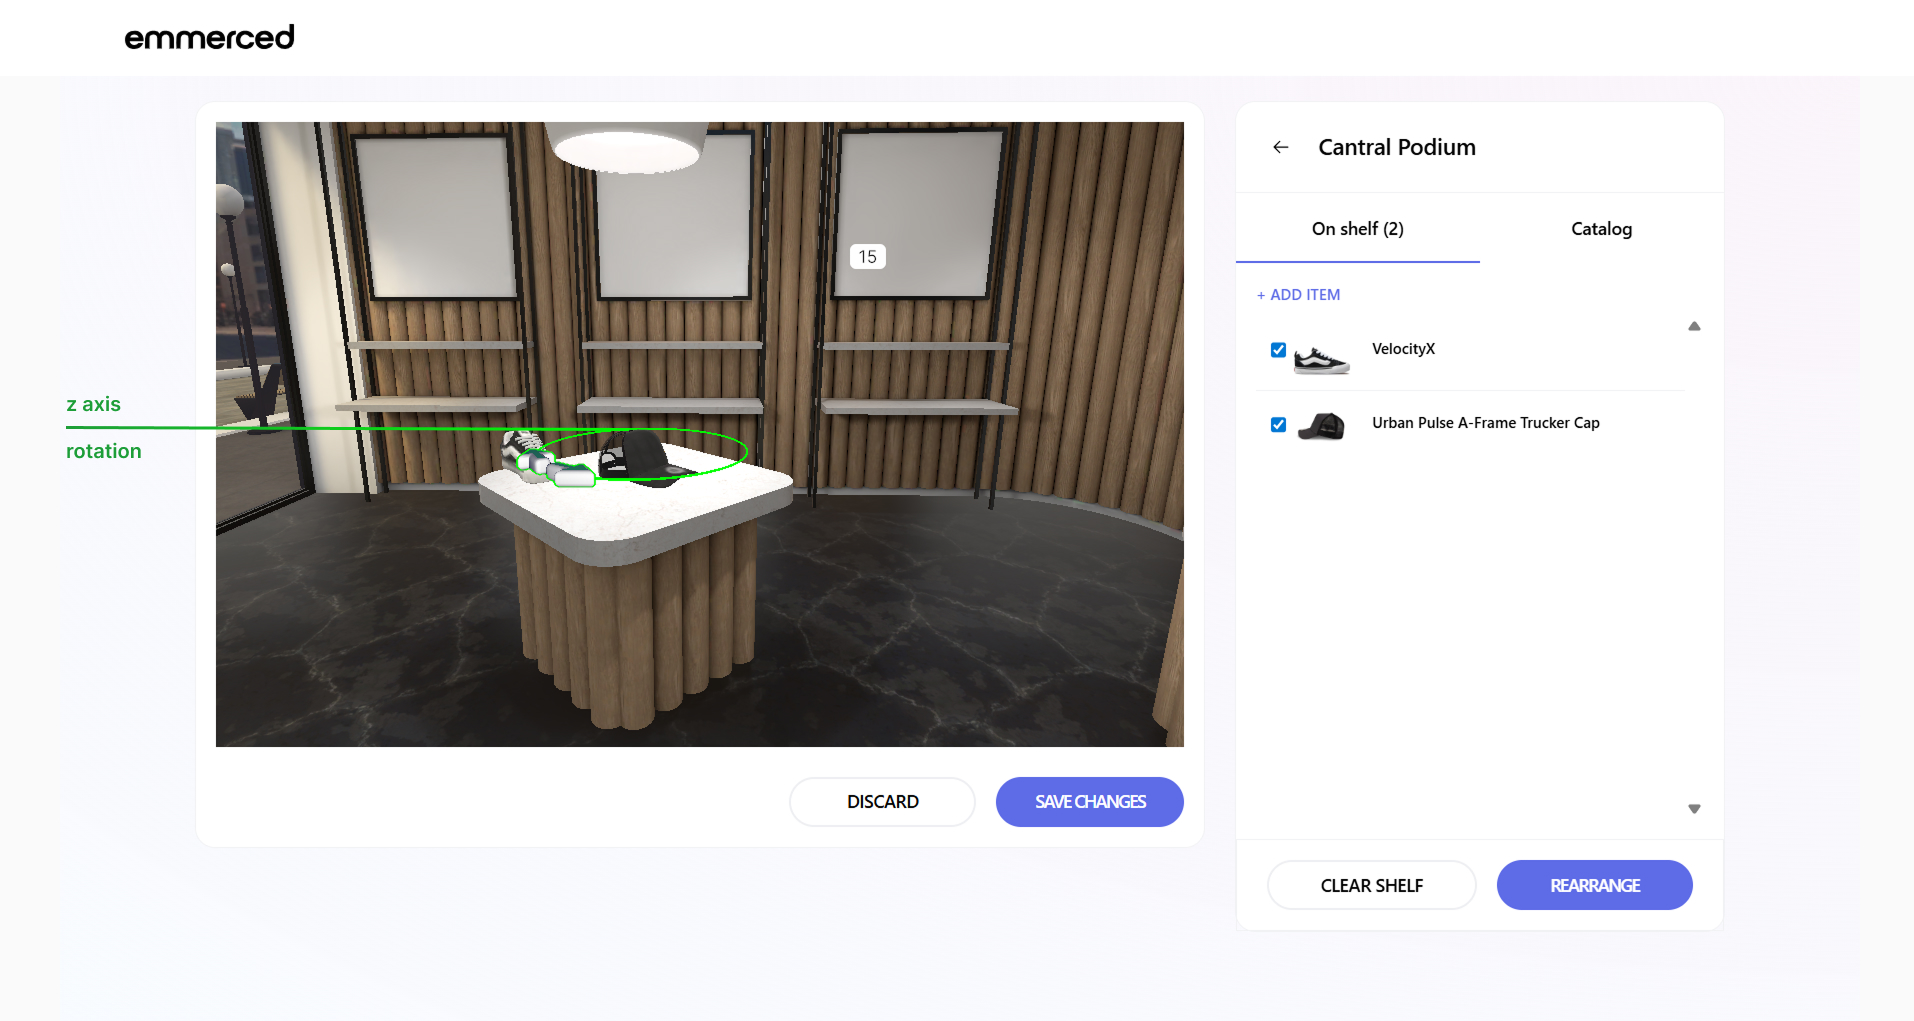
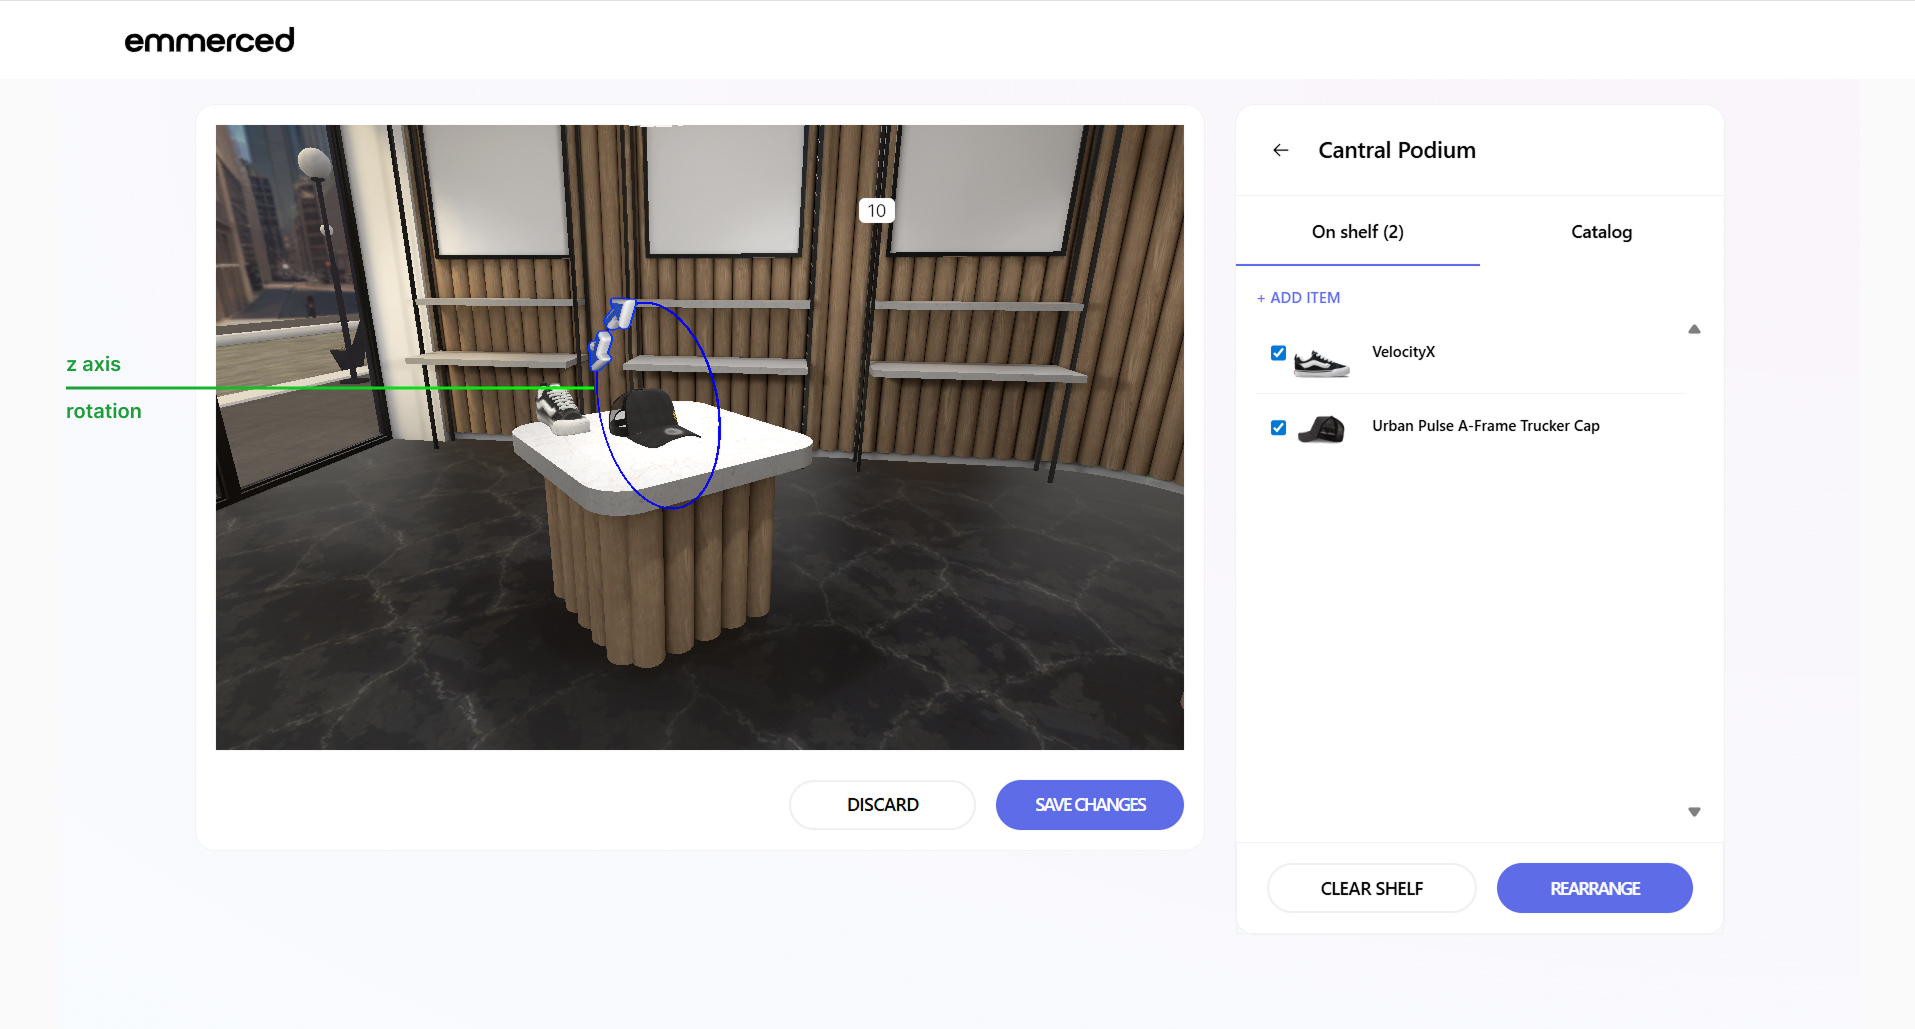
- Use the arrows above and around the 3D Model to adjust its position with greater precision.
- Click on the circle to reset all the changes.
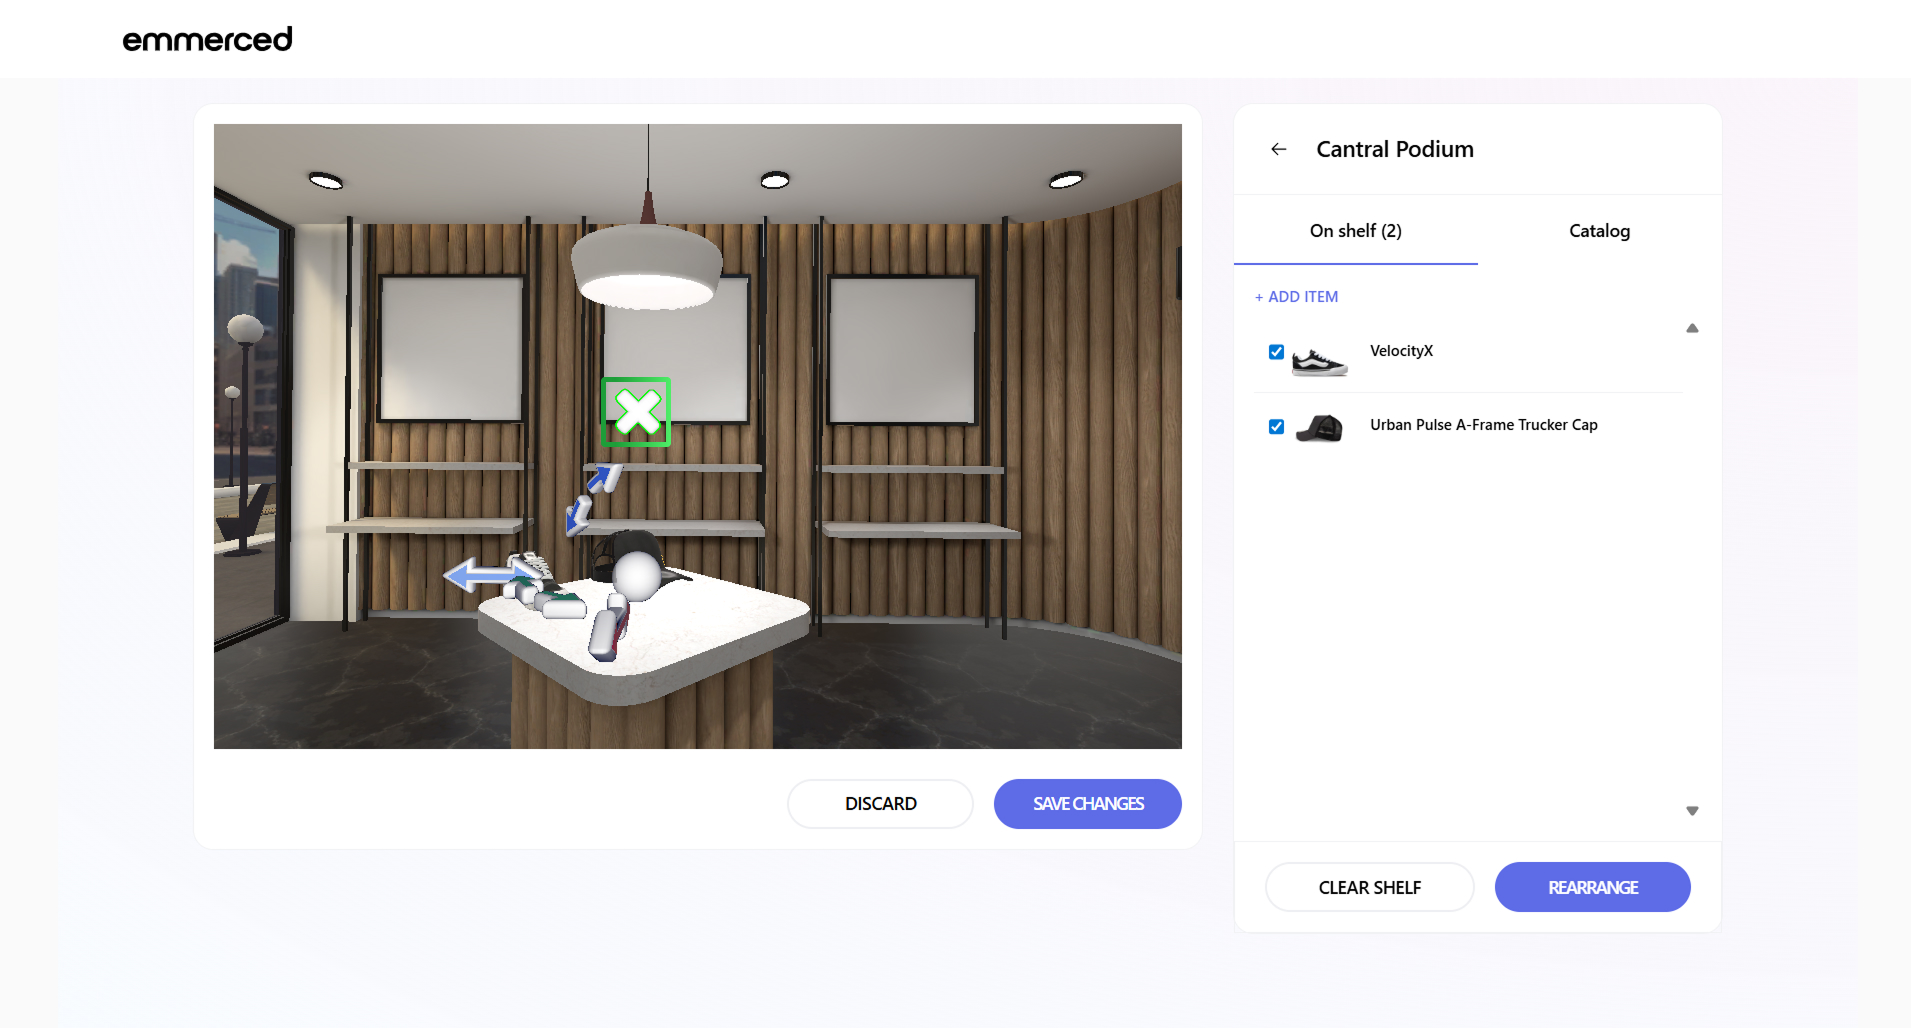
- Click on the cross to remove the arrows above and around the 3D Model.
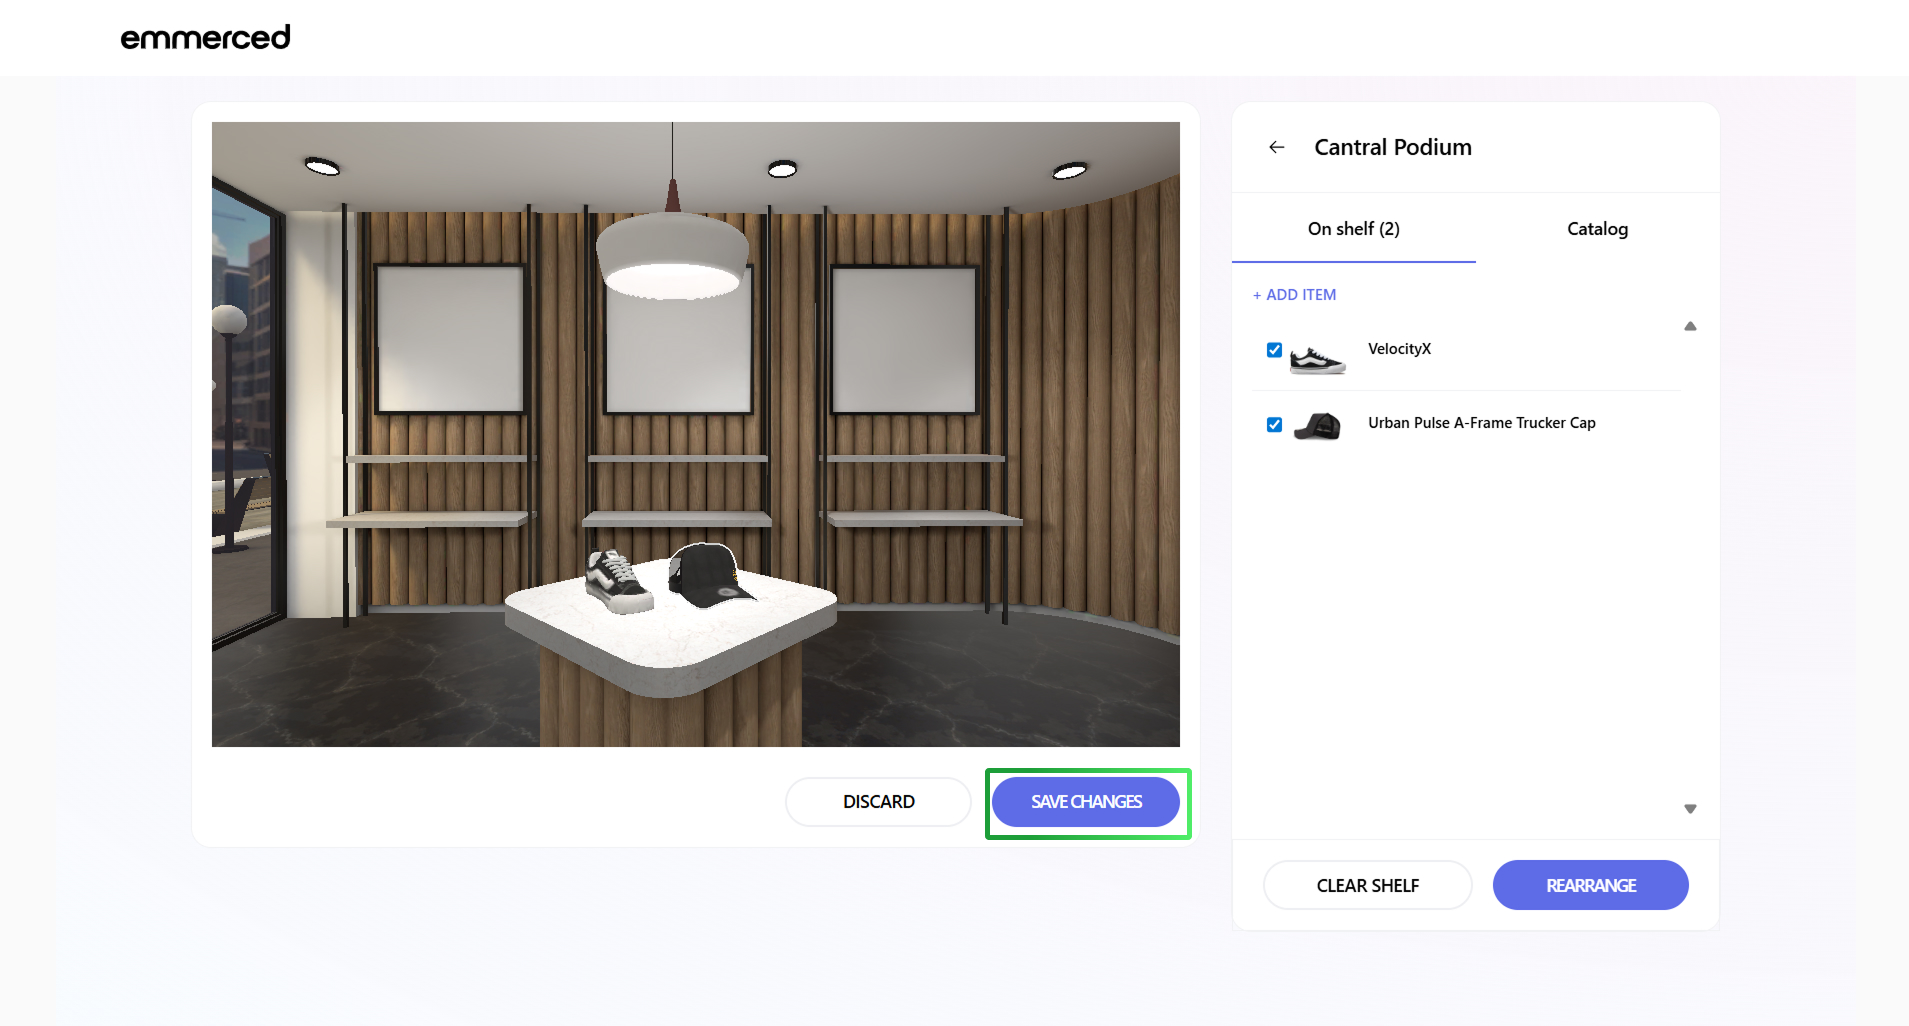
- Click the “Save Changes” button to apply and finalize your updates.
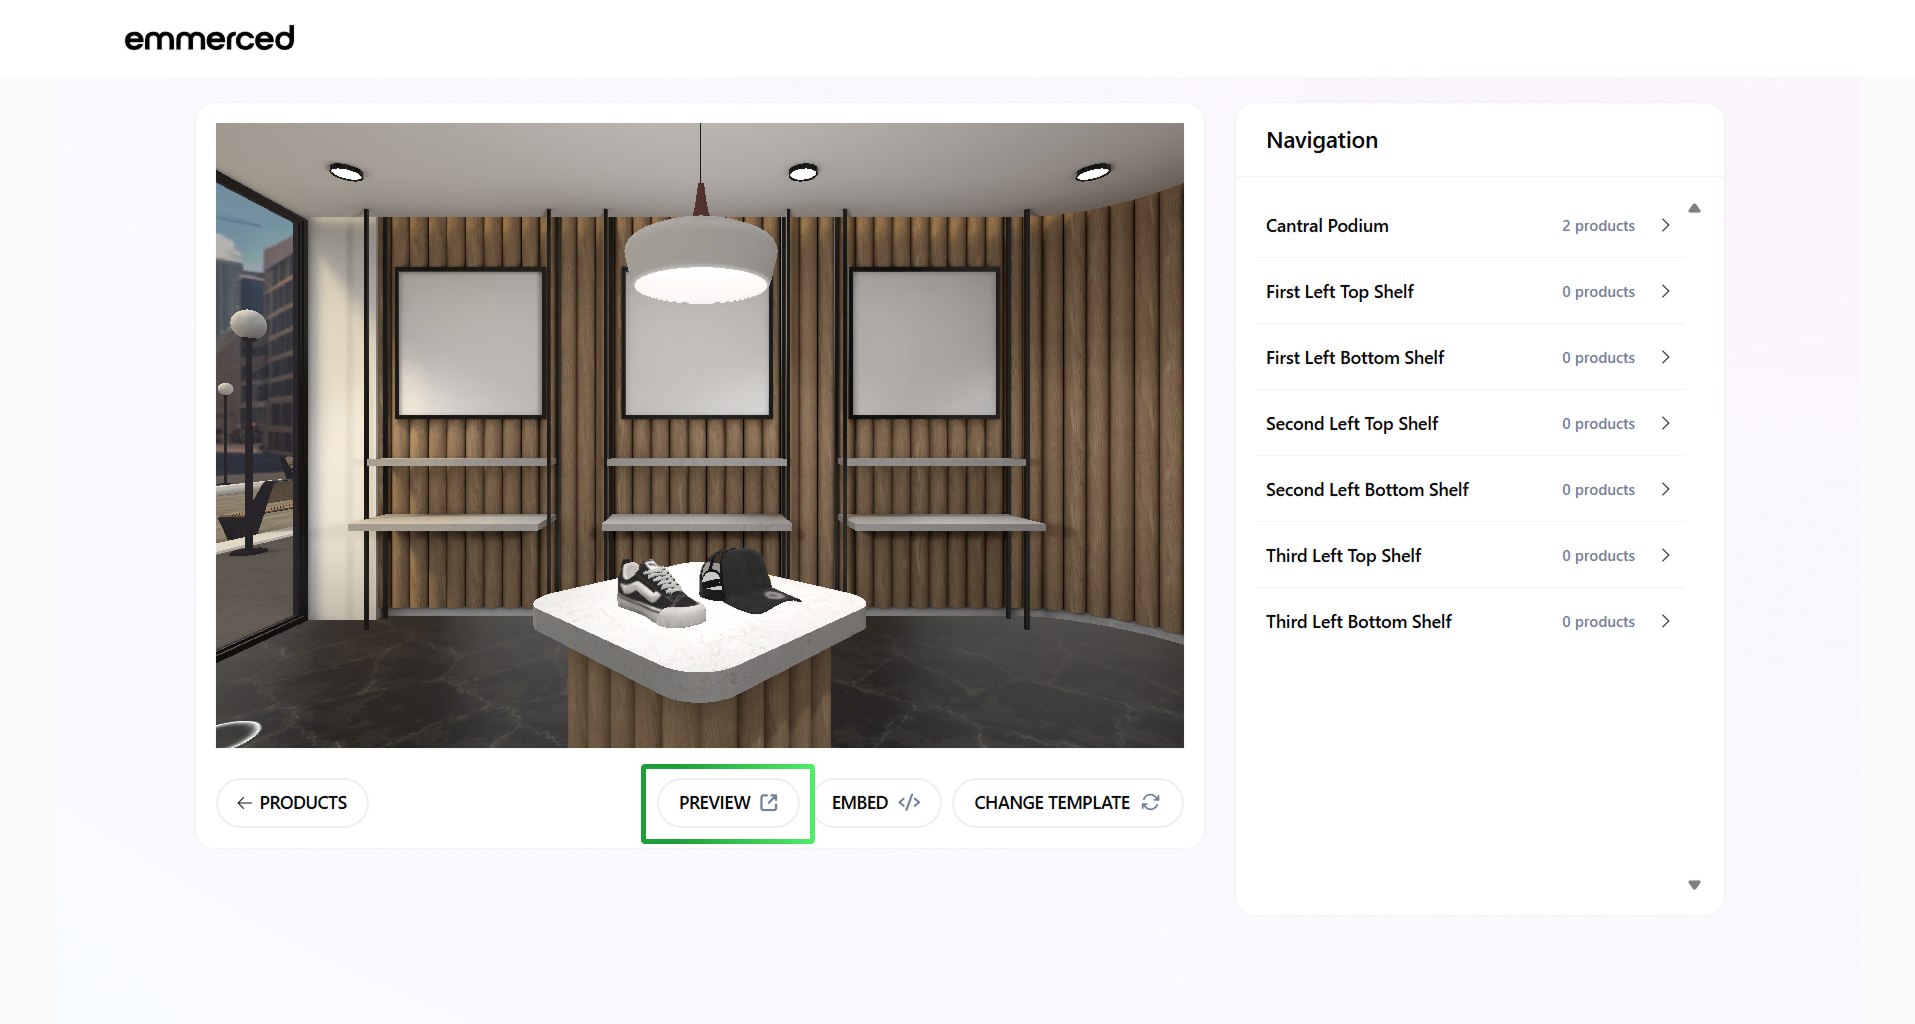
- Click on the “PREVIEW“ button to see all your changes.


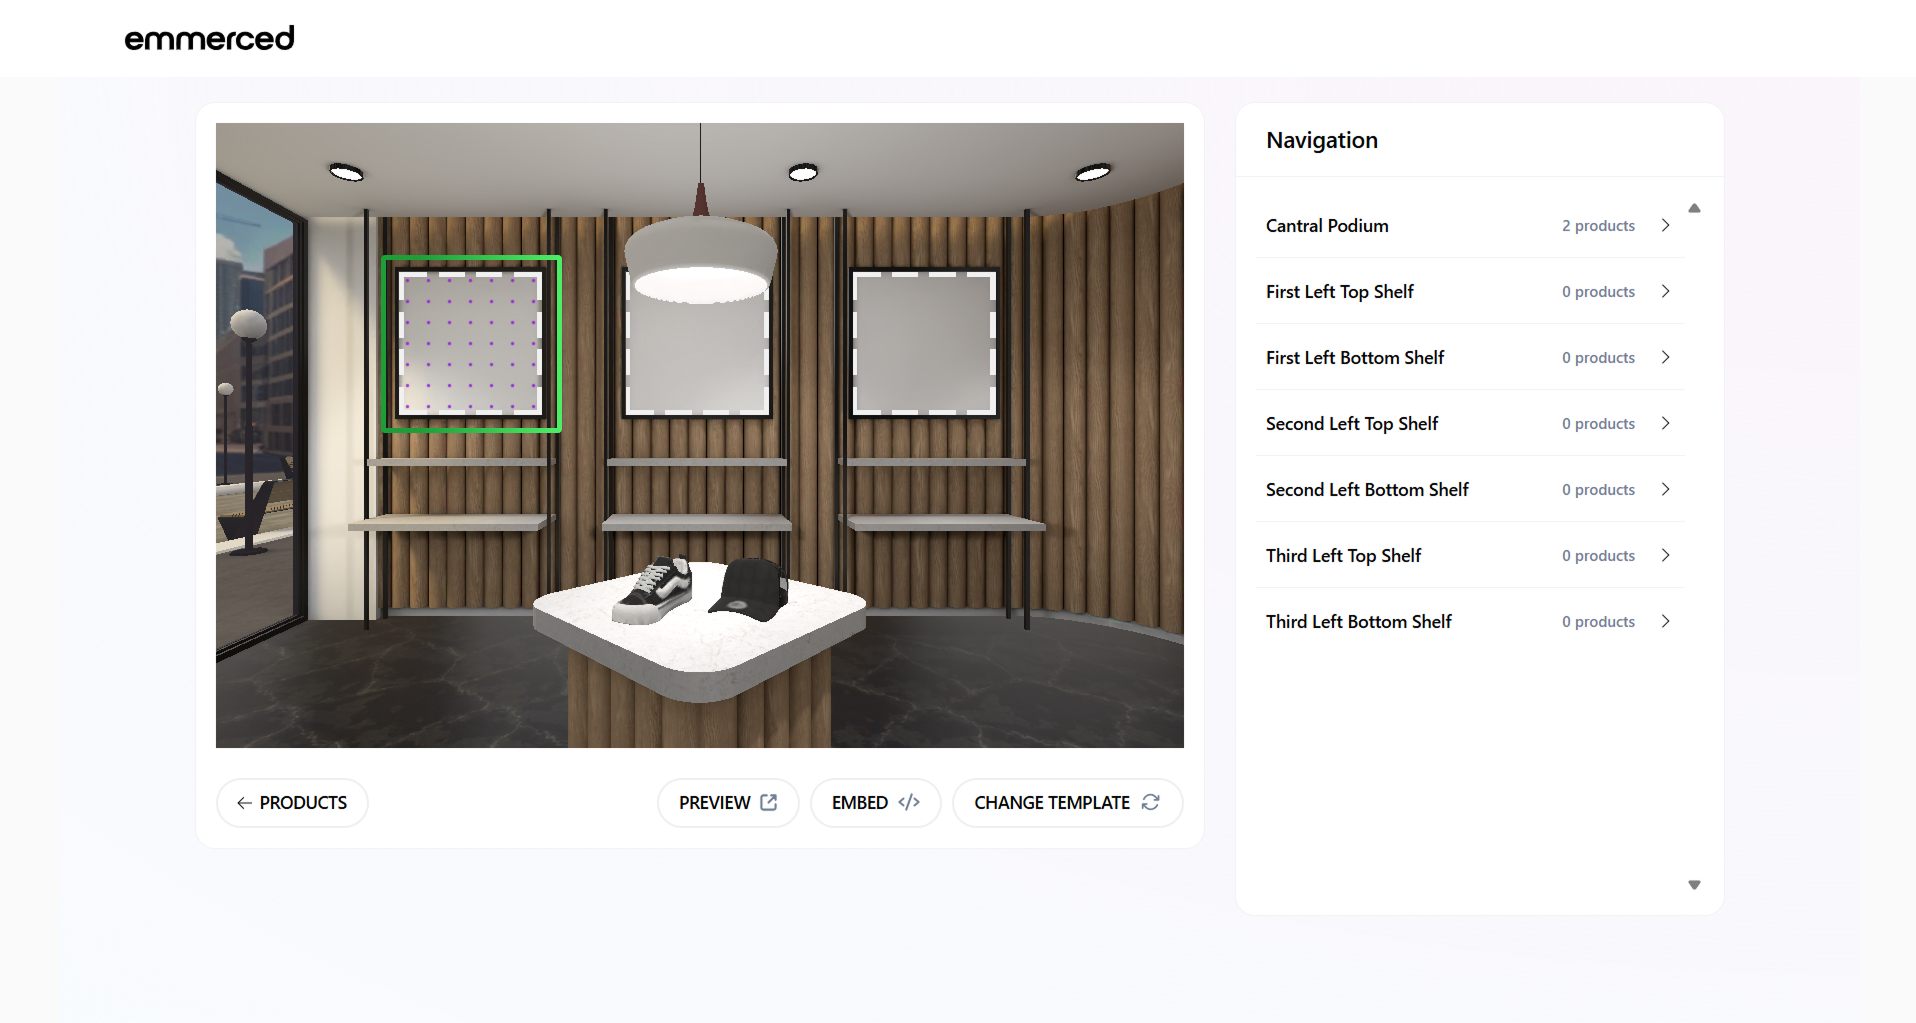
Instructions on how to add a banner in the 3D Stores:
- Click on the “Shop Editor” section.
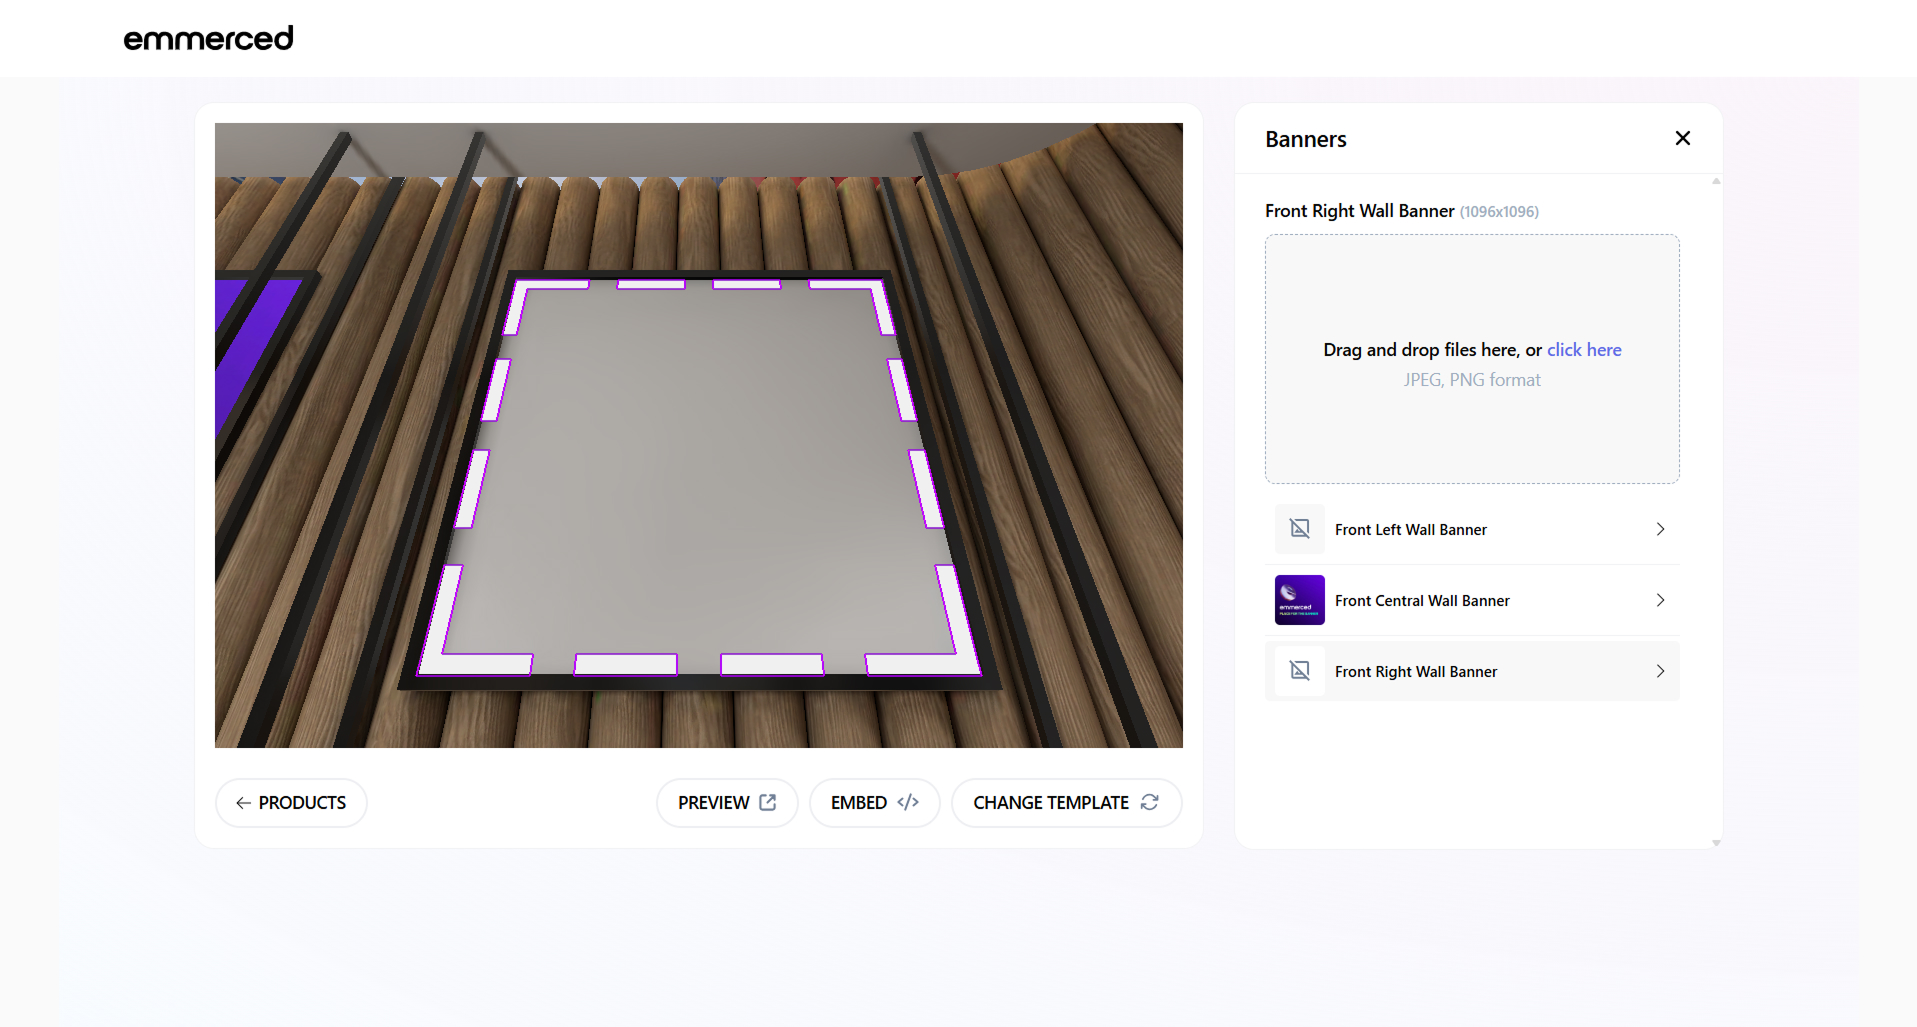
- Click on the banner area inside the virtual store.
The banner area is marked with a white dotted line, and when hovered over, a purple grid appears. - Click on the banner image upload area or drag and drop the file.
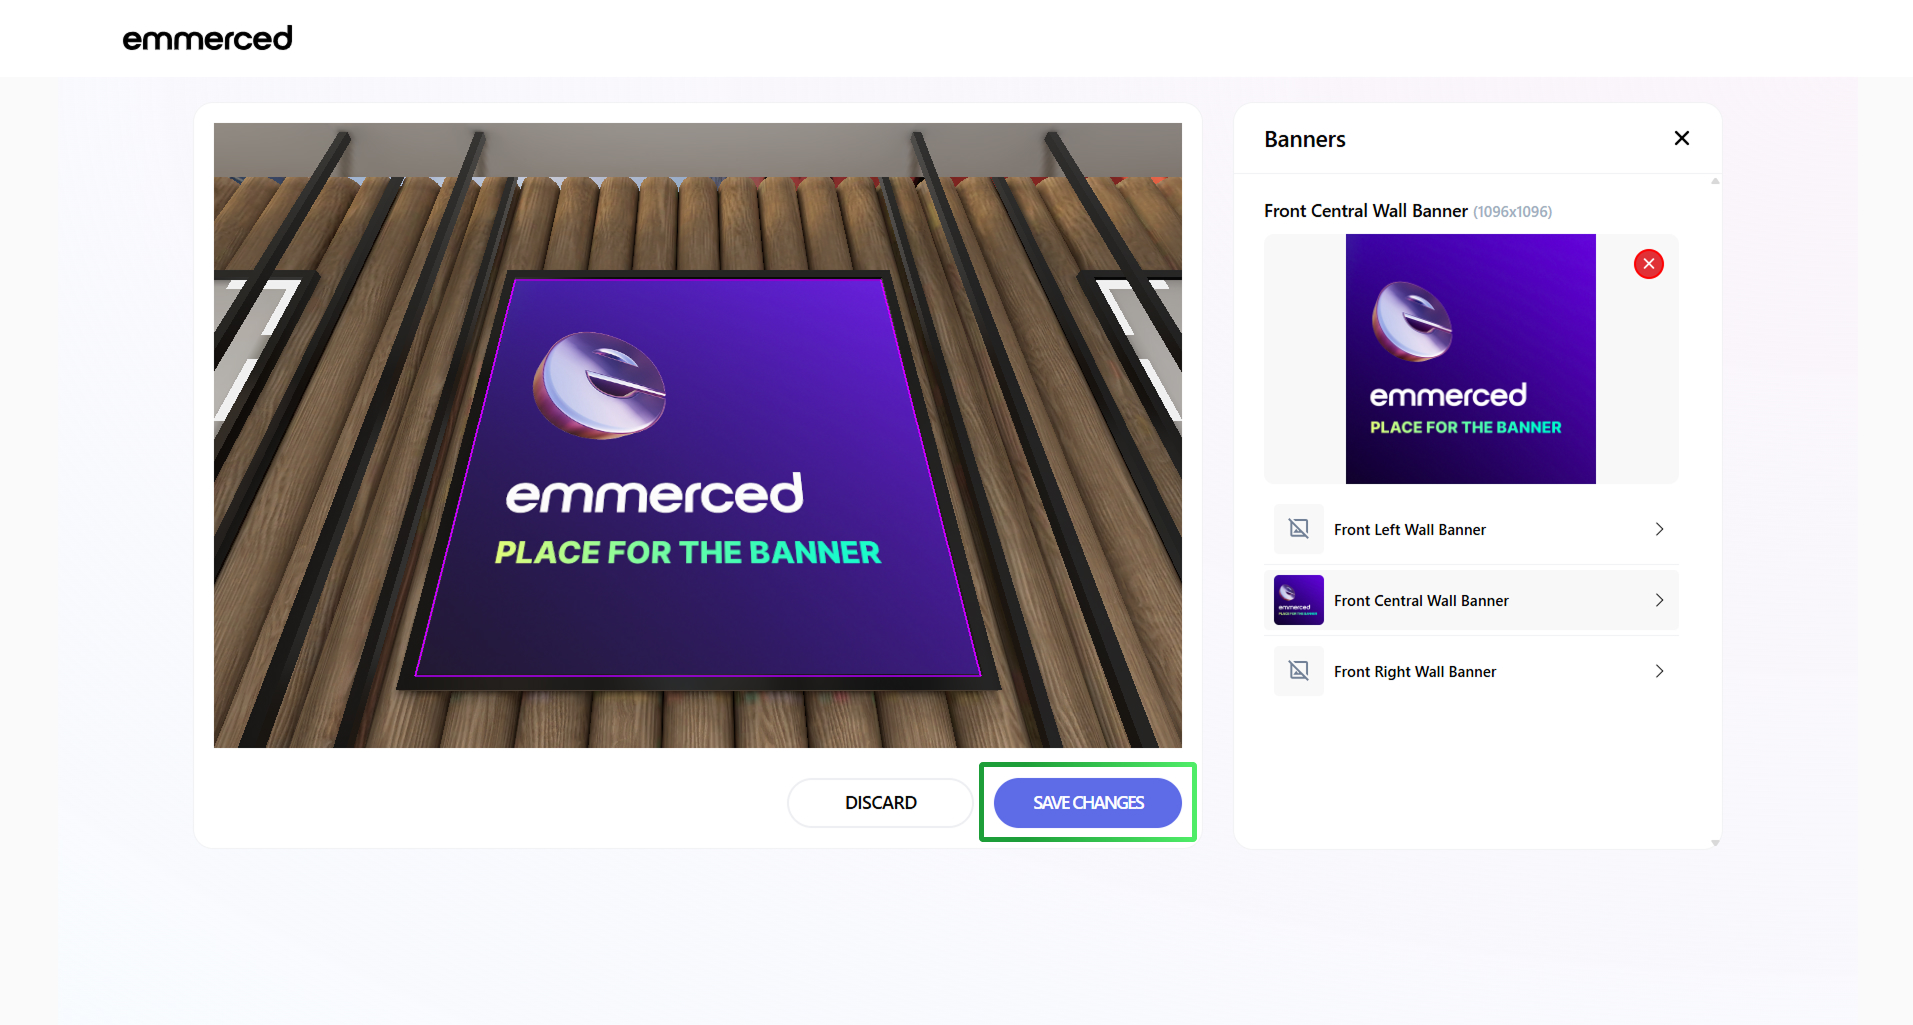
- Click on one of the banners in the list to set up other banners.
- Click on the “Delete” icon if you want to delete the banner.
- Click on the “Save” button.
- Click on the “Preview” button to enjoy the view of your custom store.


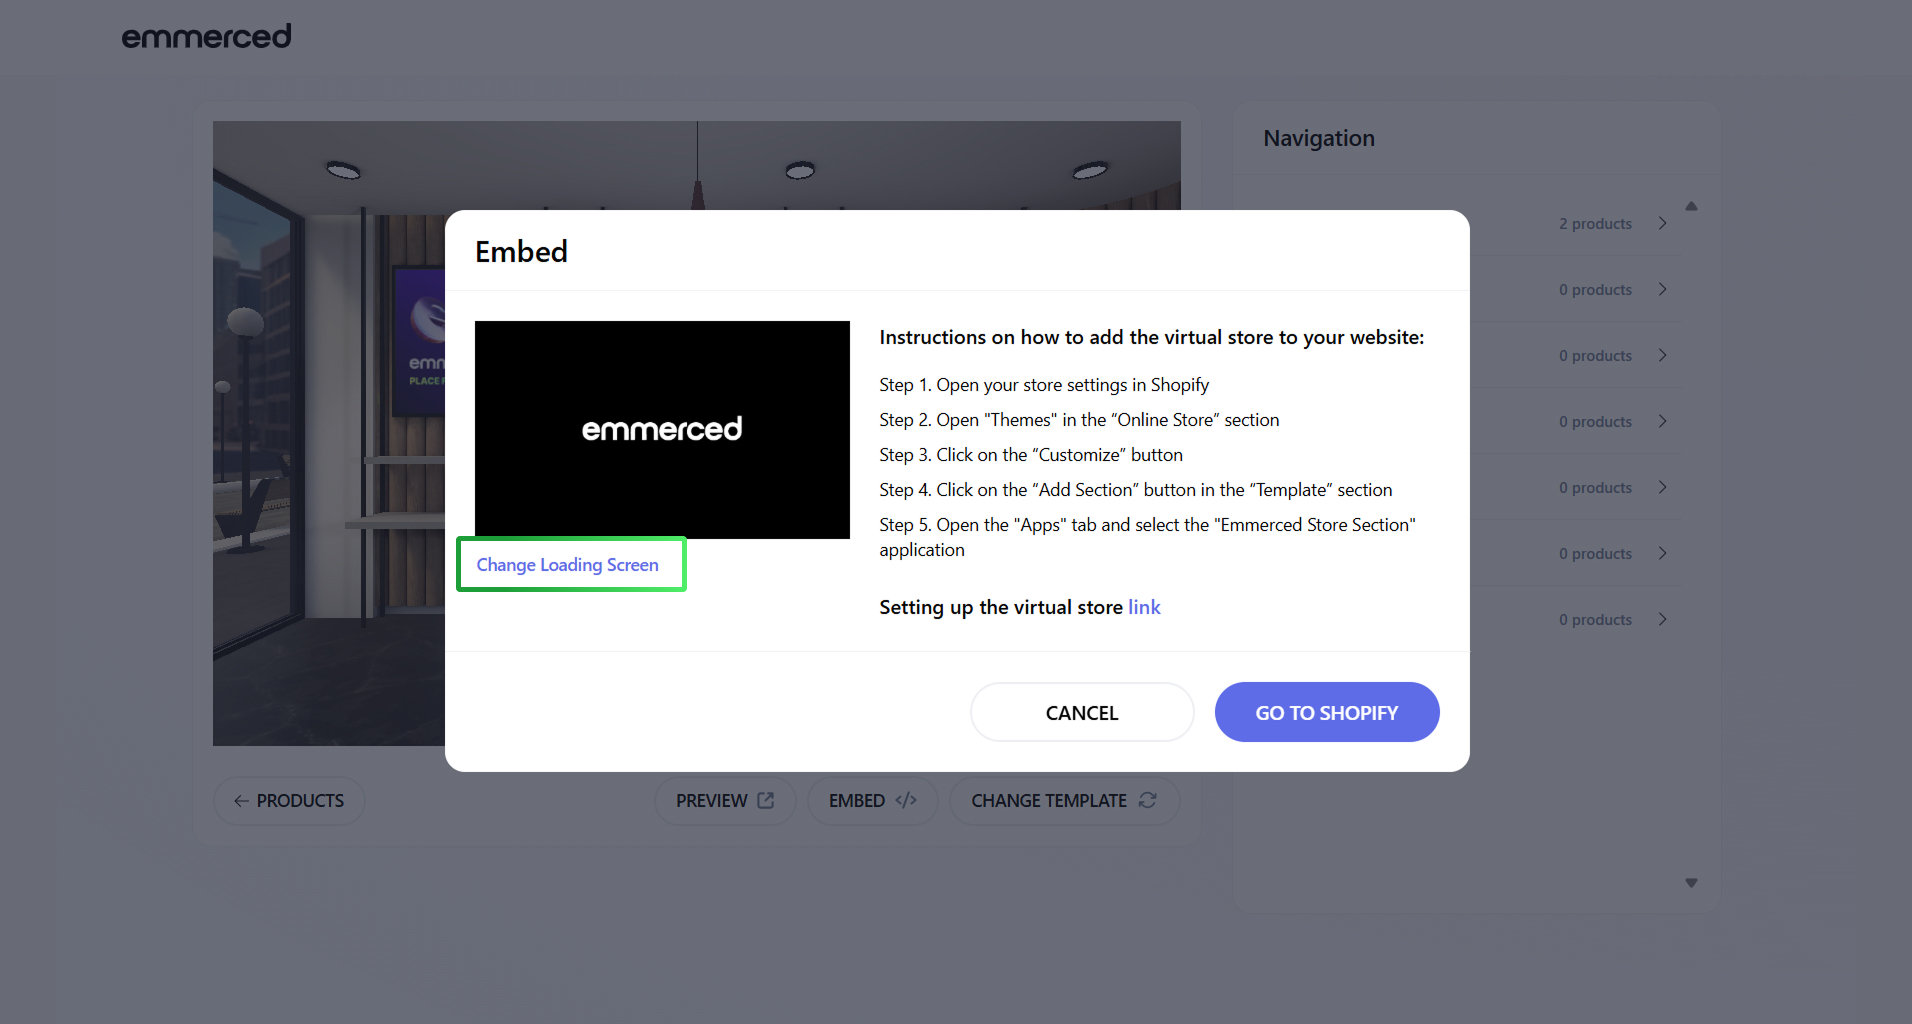
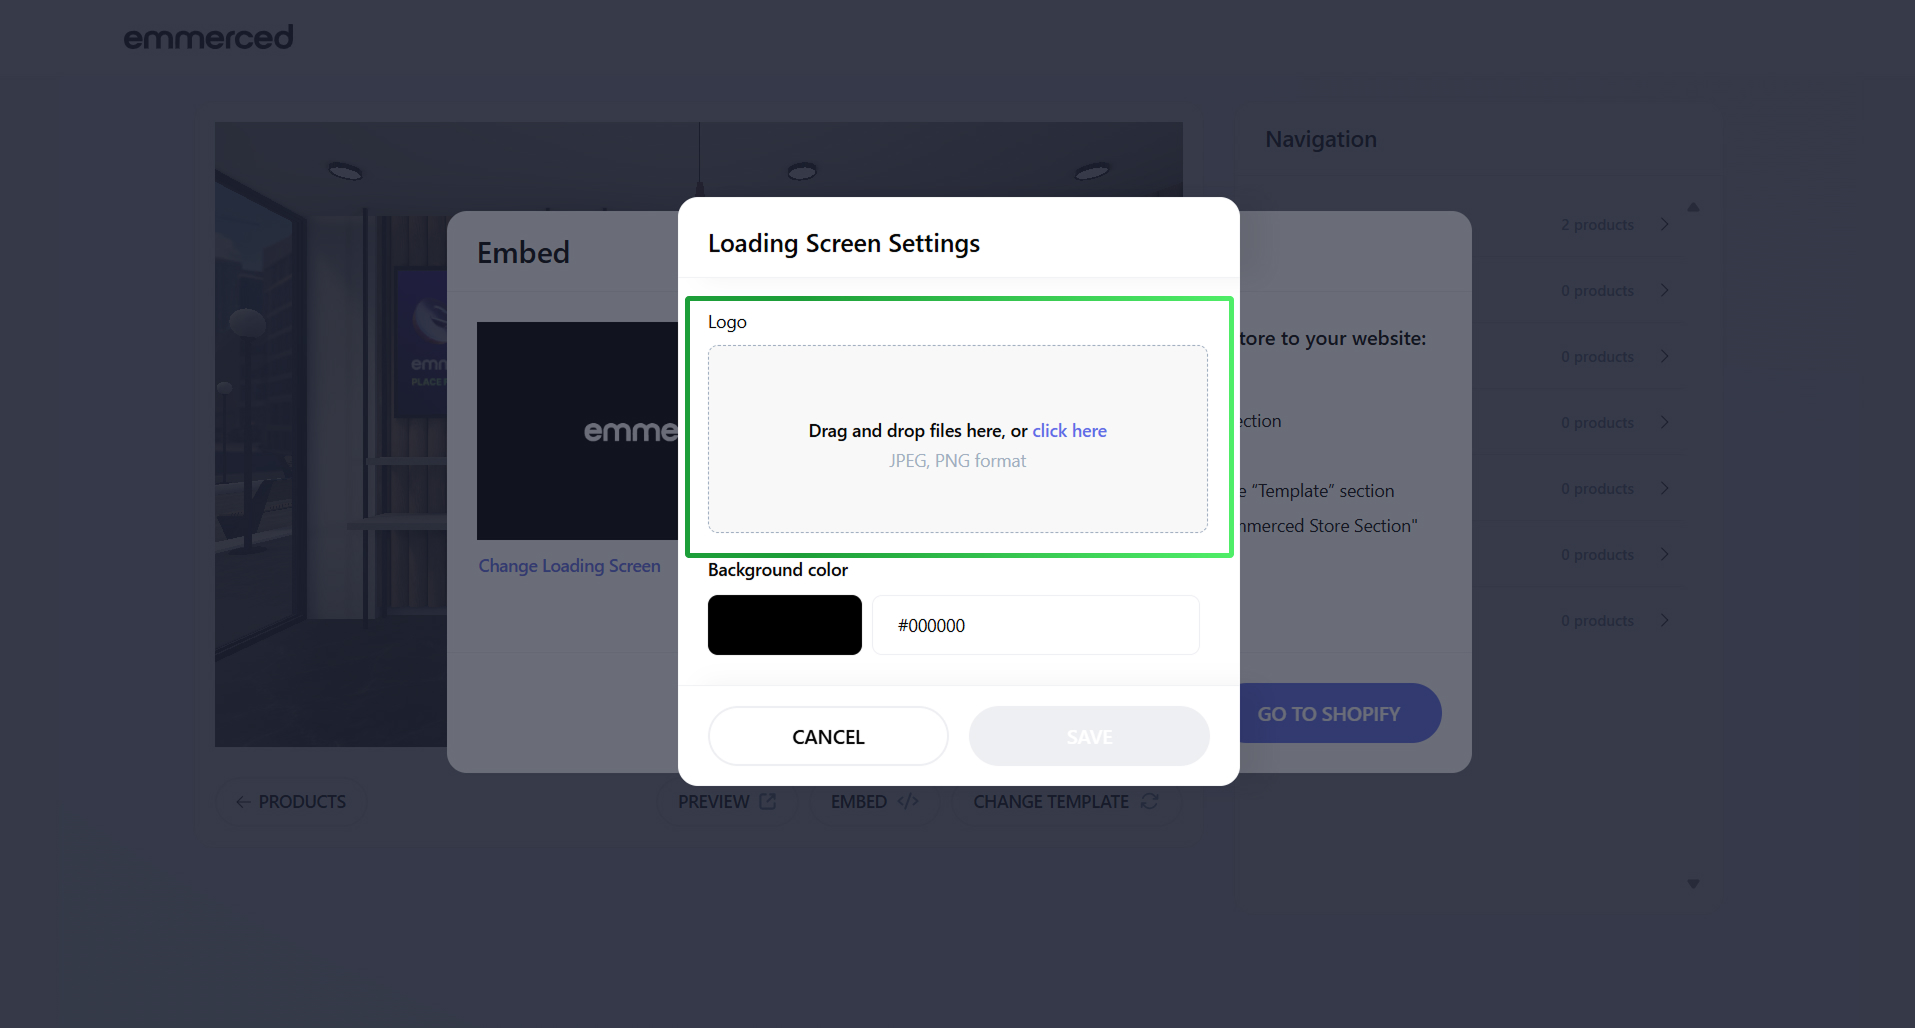
Instructions for changing the loading screen of the 3D Store.
- Click on the “Shop Editor” section.
- Click on the “Embed” button.
- Click on the “Change Loading Screen” link.
- Click on the logo upload area or drag and drop the file.
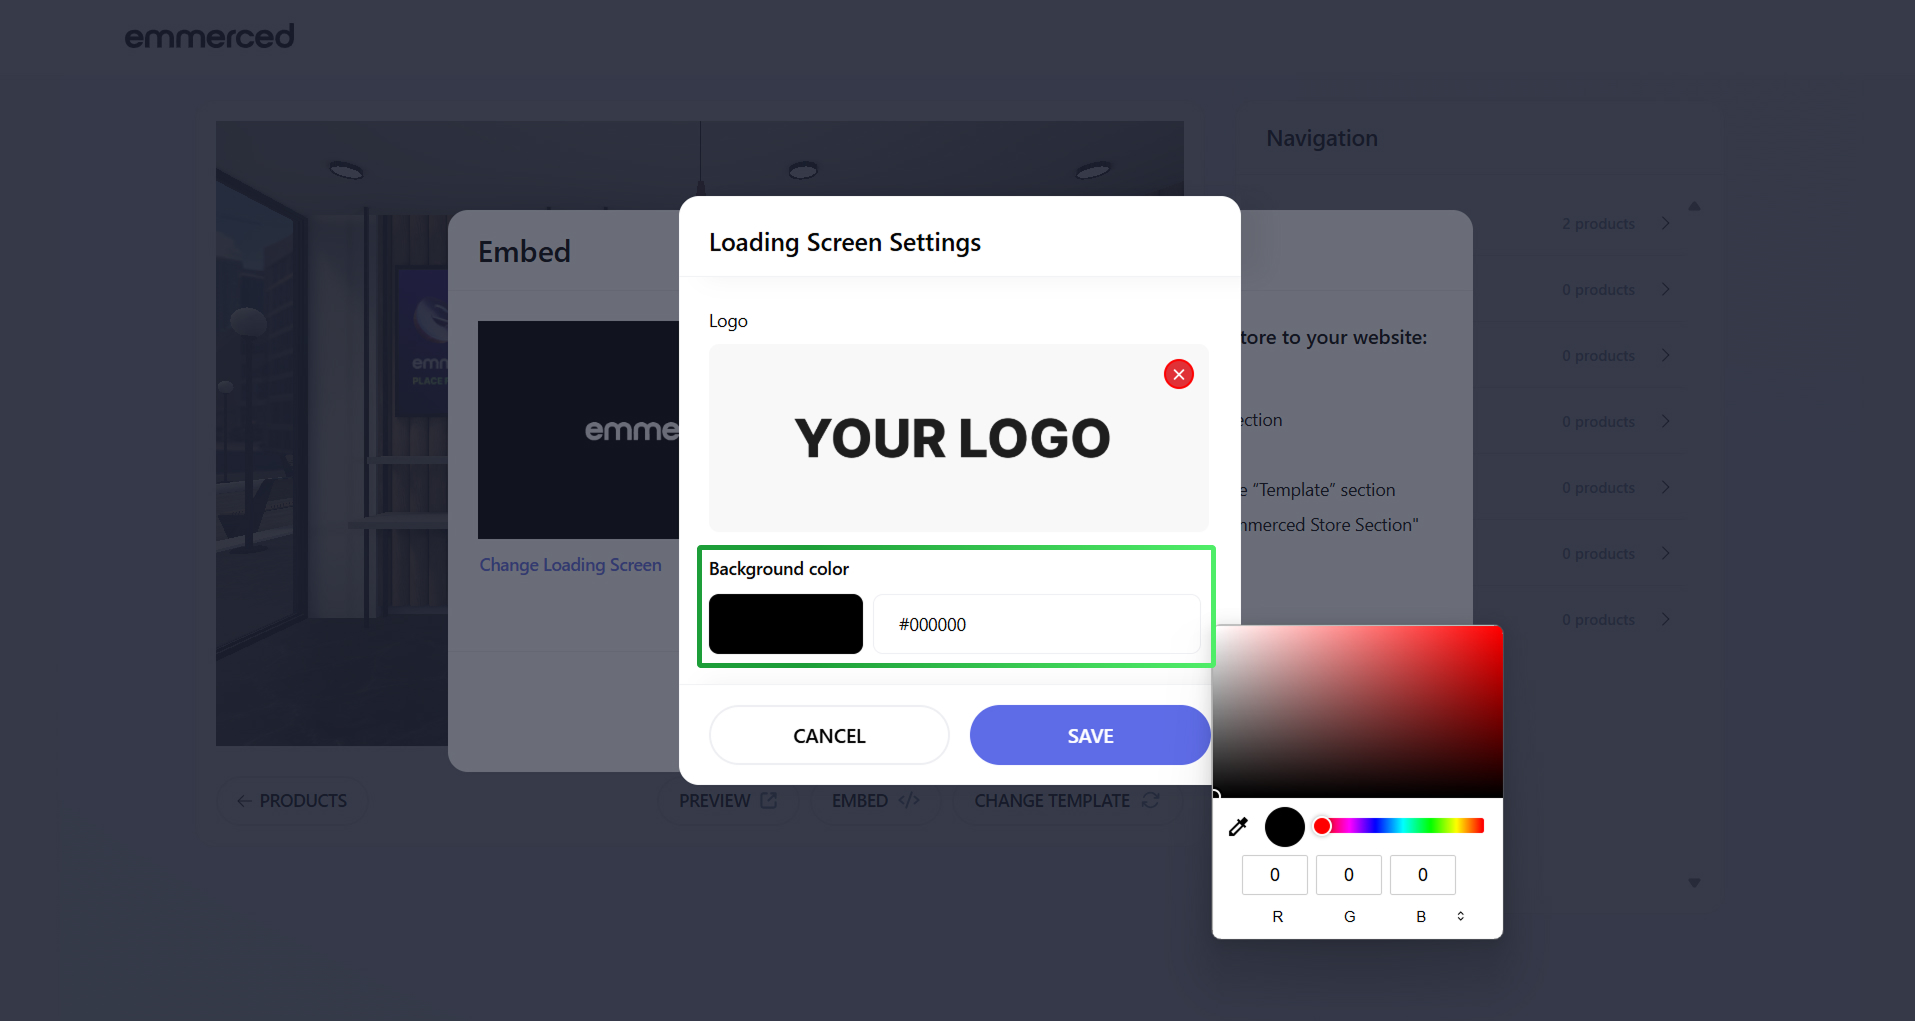
- Click on the color zone, select the color, or enter a pattern with this color.
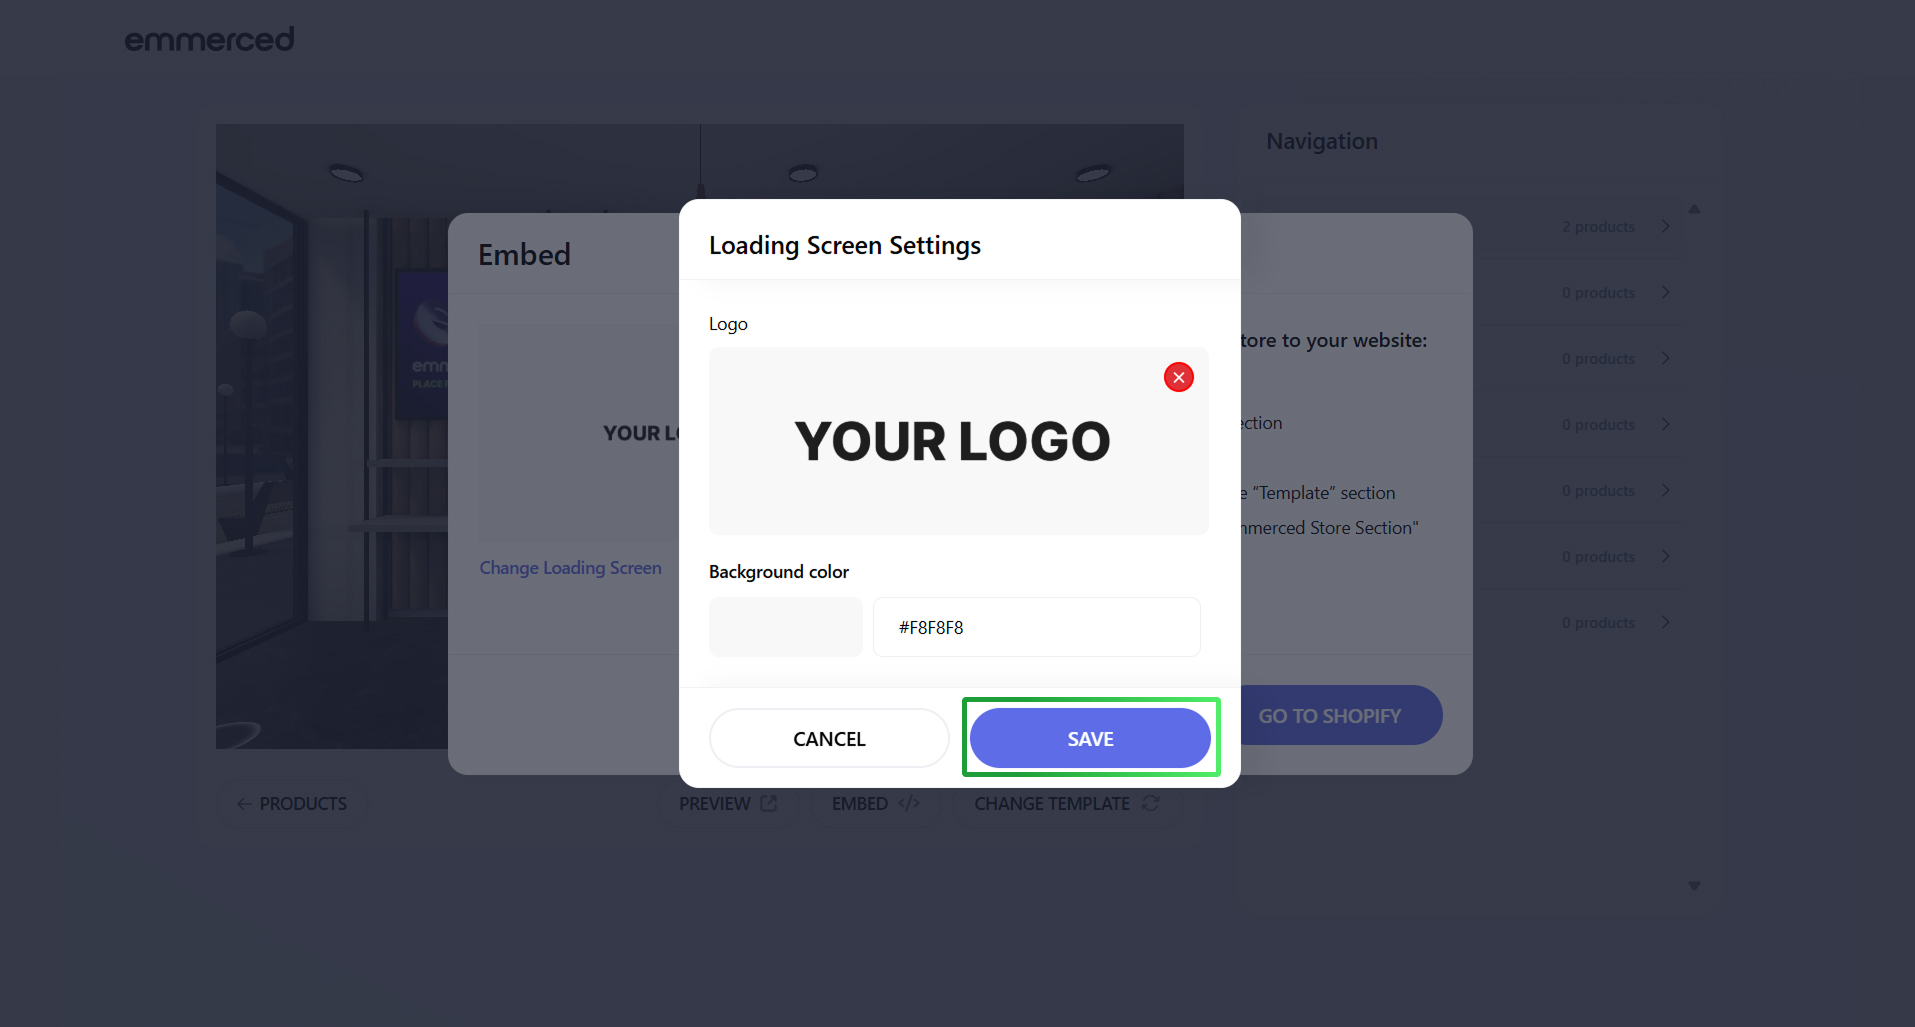
- Click on the “Delete” icon if you want to delete the logo.
- Click on the “Save” button.
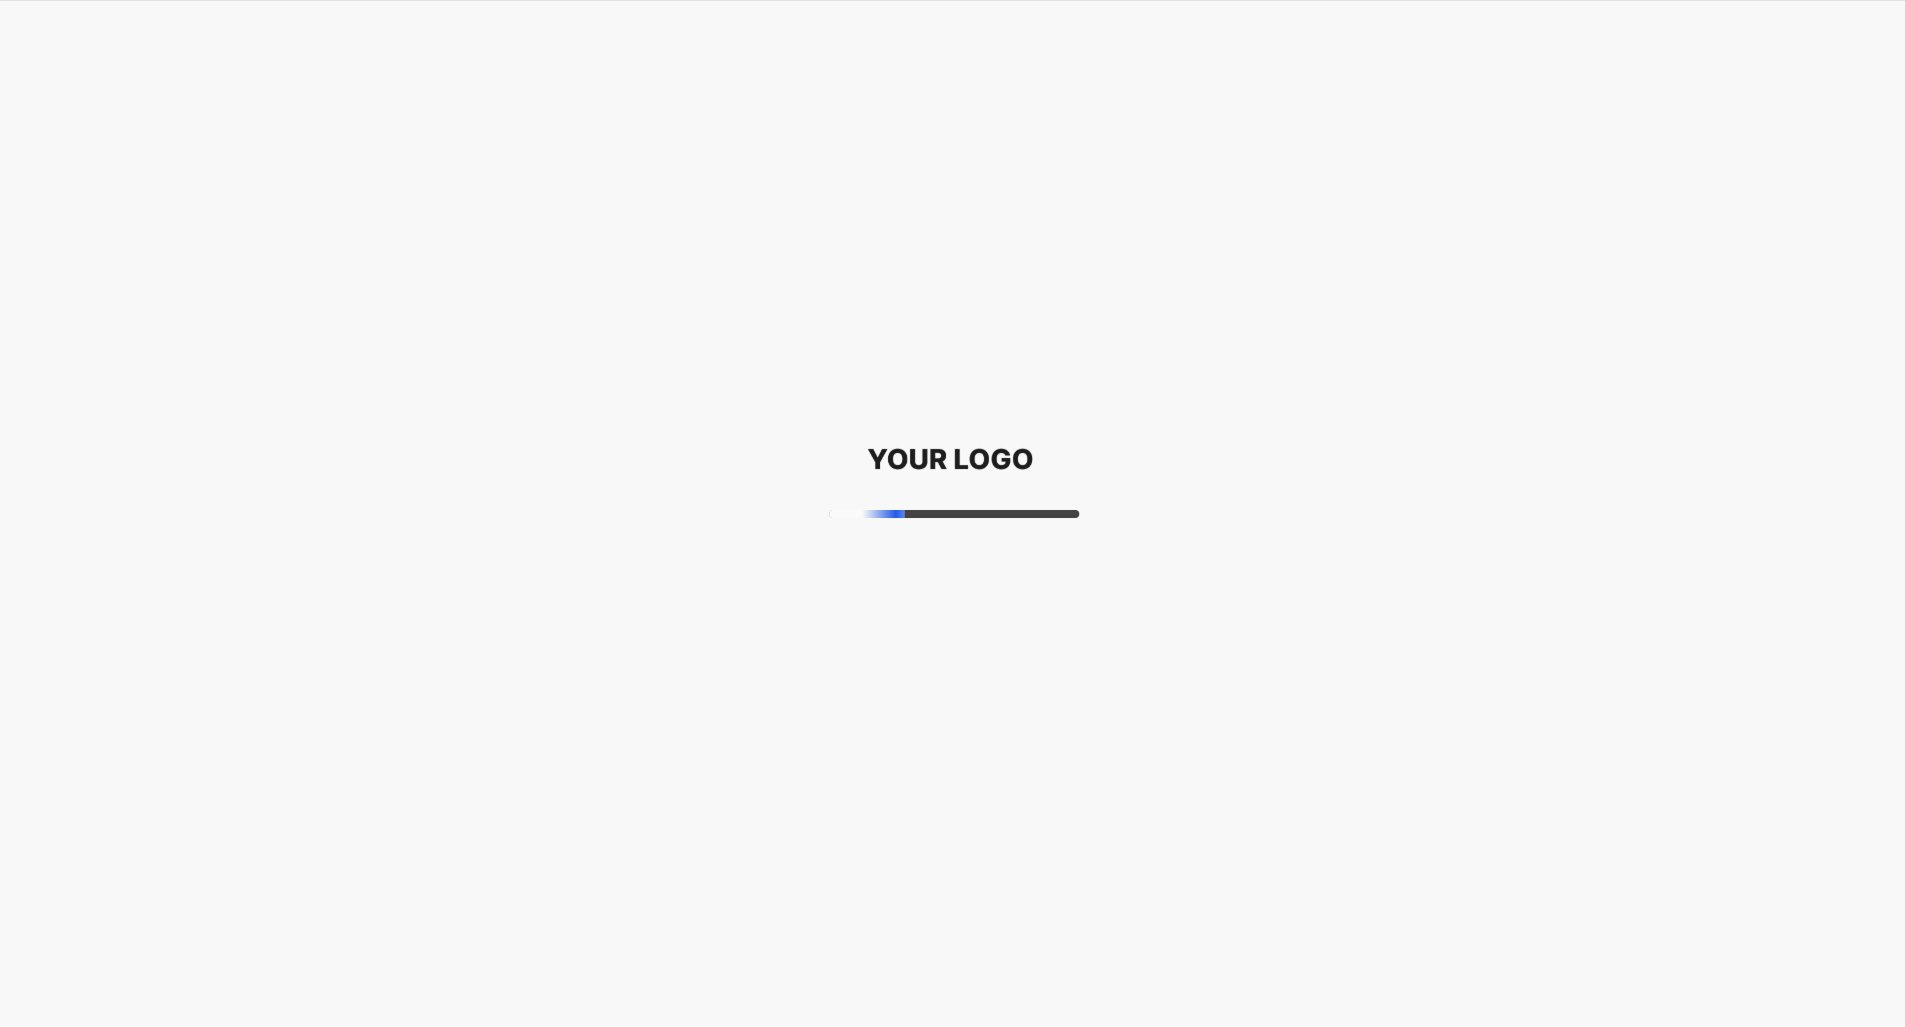
- Click on the “Preview” button to see the result of your changes.

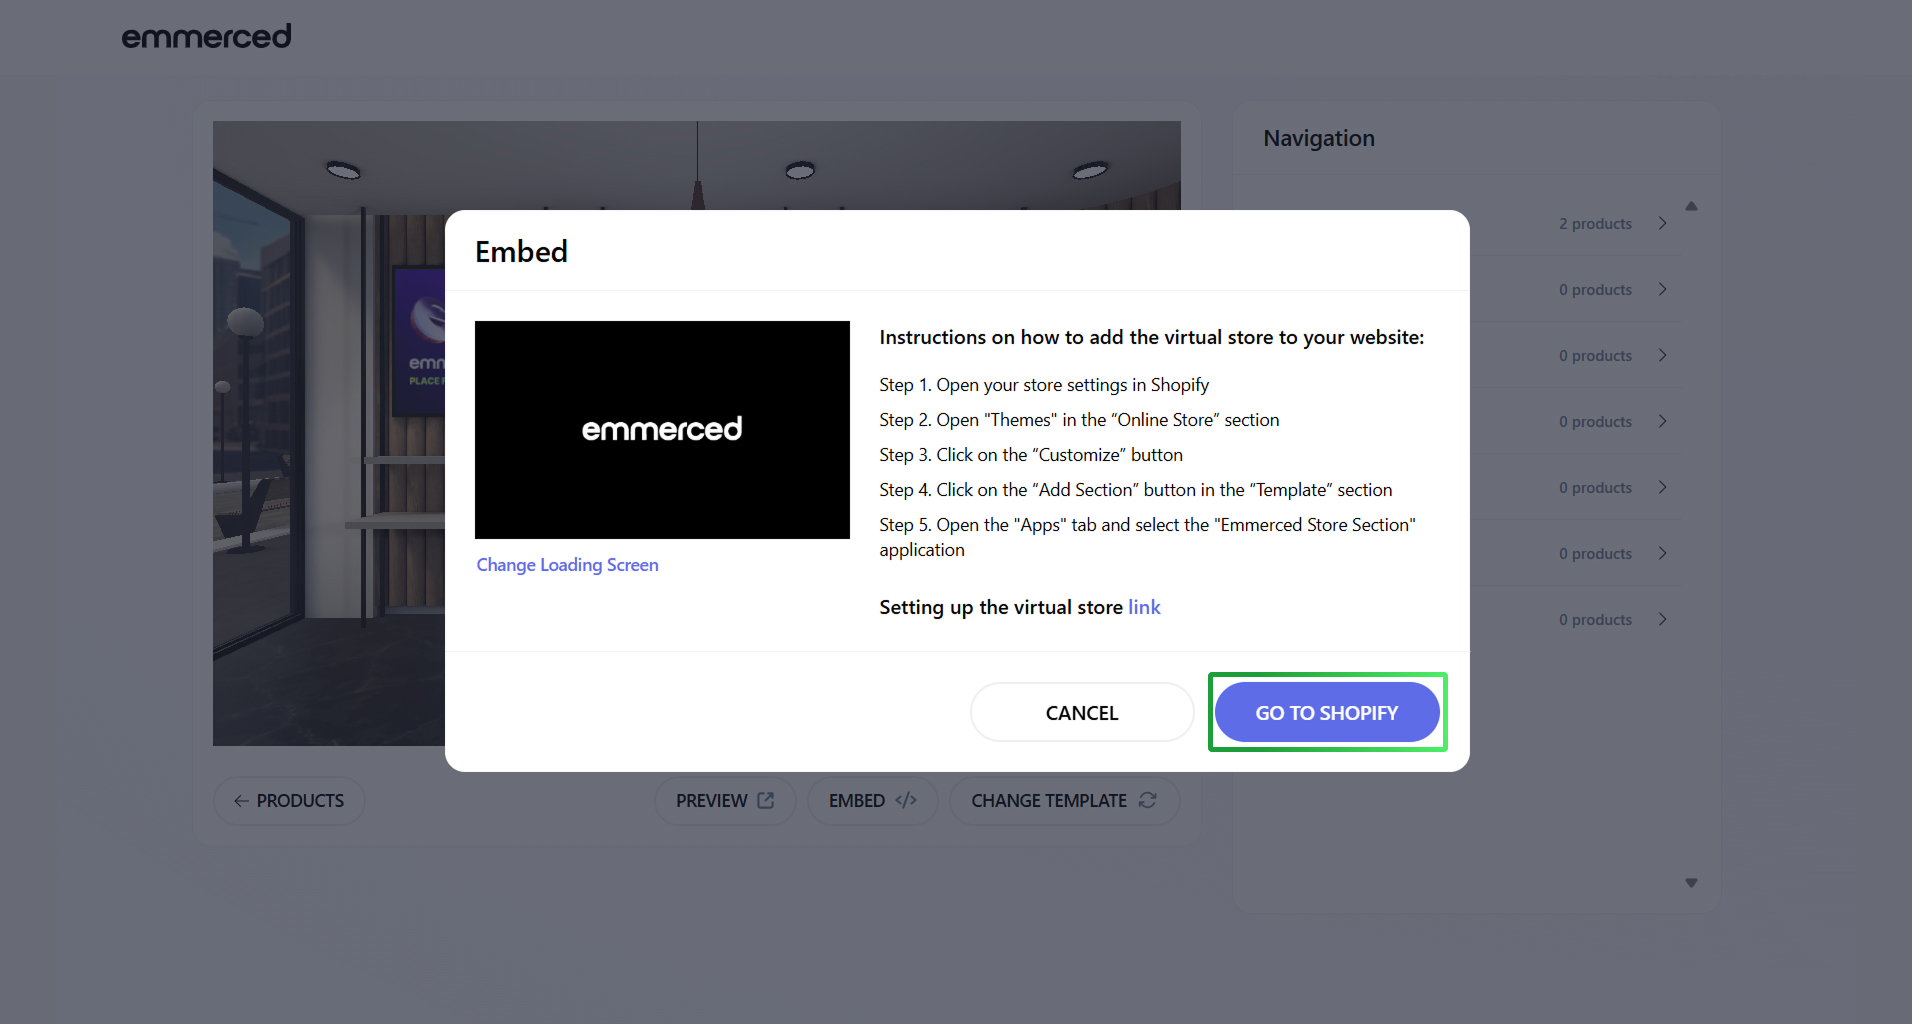
Integrating the widget with 3D Store into your website is a straightforward and impactful way to enhance functionality and improve user experience. By embedding the widget, you can prominently showcase specific products or features directly on your site. Follow the steps below to customize and copy the widget code for effortless integration.
- Click on the “Embed” button open the widget settings menu.
- Read the instruction and click “Go to Shopify”
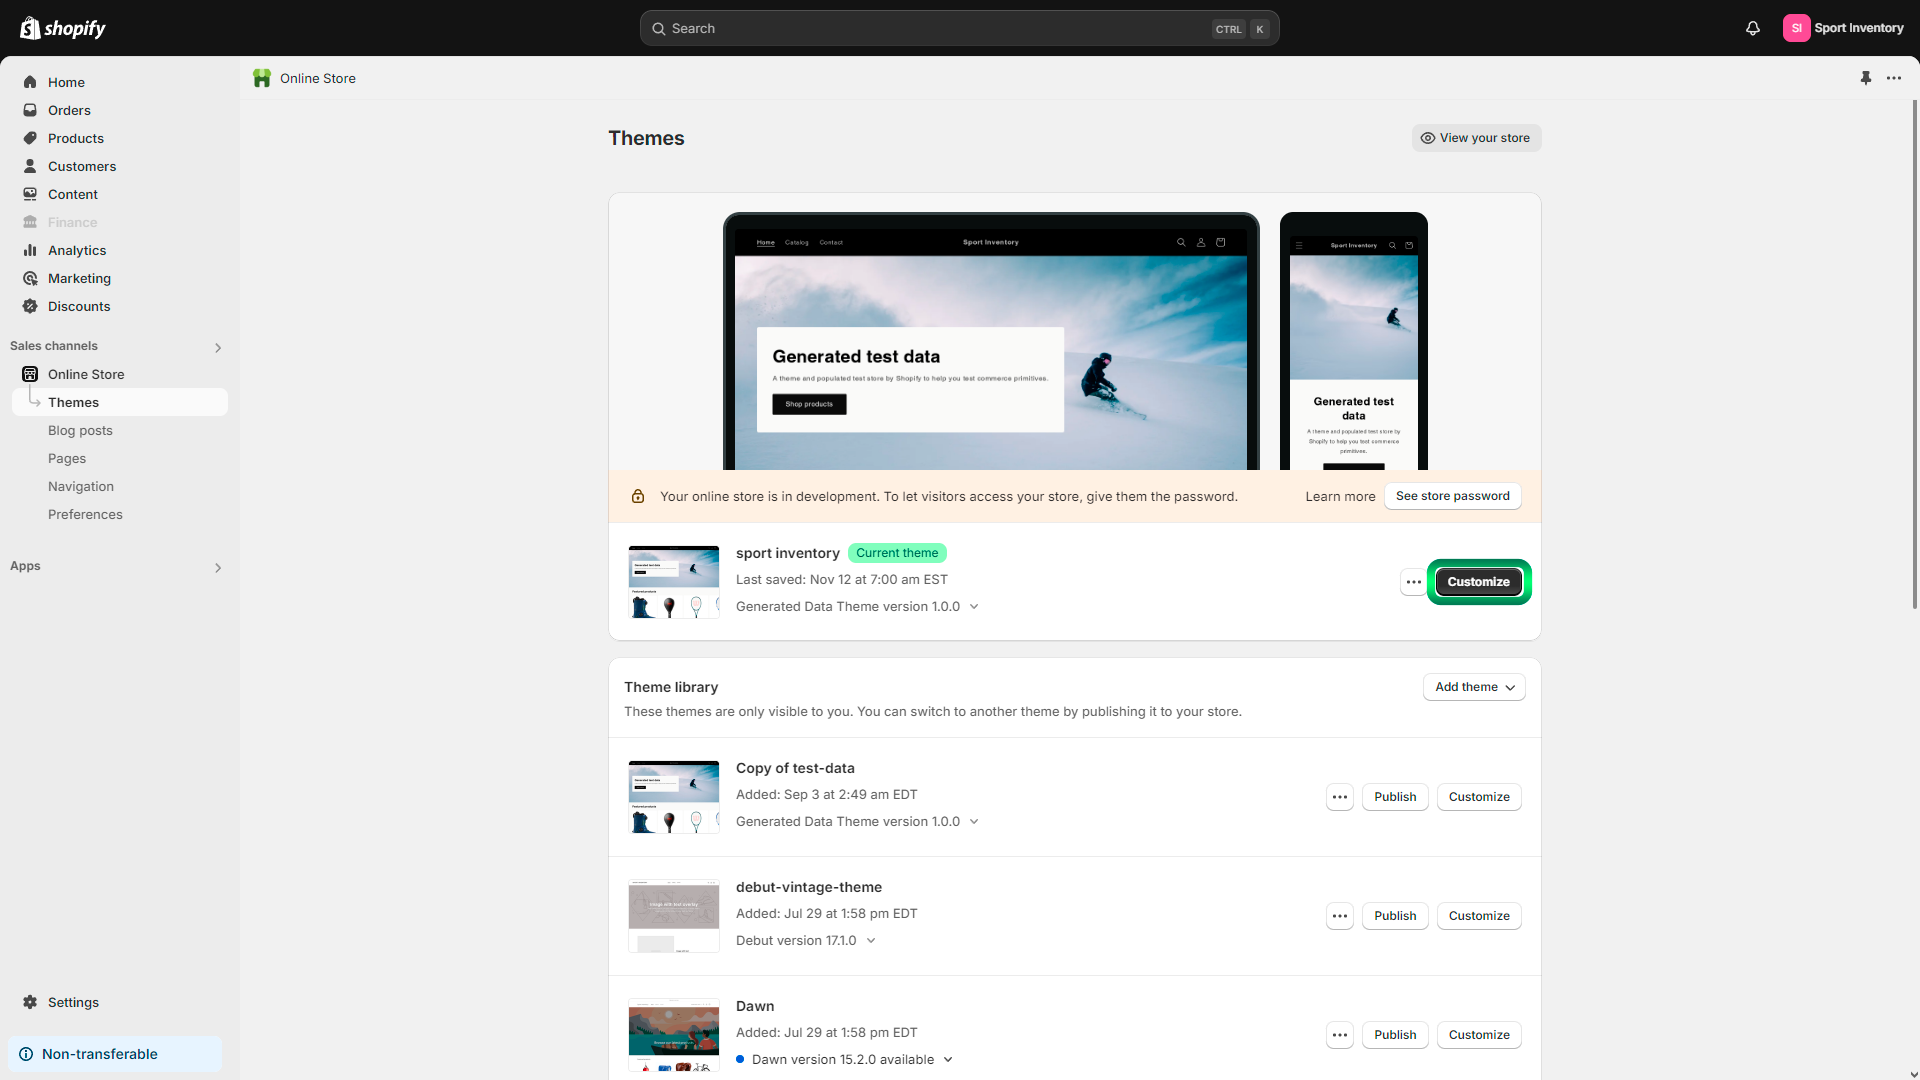
- Read the instructions carefully, then click “Go to Shopify” to proceed.
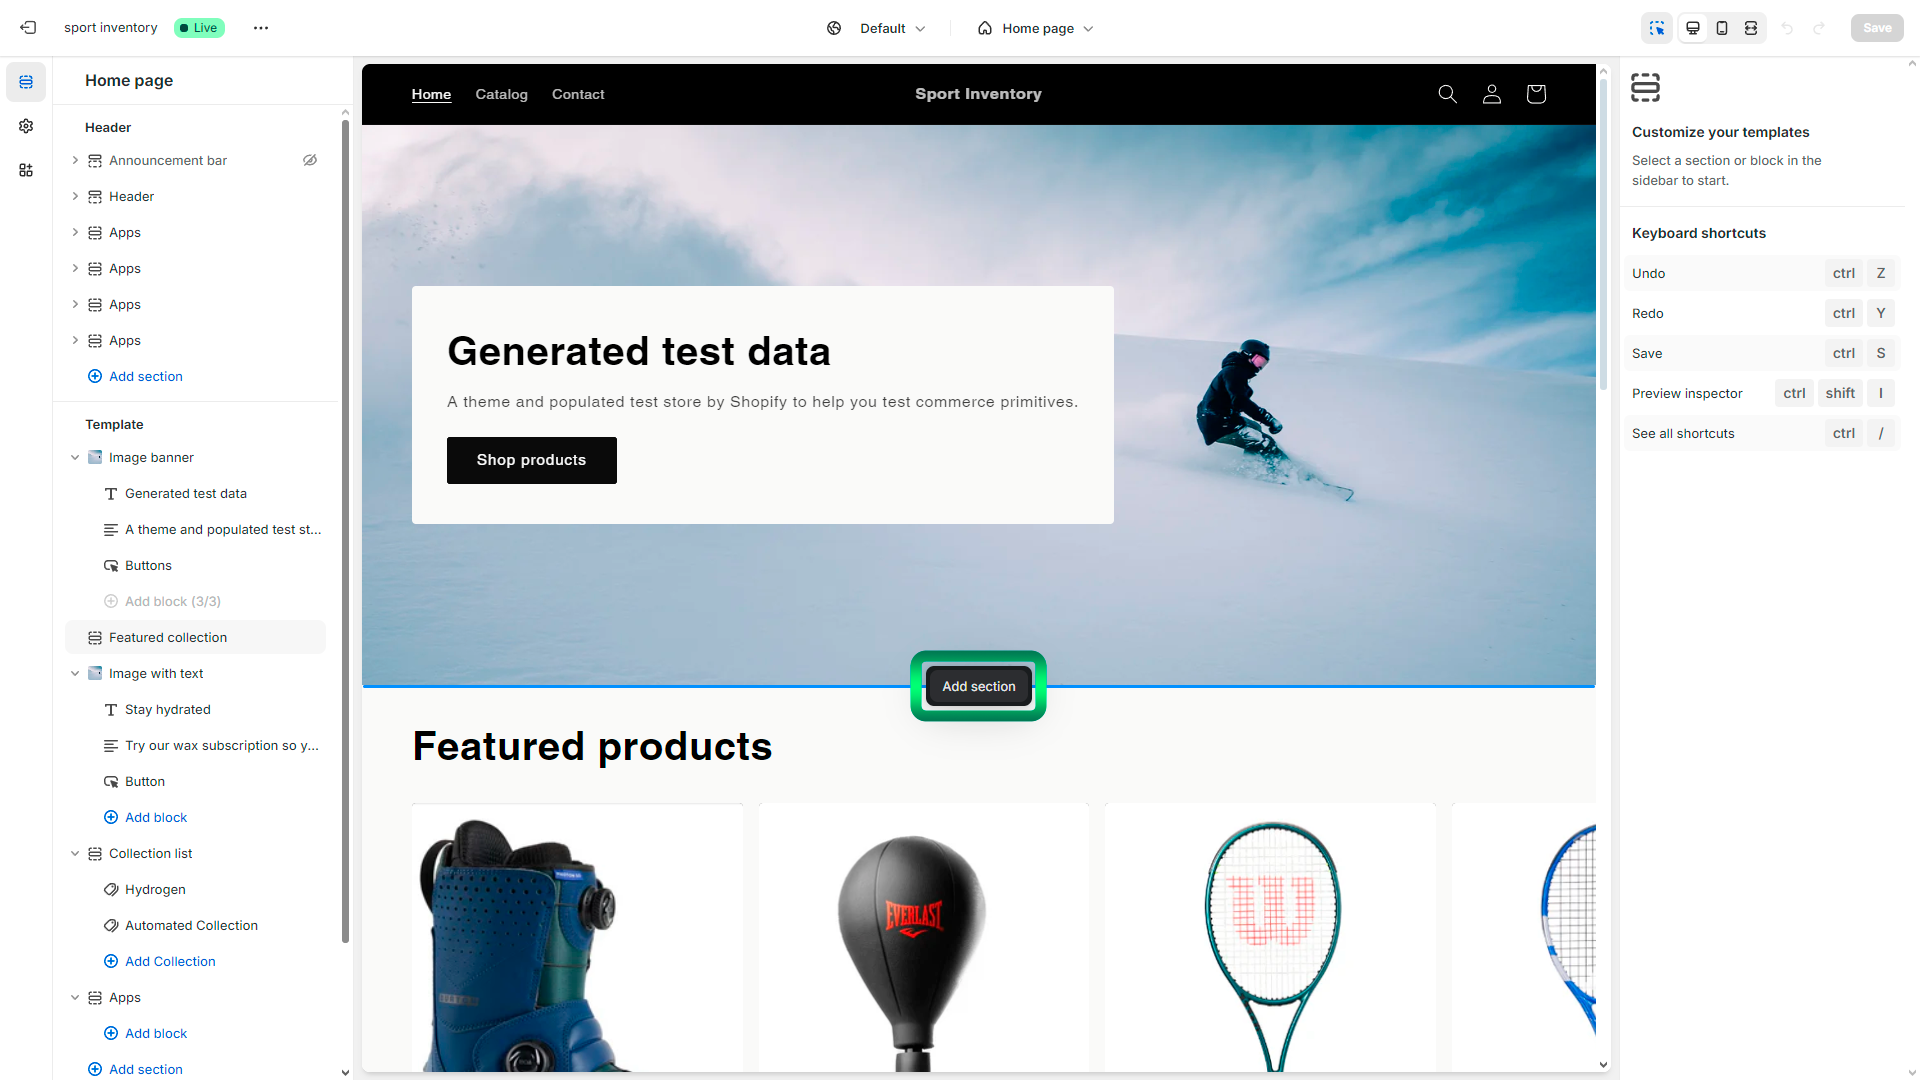
- Select the location where you want to place the widget, then click “Add Section.”
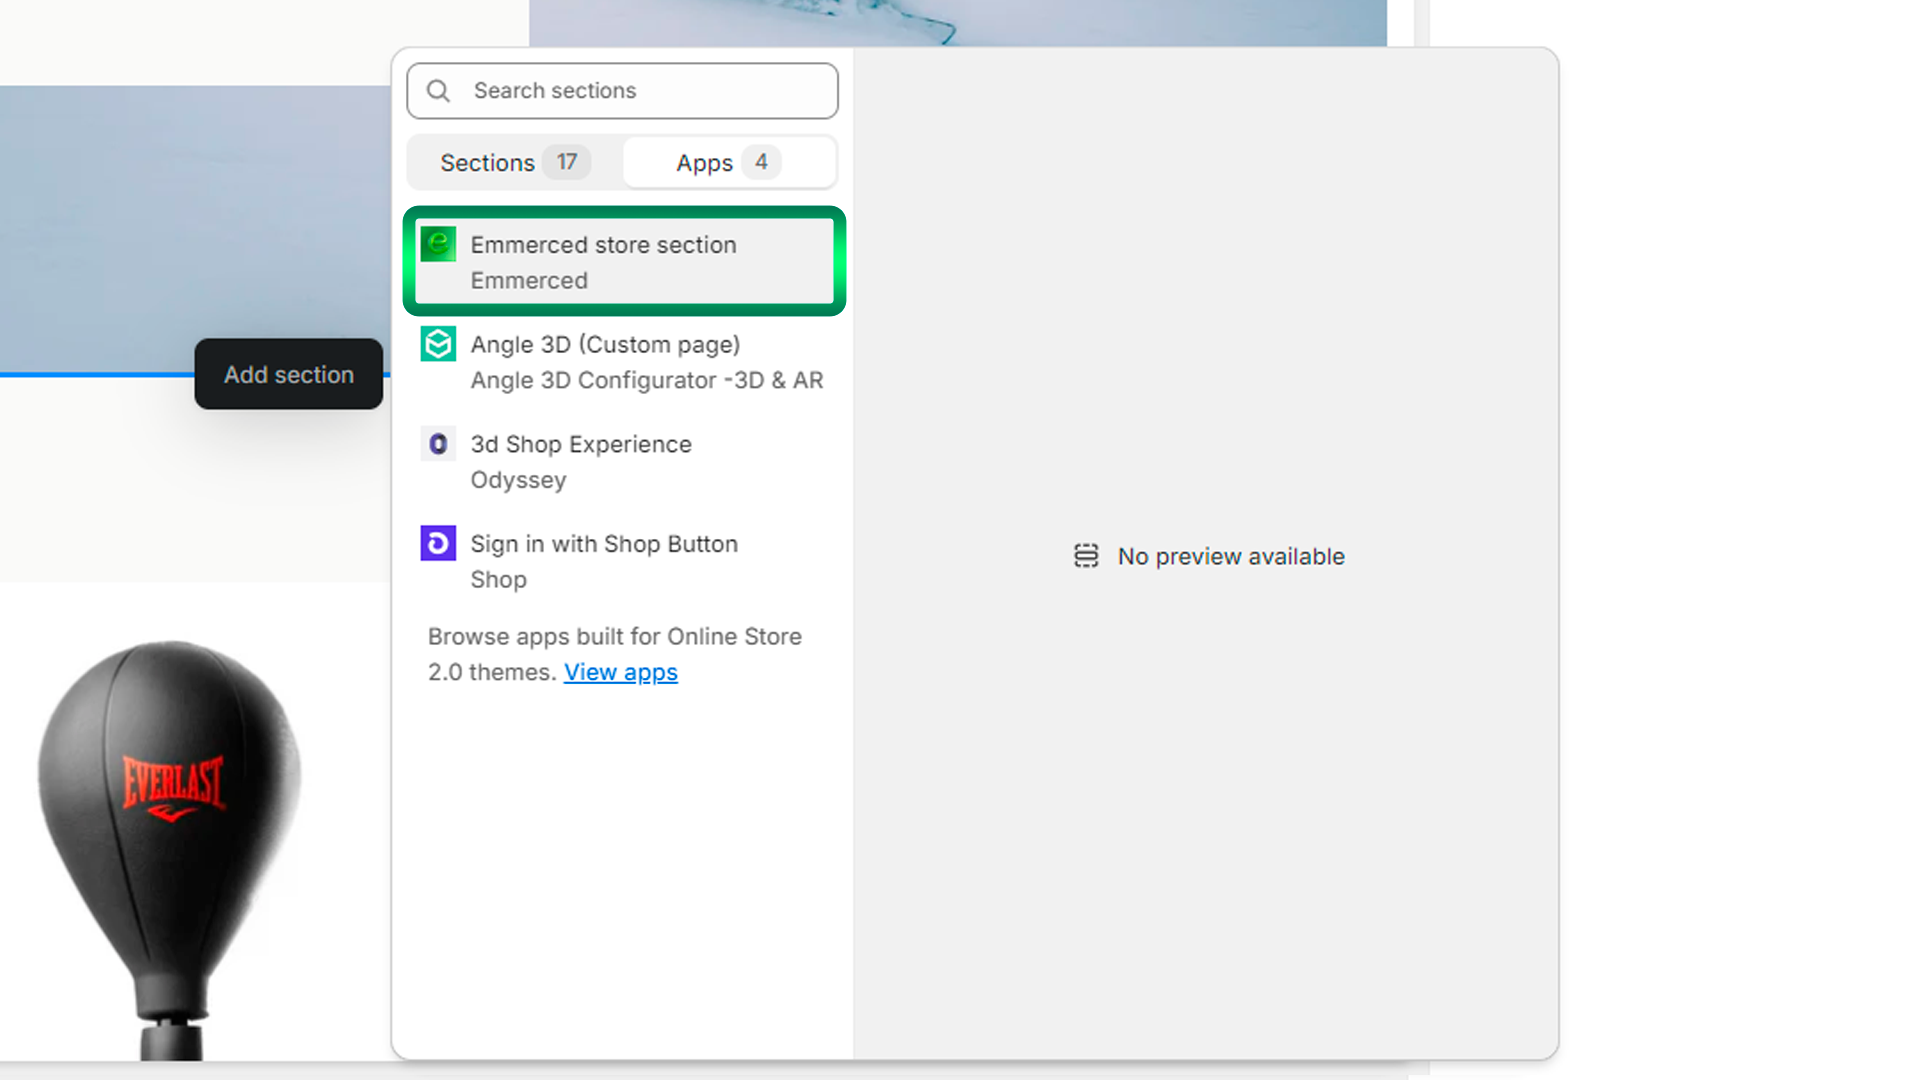
- Select the “Apps” section.
- Select “Emmerced” from the list of available apps.
- Use the settings panel in the top-right corner to customize the loading screen color and adjust the widget height to suit your website’s design.
- Click “Save”
- Now the widget is placed on your Shopify store’s page
- Click on the “Embed” button open the widget settings menu.


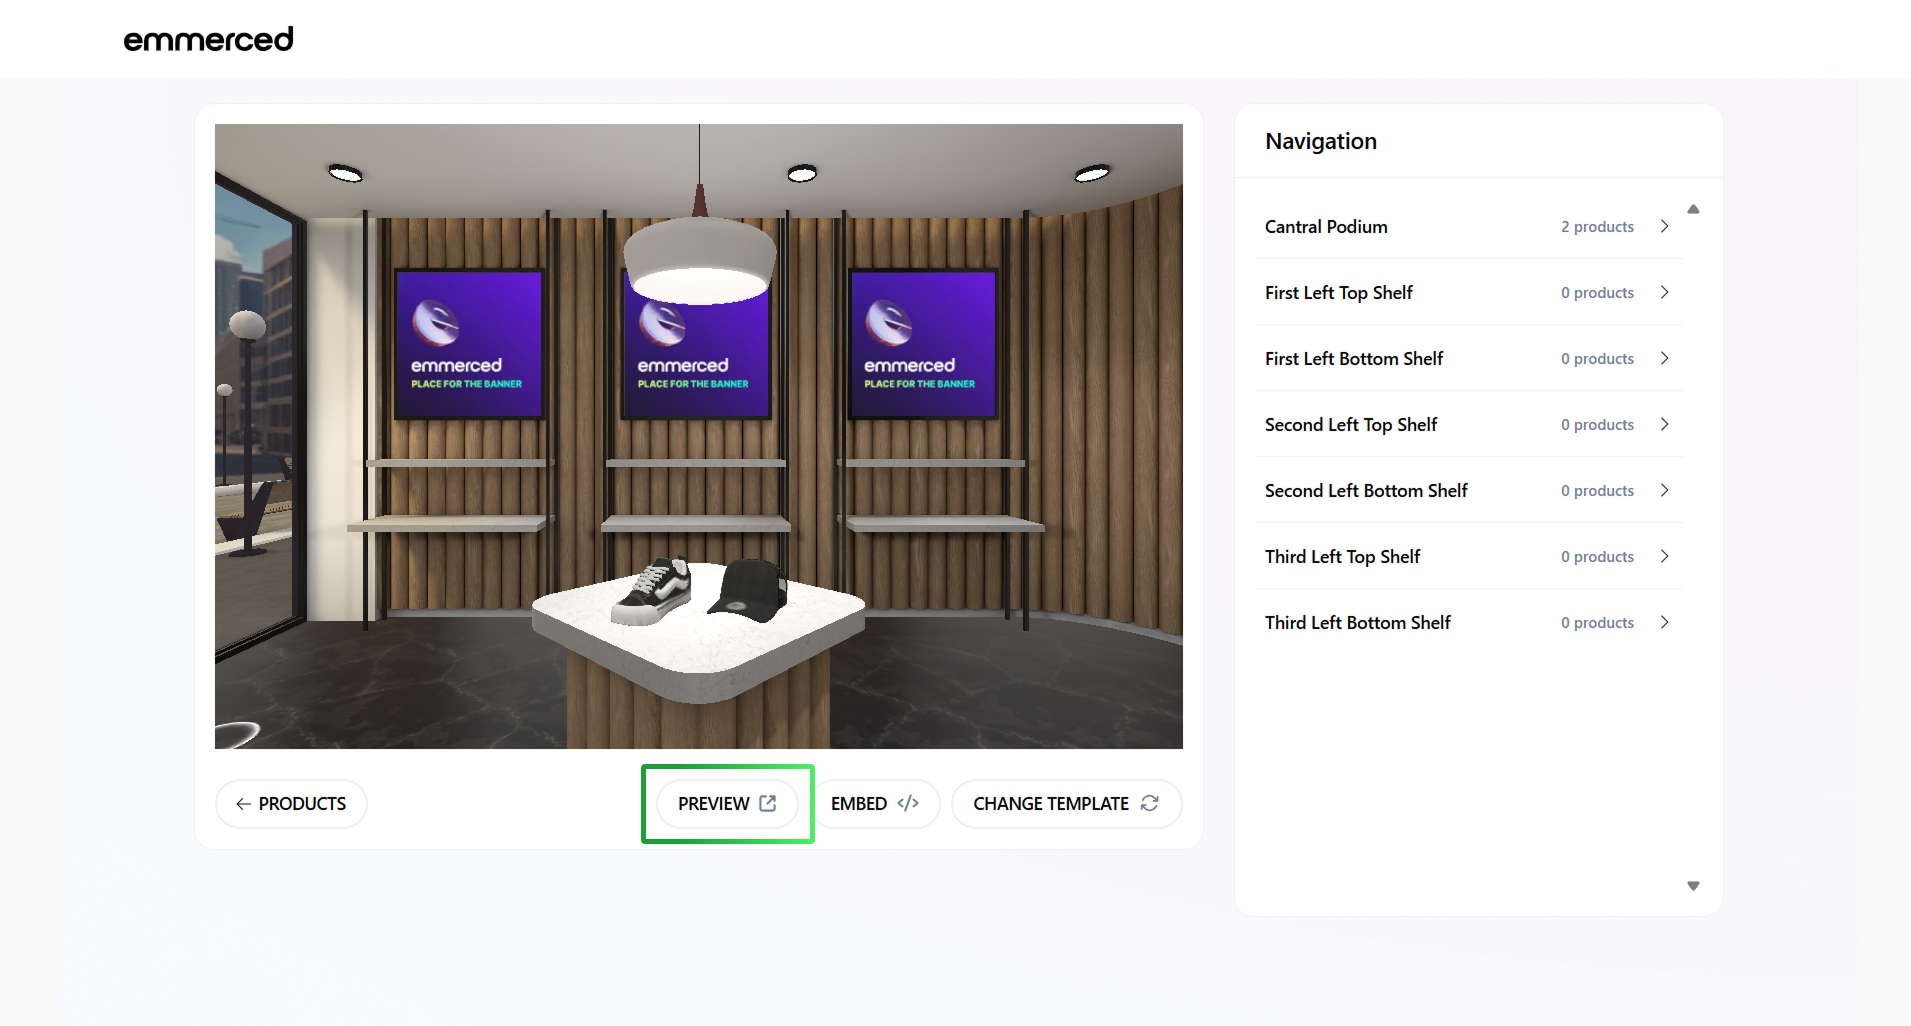
After completing the setup, it’s essential to verify that your 3D Store is operating as expected. The preview feature lets you review your changes in real-time, ensuring everything is perfect before going live. Follow the steps below to preview your store and make any final adjustments before launching it to your customers.
After completing all the setup steps, click “Preview” to review your 3D store and ensure everything looks and functions as intended.
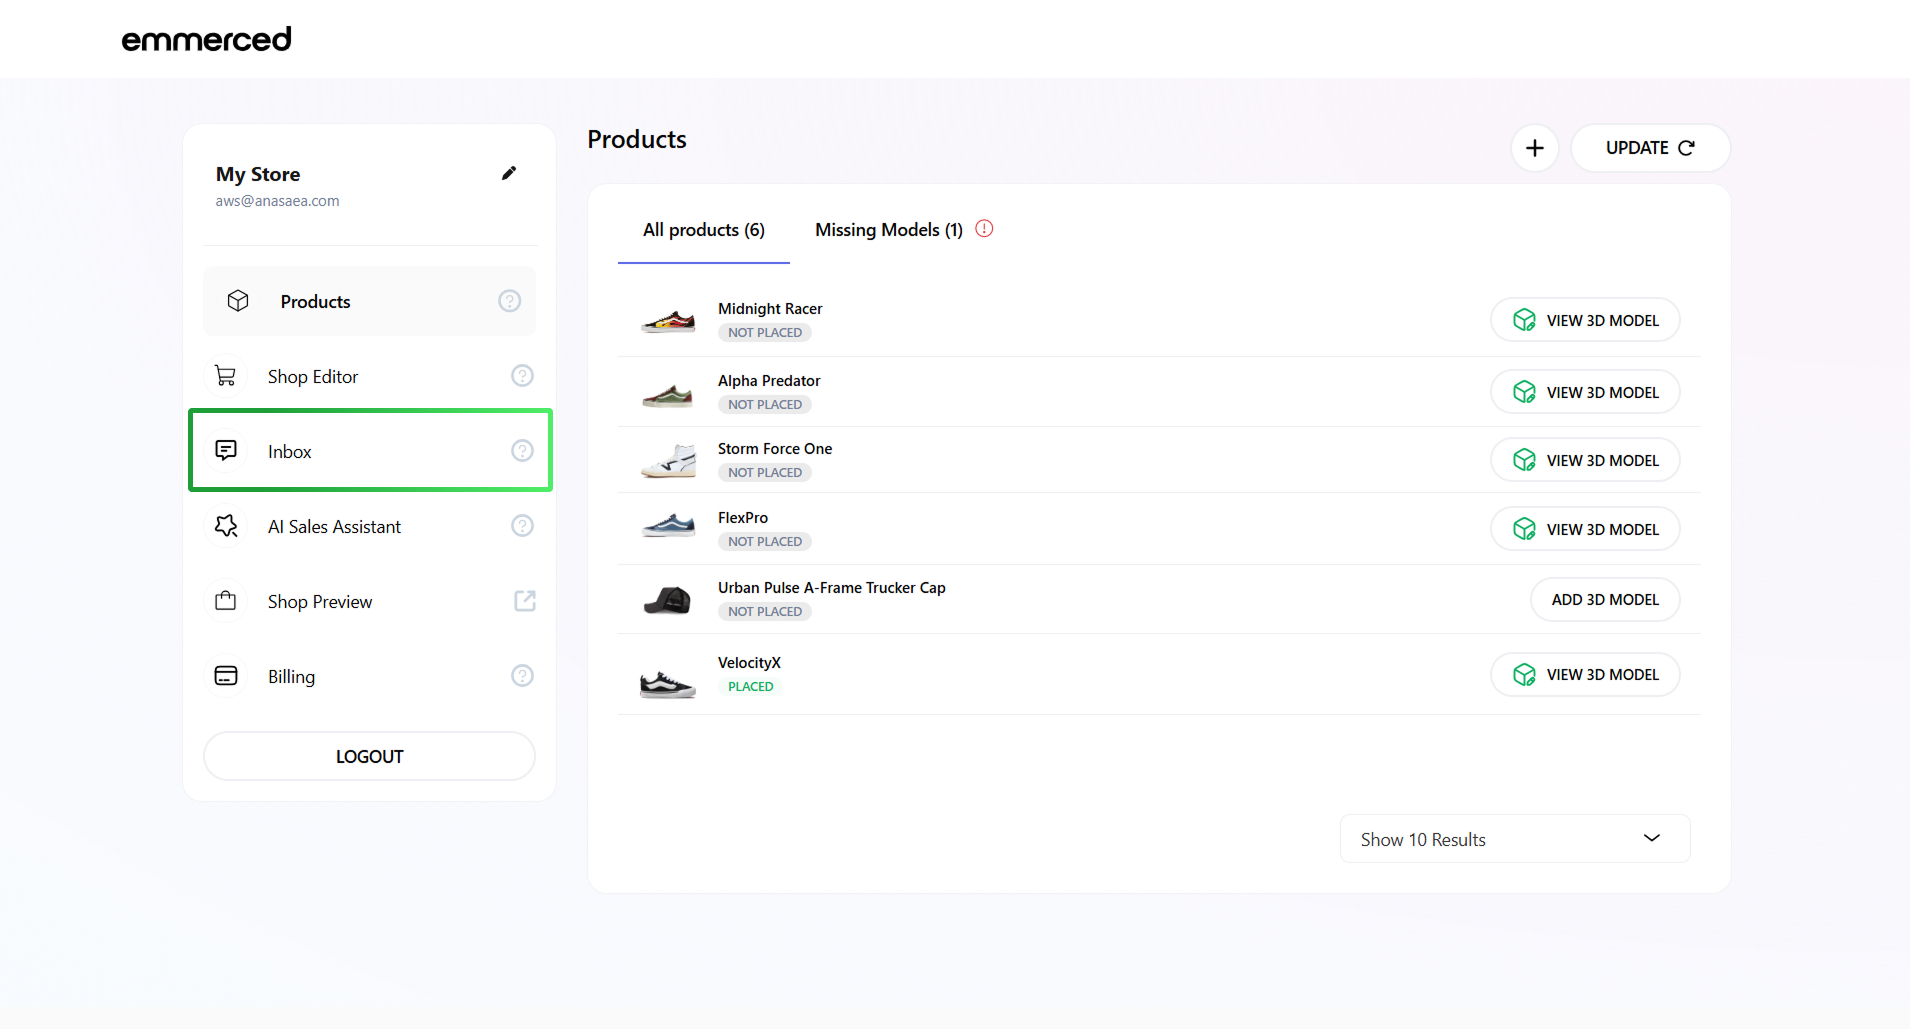
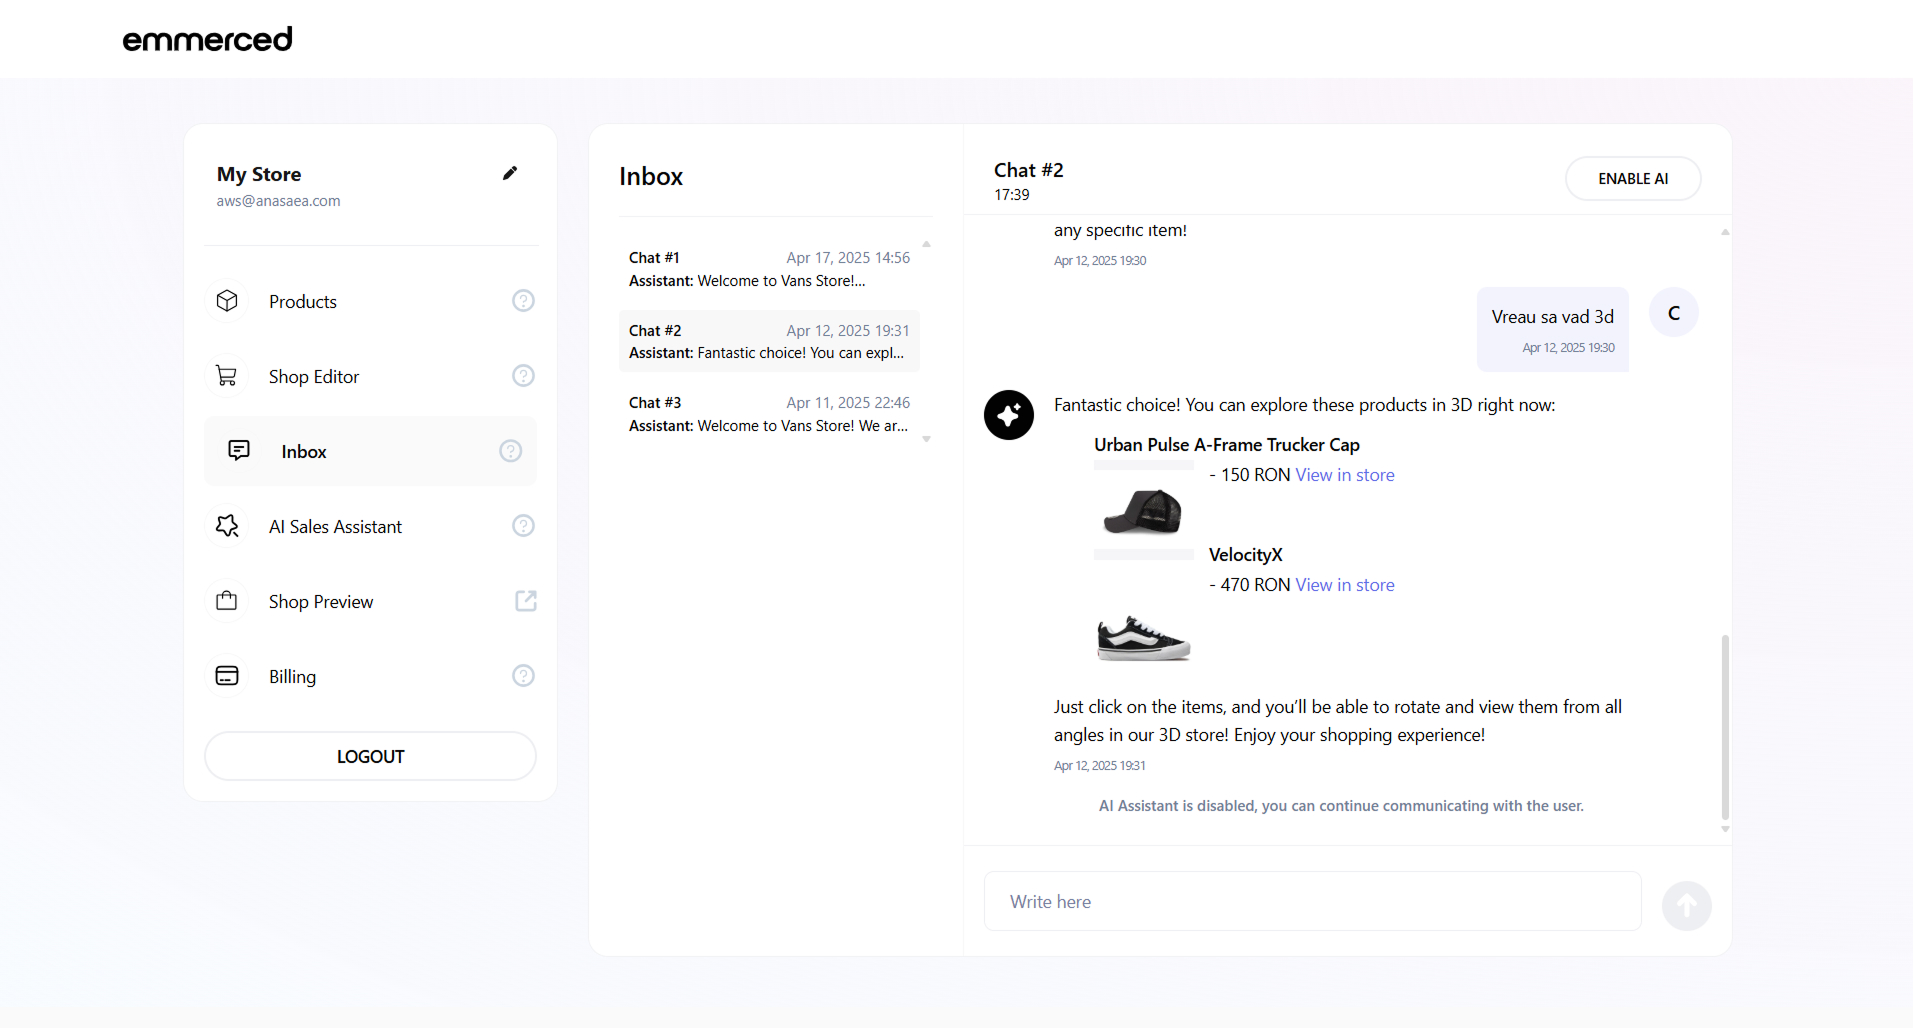
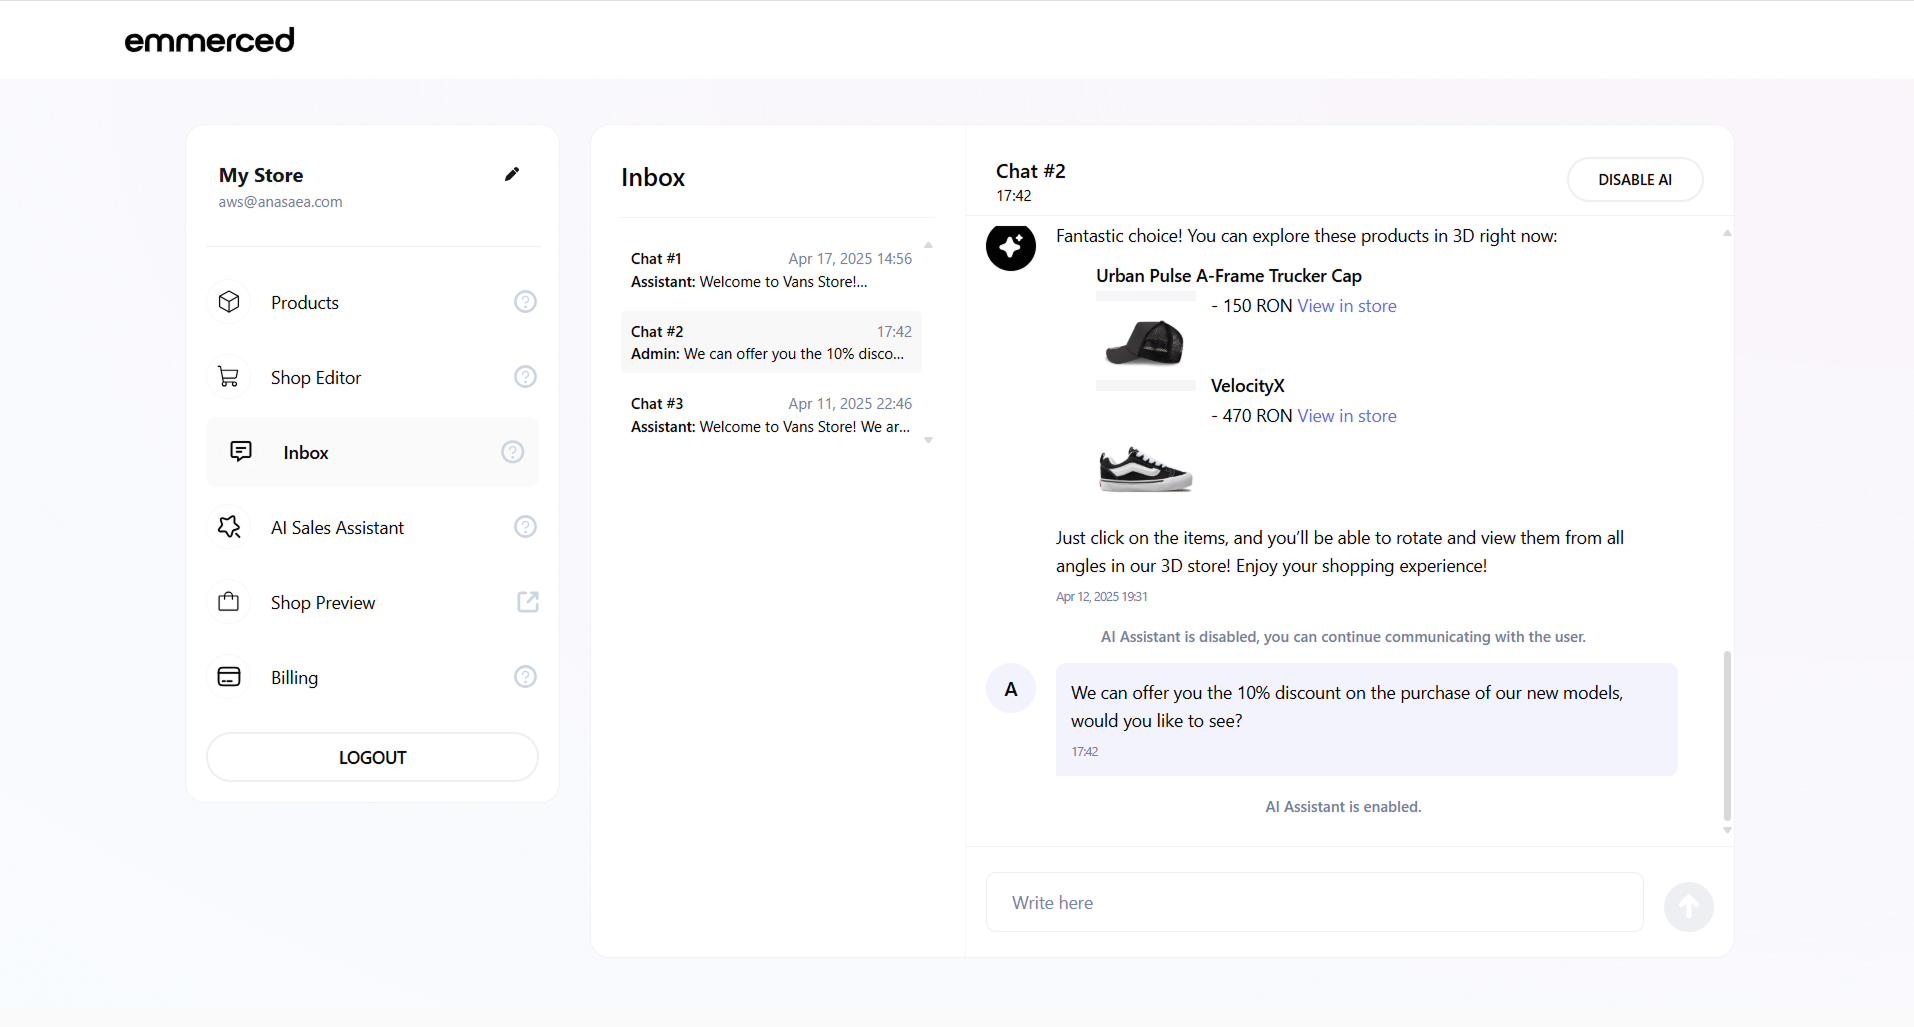
- Click on the “INBOX” section to see all customer chats with the assistant, both on your website and in the 3D store.
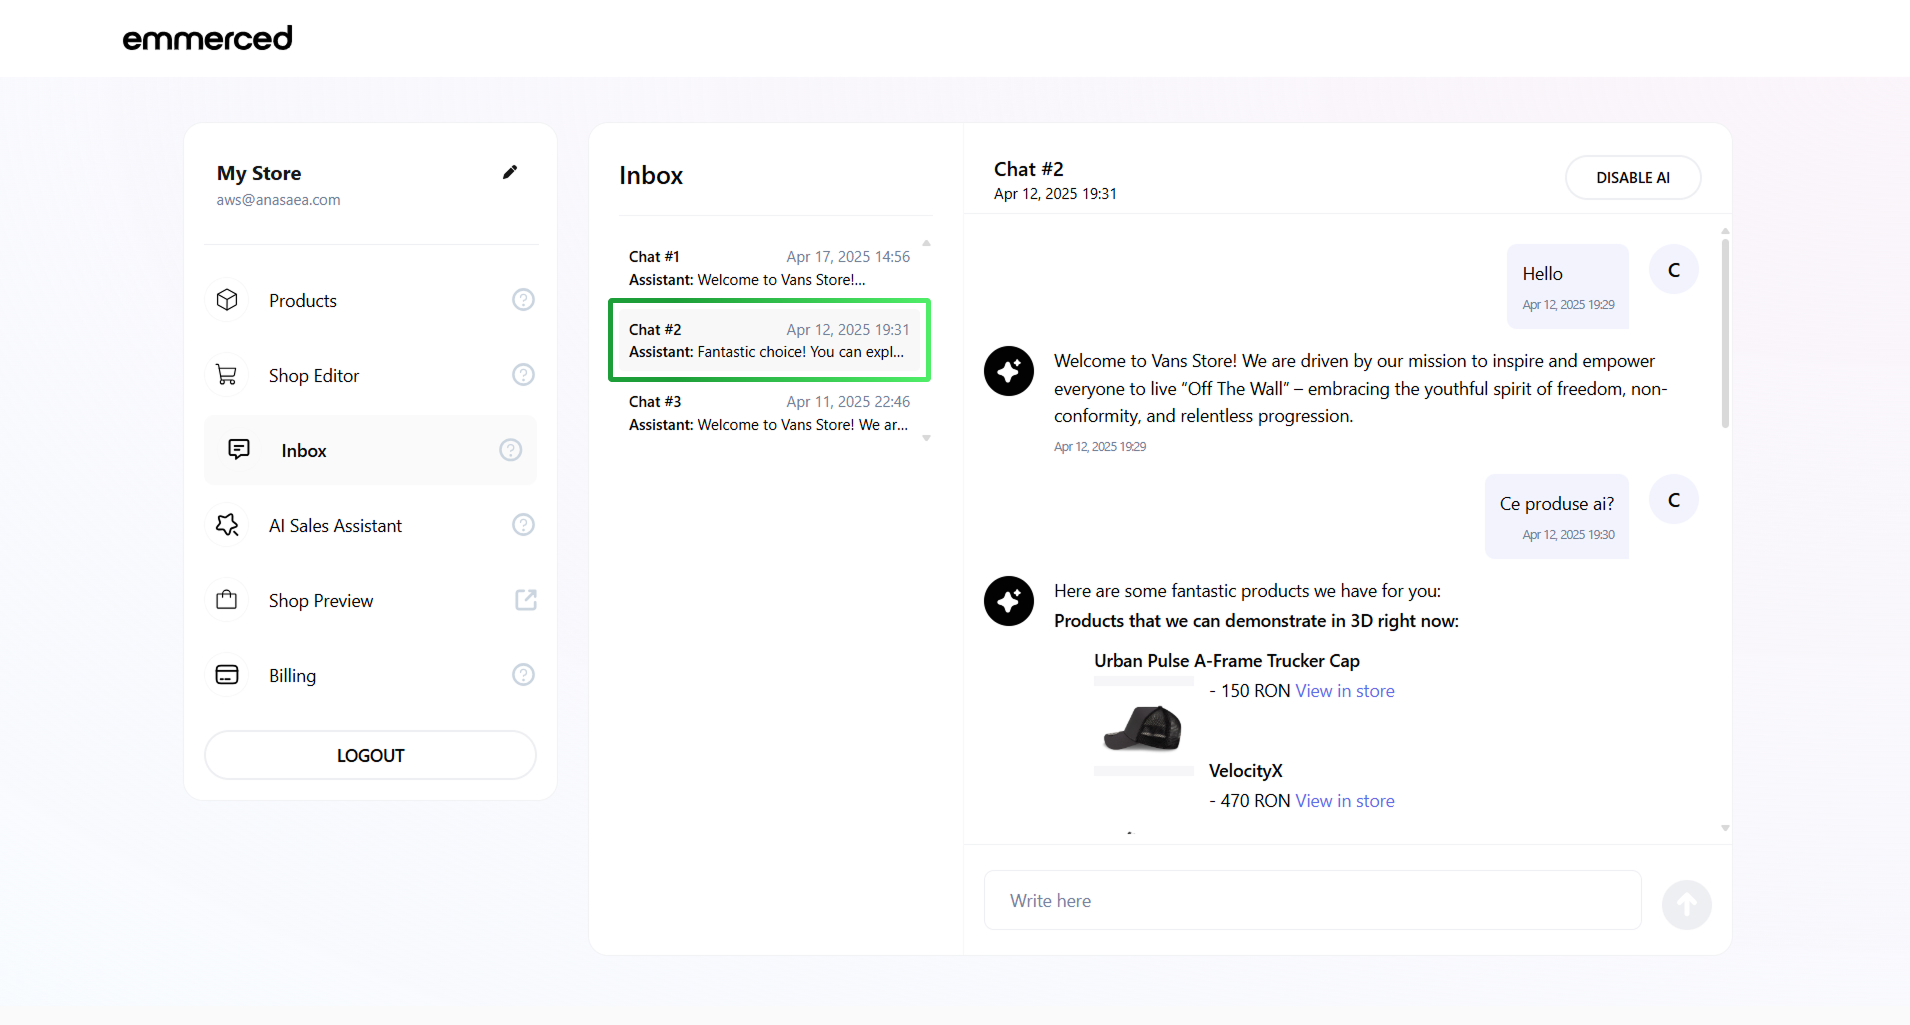
- Click on one of the chats to see the client’s message history with the assistant and the operator.
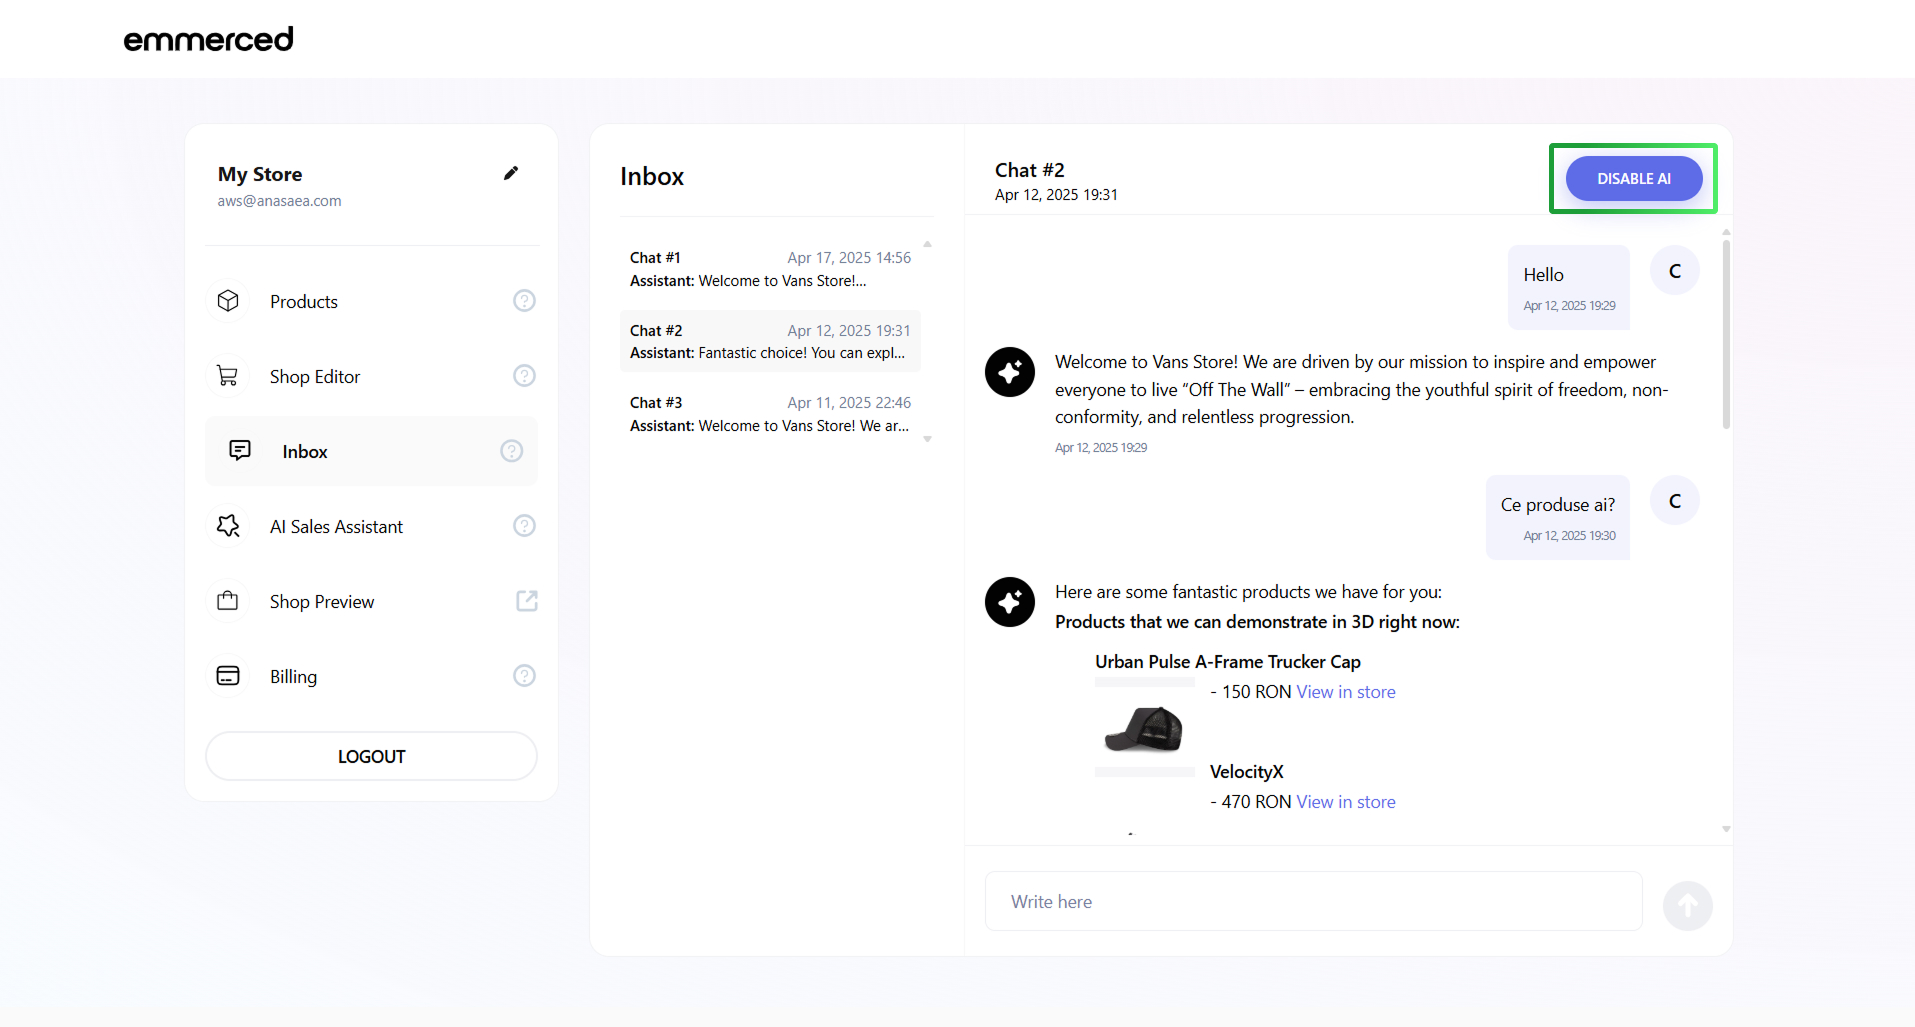
- Click on the “DISABLE AI” button to disable AI Assistant and reply to the client’s message.
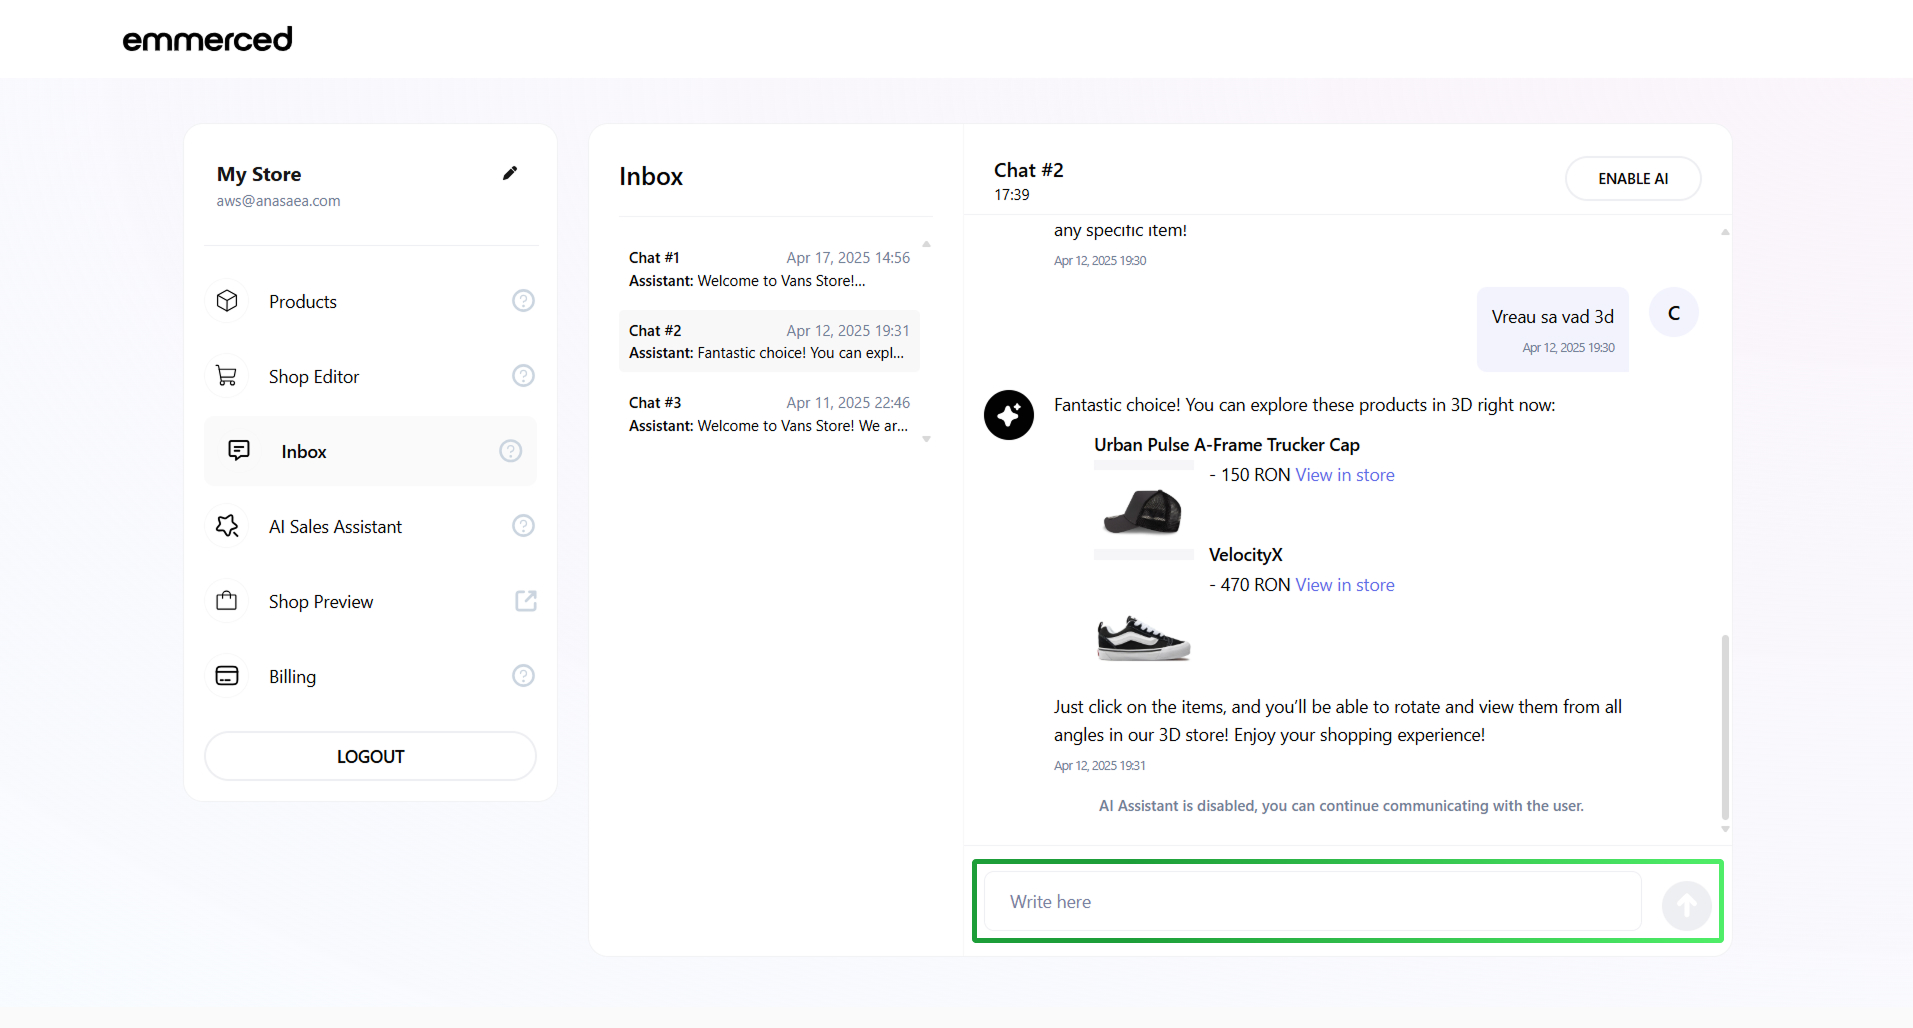
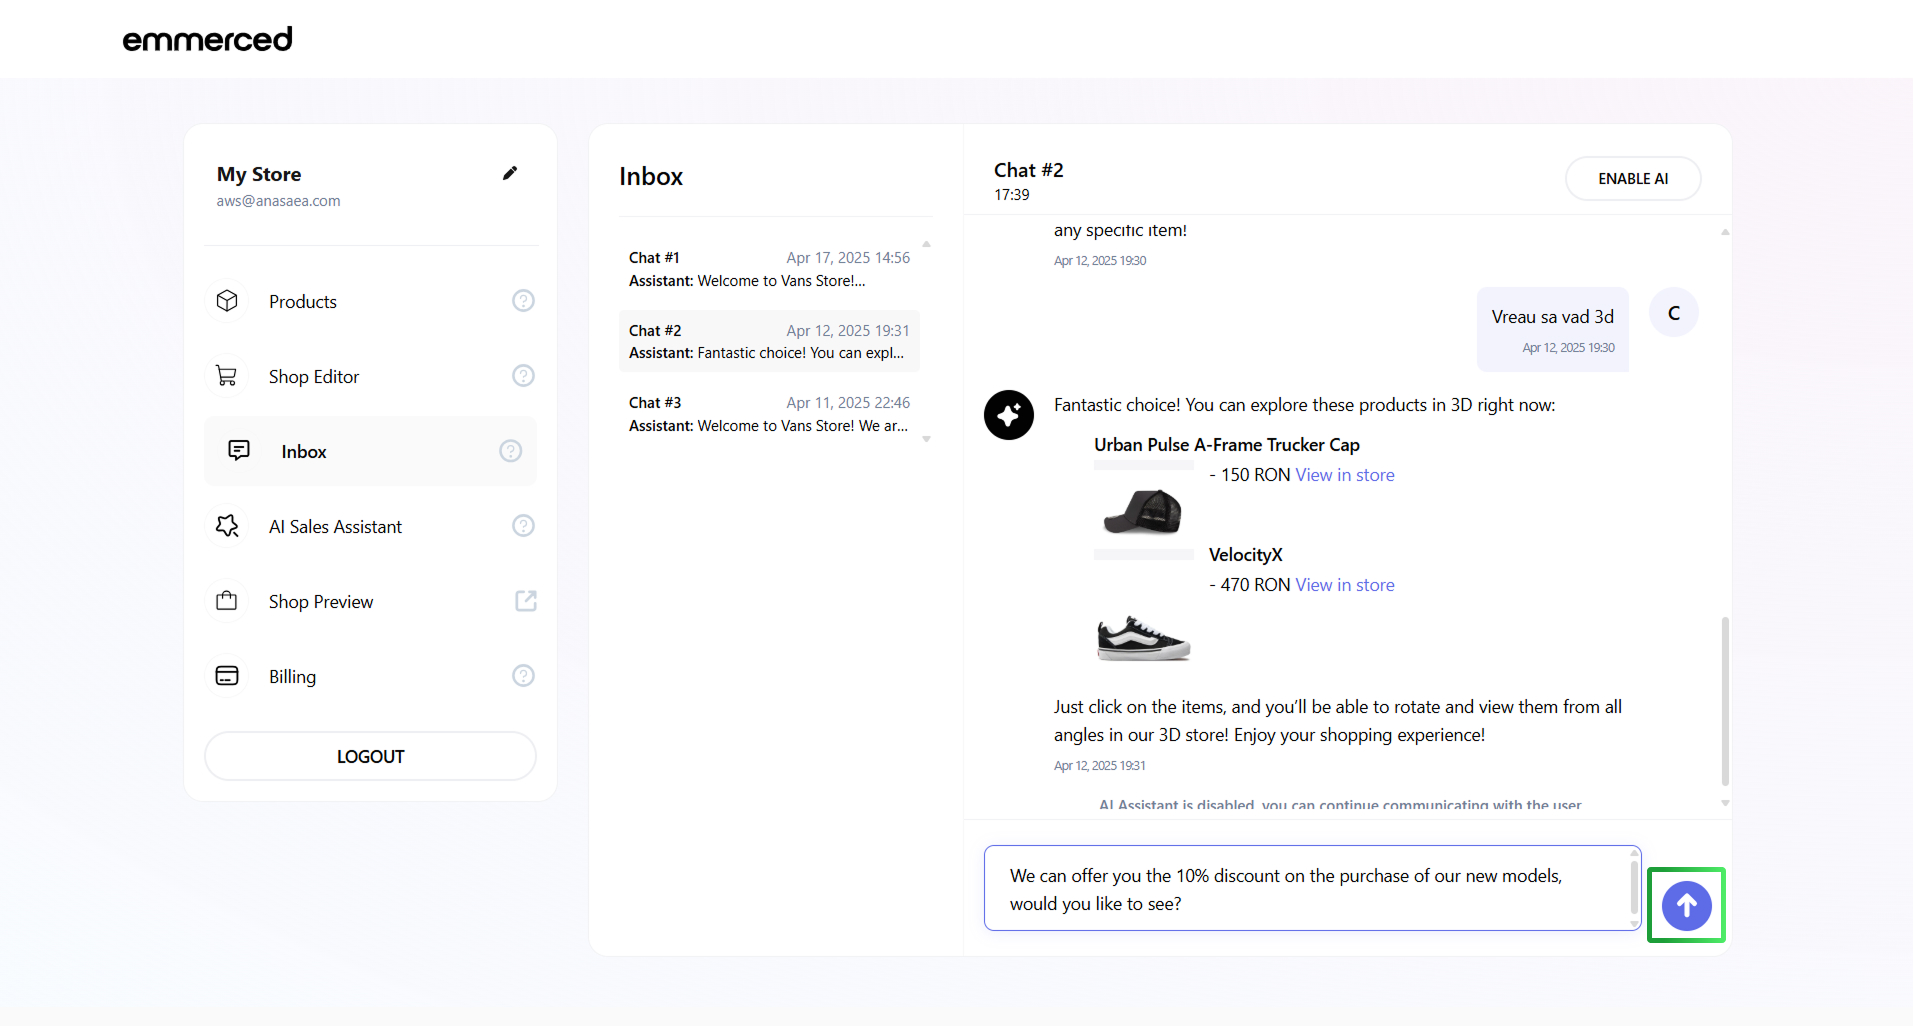
- Click on the input field to write and send a message to the client.
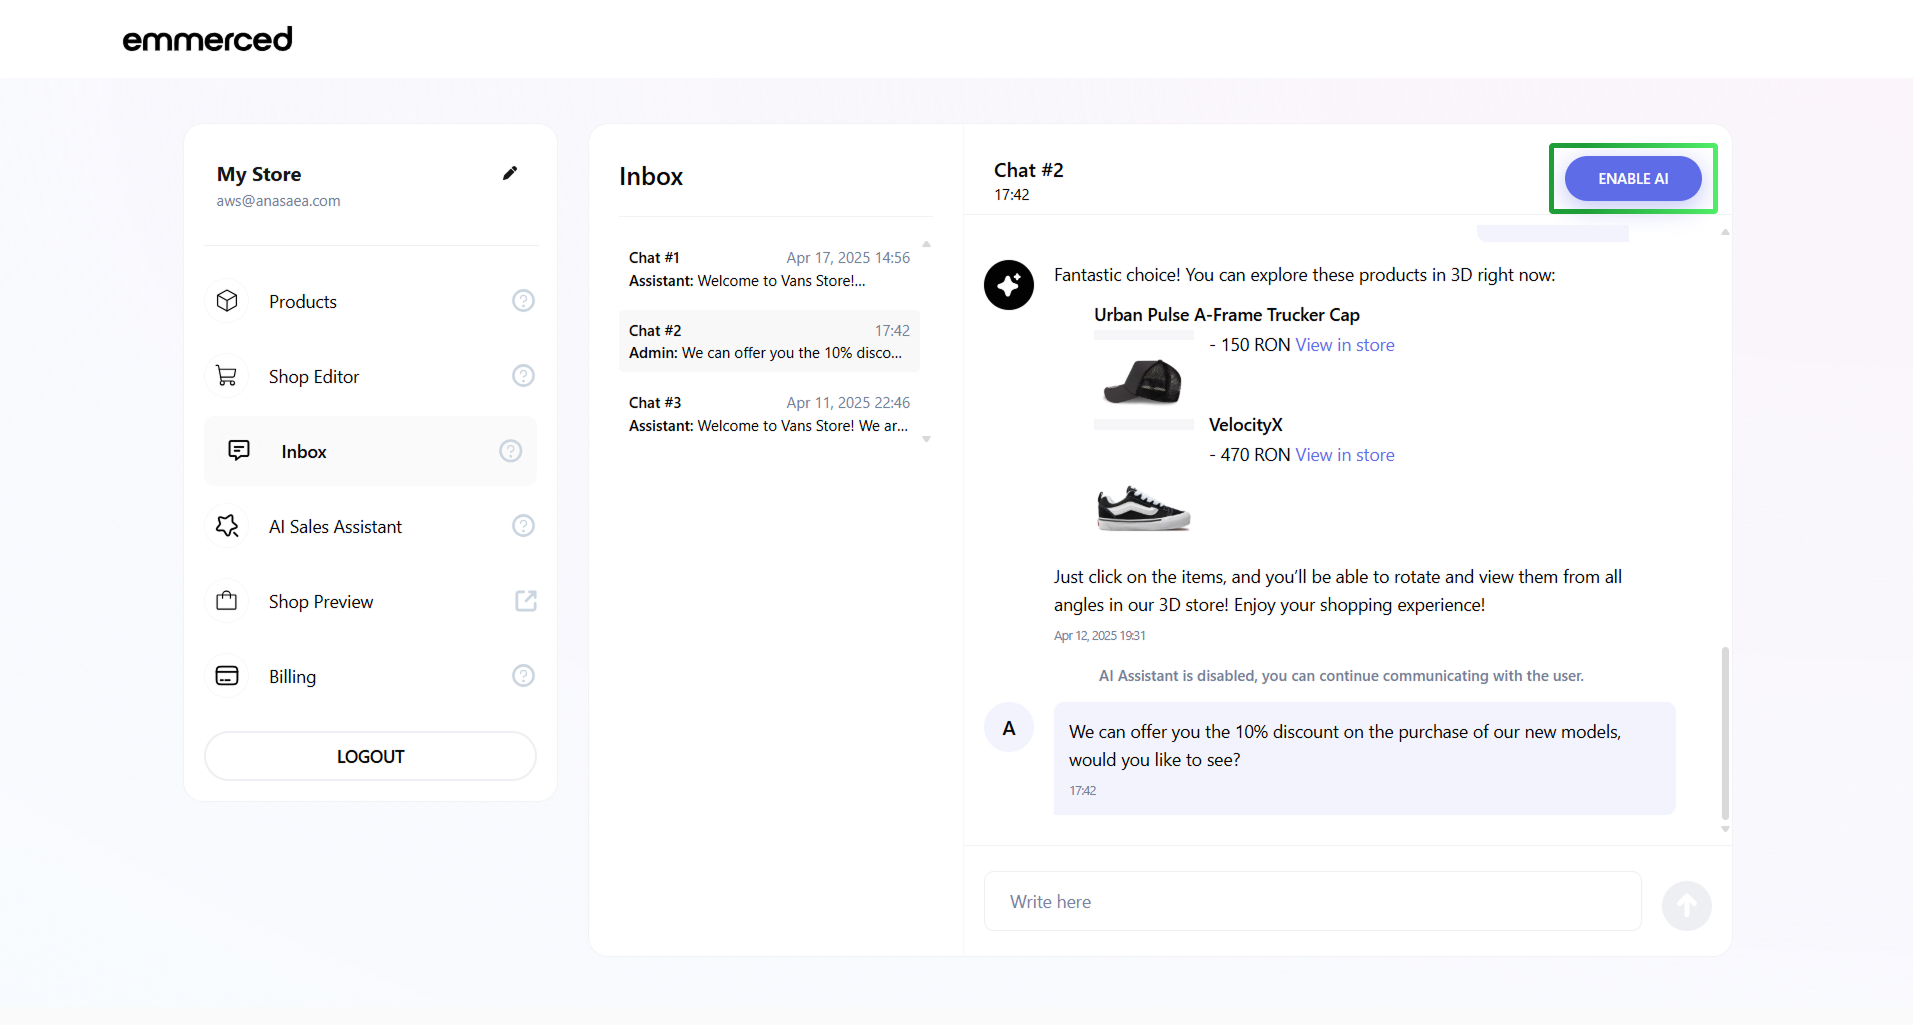
- Click on the “ENABLE AI” button to enable AI Assistent to communicate with the client again.
The AI Assistant will already respond to all subsequent messages from the client.
- Select the “AI Sales Assistant” section from the navigation panel to begin the setup process.
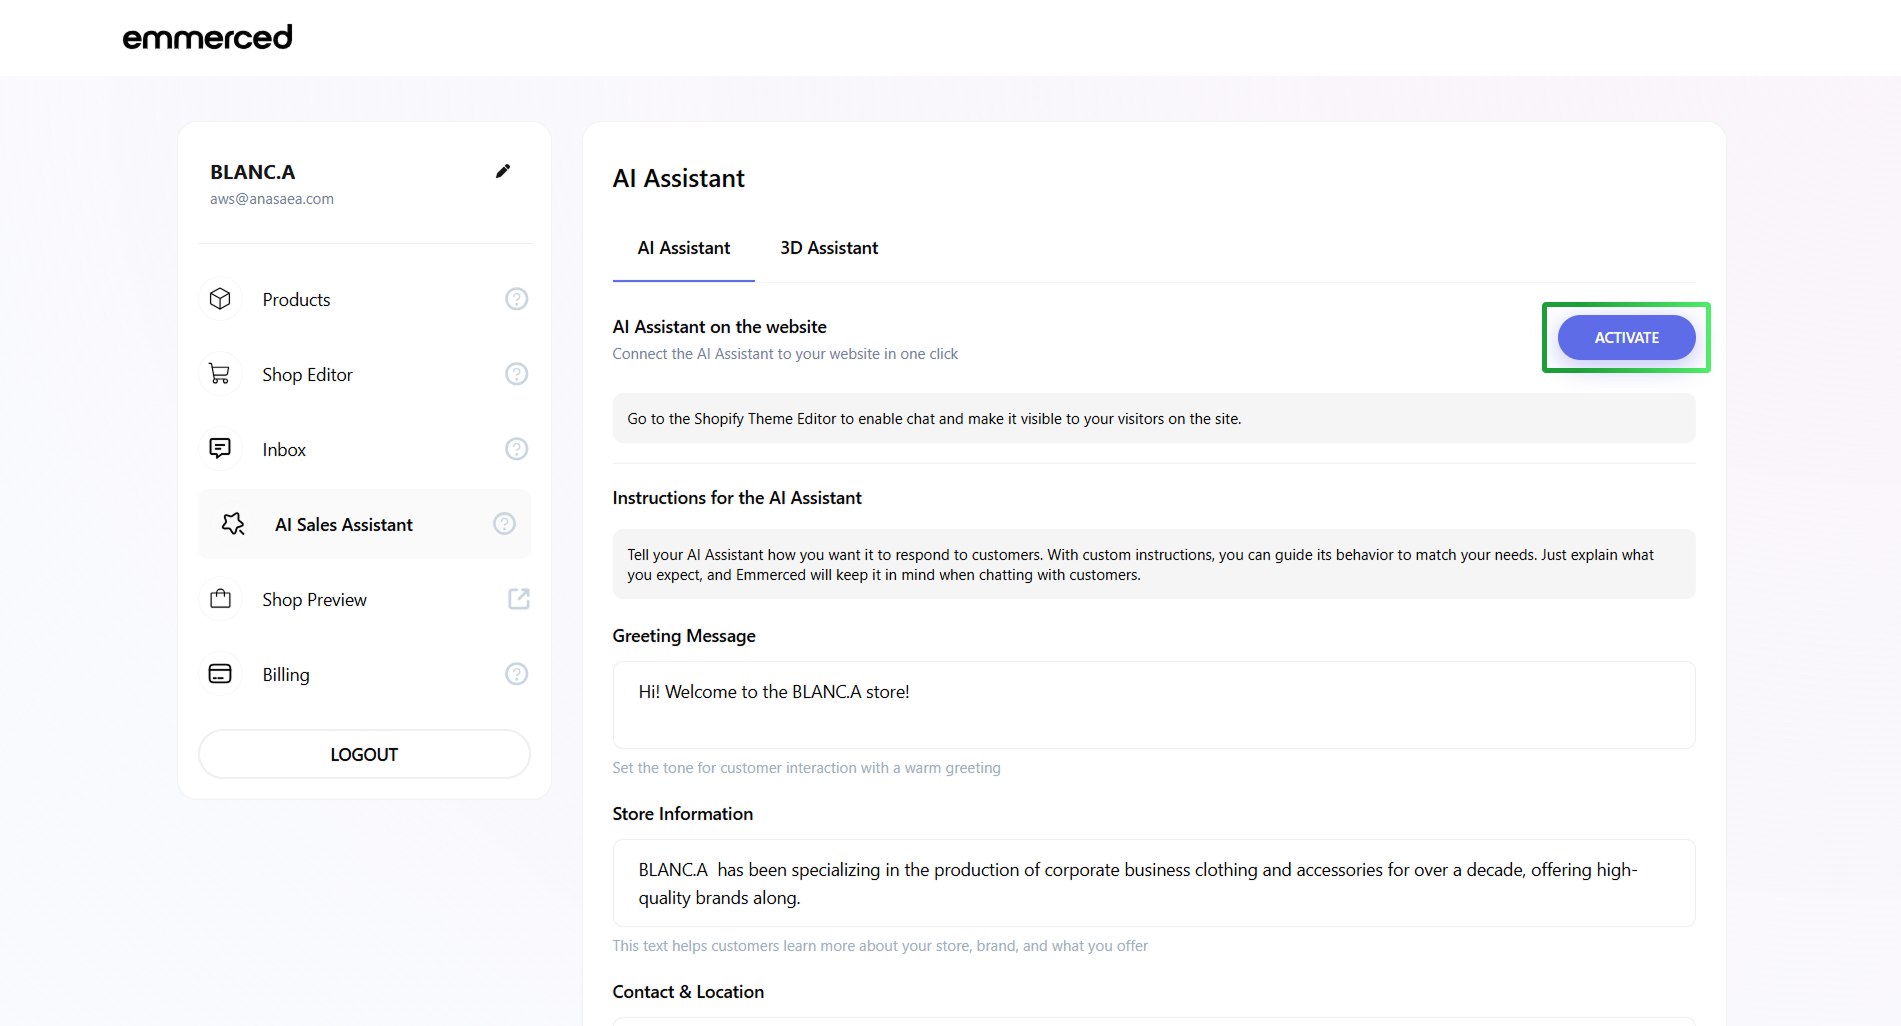
Click on the “ACTIVE” button.
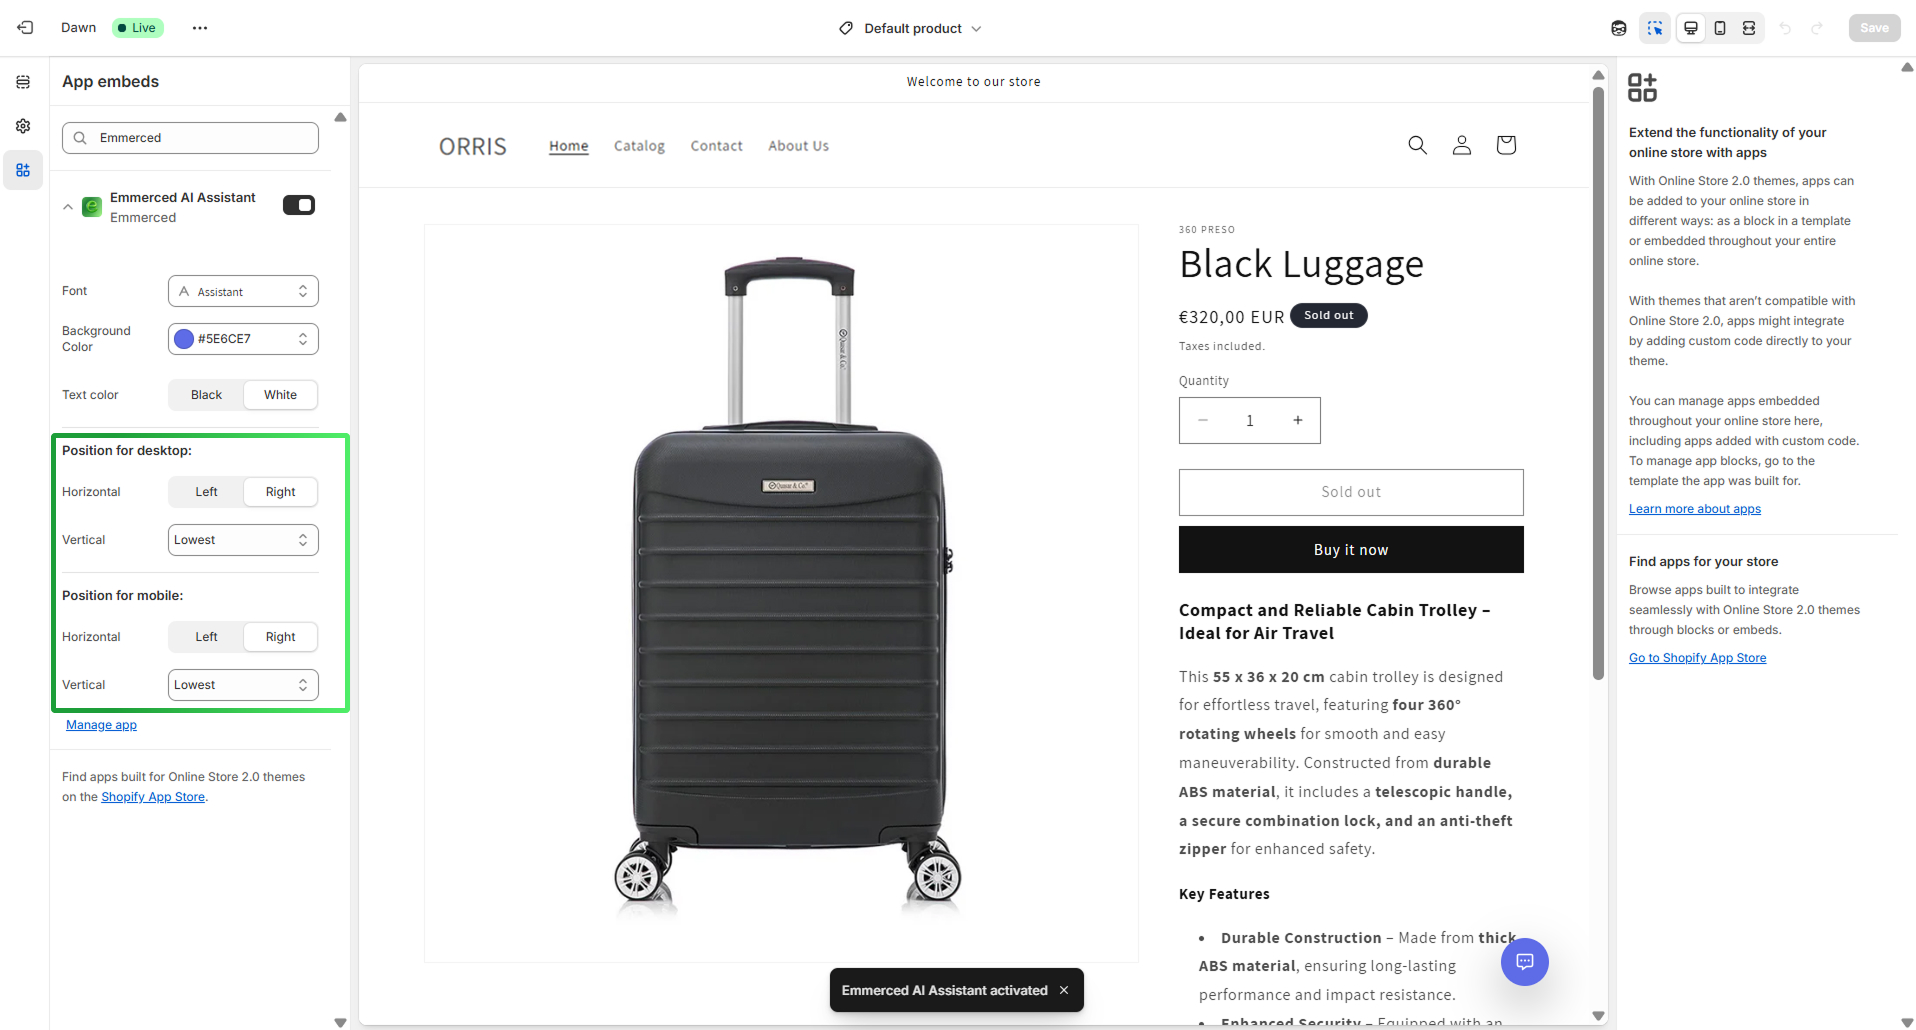
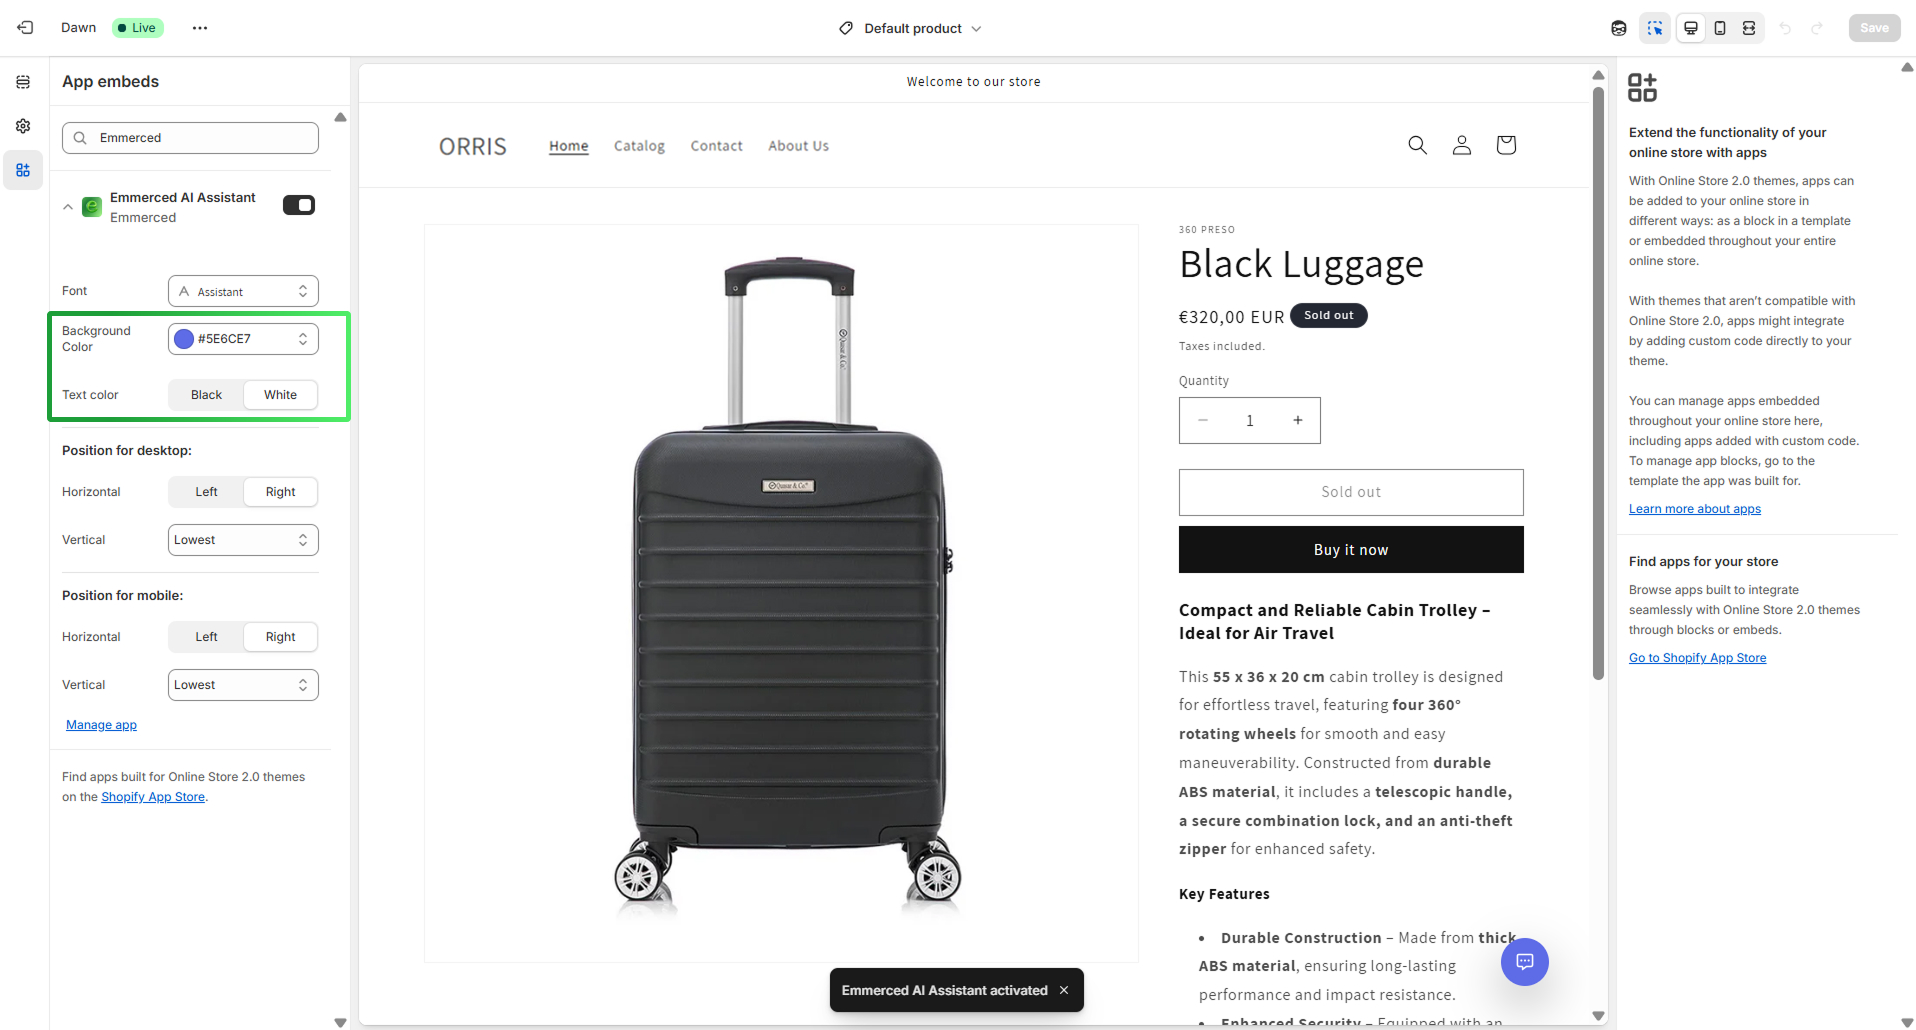
Select the location of the AI Assistant on your site in the settings section, on the left or on the right, separately for the desktop and mobile versions of the site.
Select the color of the AI Assistant button and cap in the settings section so that the AI Assistant matches the colors of your brand.
Choose the font of the message text inside the chat to match your brand.
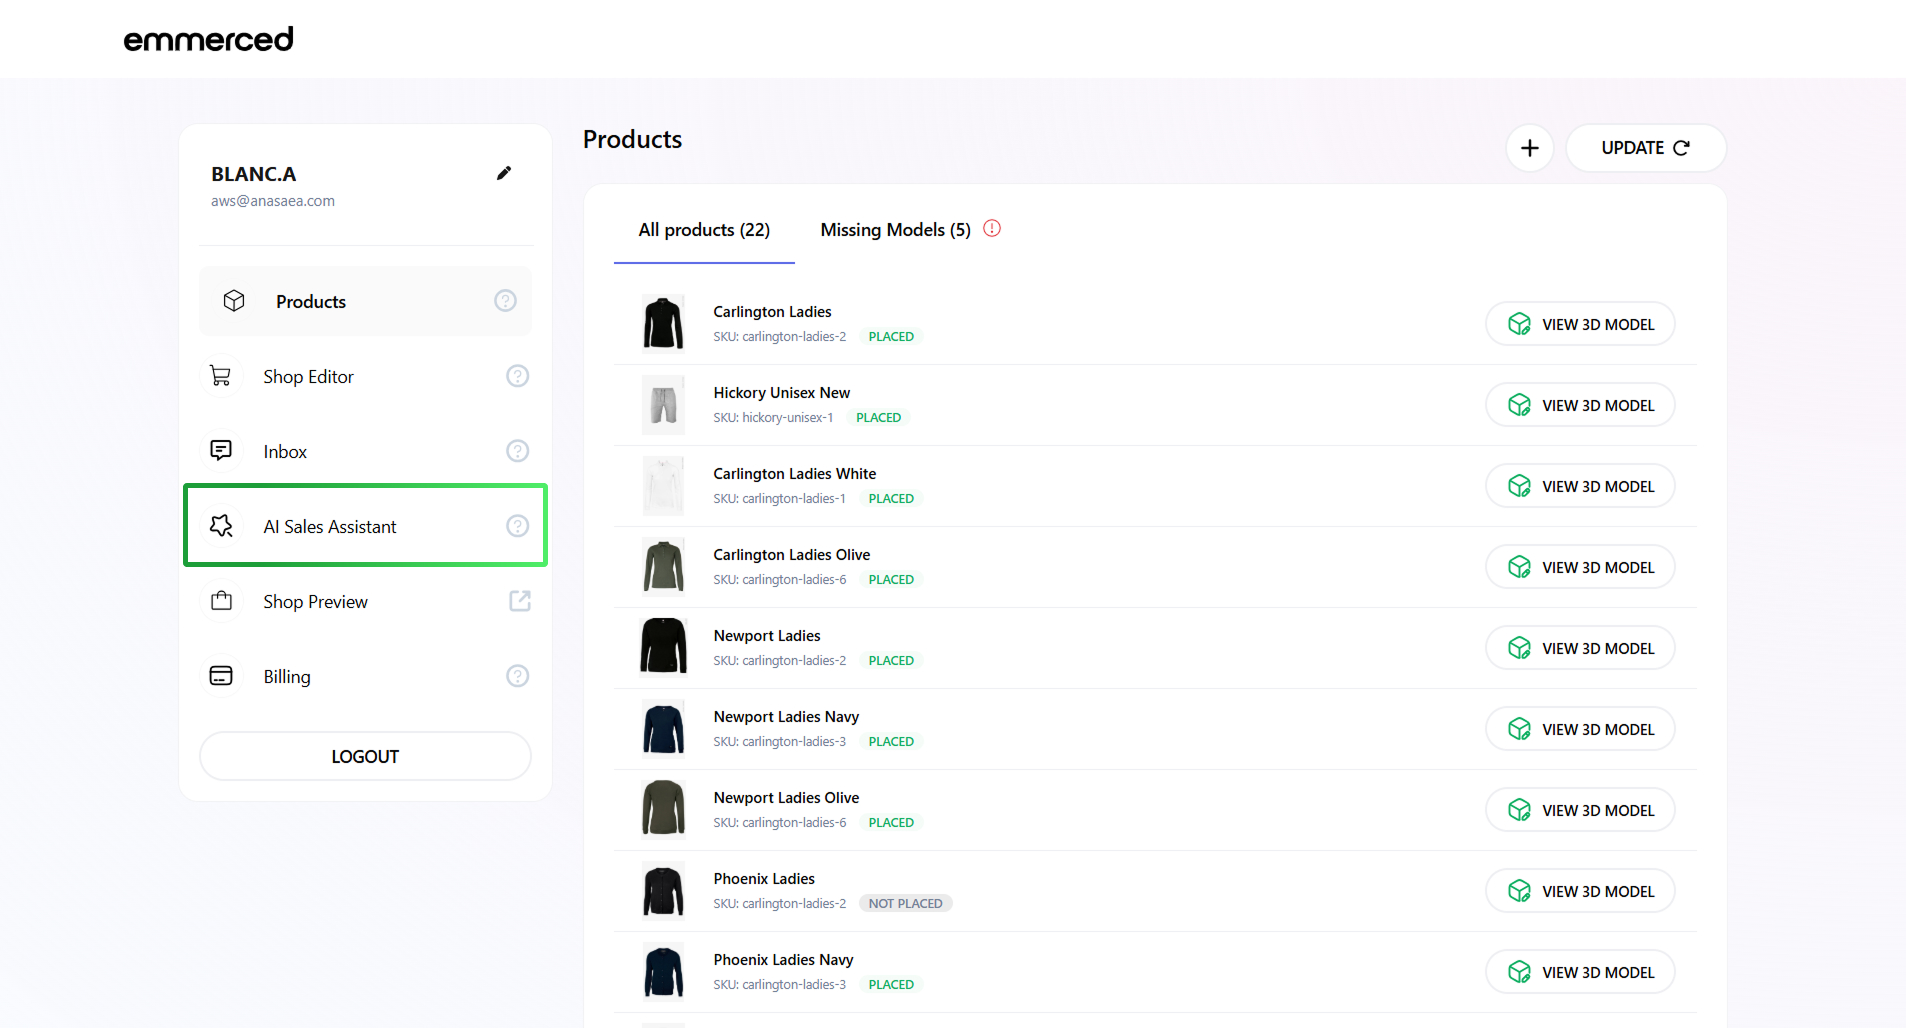


- Select the “AI Sales Assistant” section from the navigation panel to begin the setup process.
- Add information to the fields “Greeting Message”, “Store Information”, “Contact & Location”, “Extra Details”.
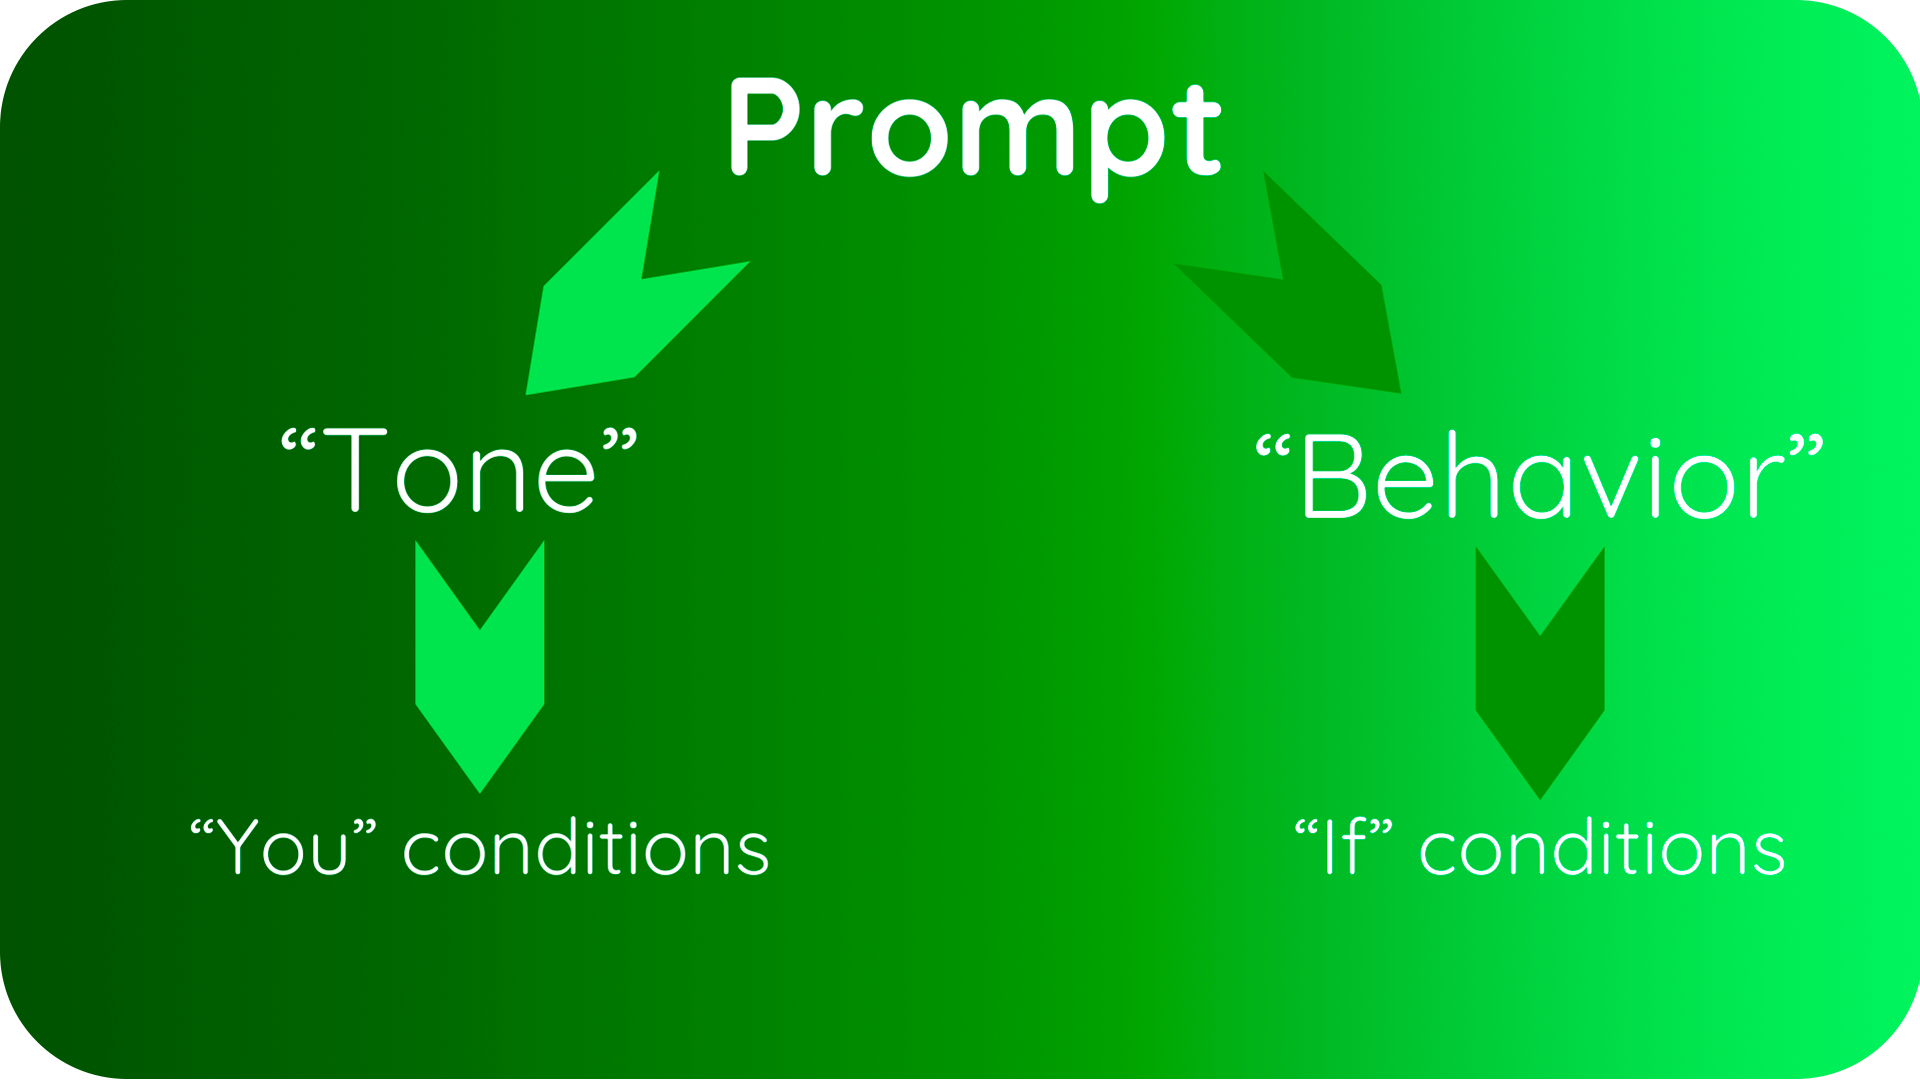
The data in these fields will allow you to configure it “Behavior” or “Tone“ in accordance with the preferred style of interaction with the guests of your site or store, as well as convey important information about your store.“Behavior” conditions allow you to define specific responses for various situations using “if” statements.
For example:
Add the following condition to the “Greeting Message“ block:
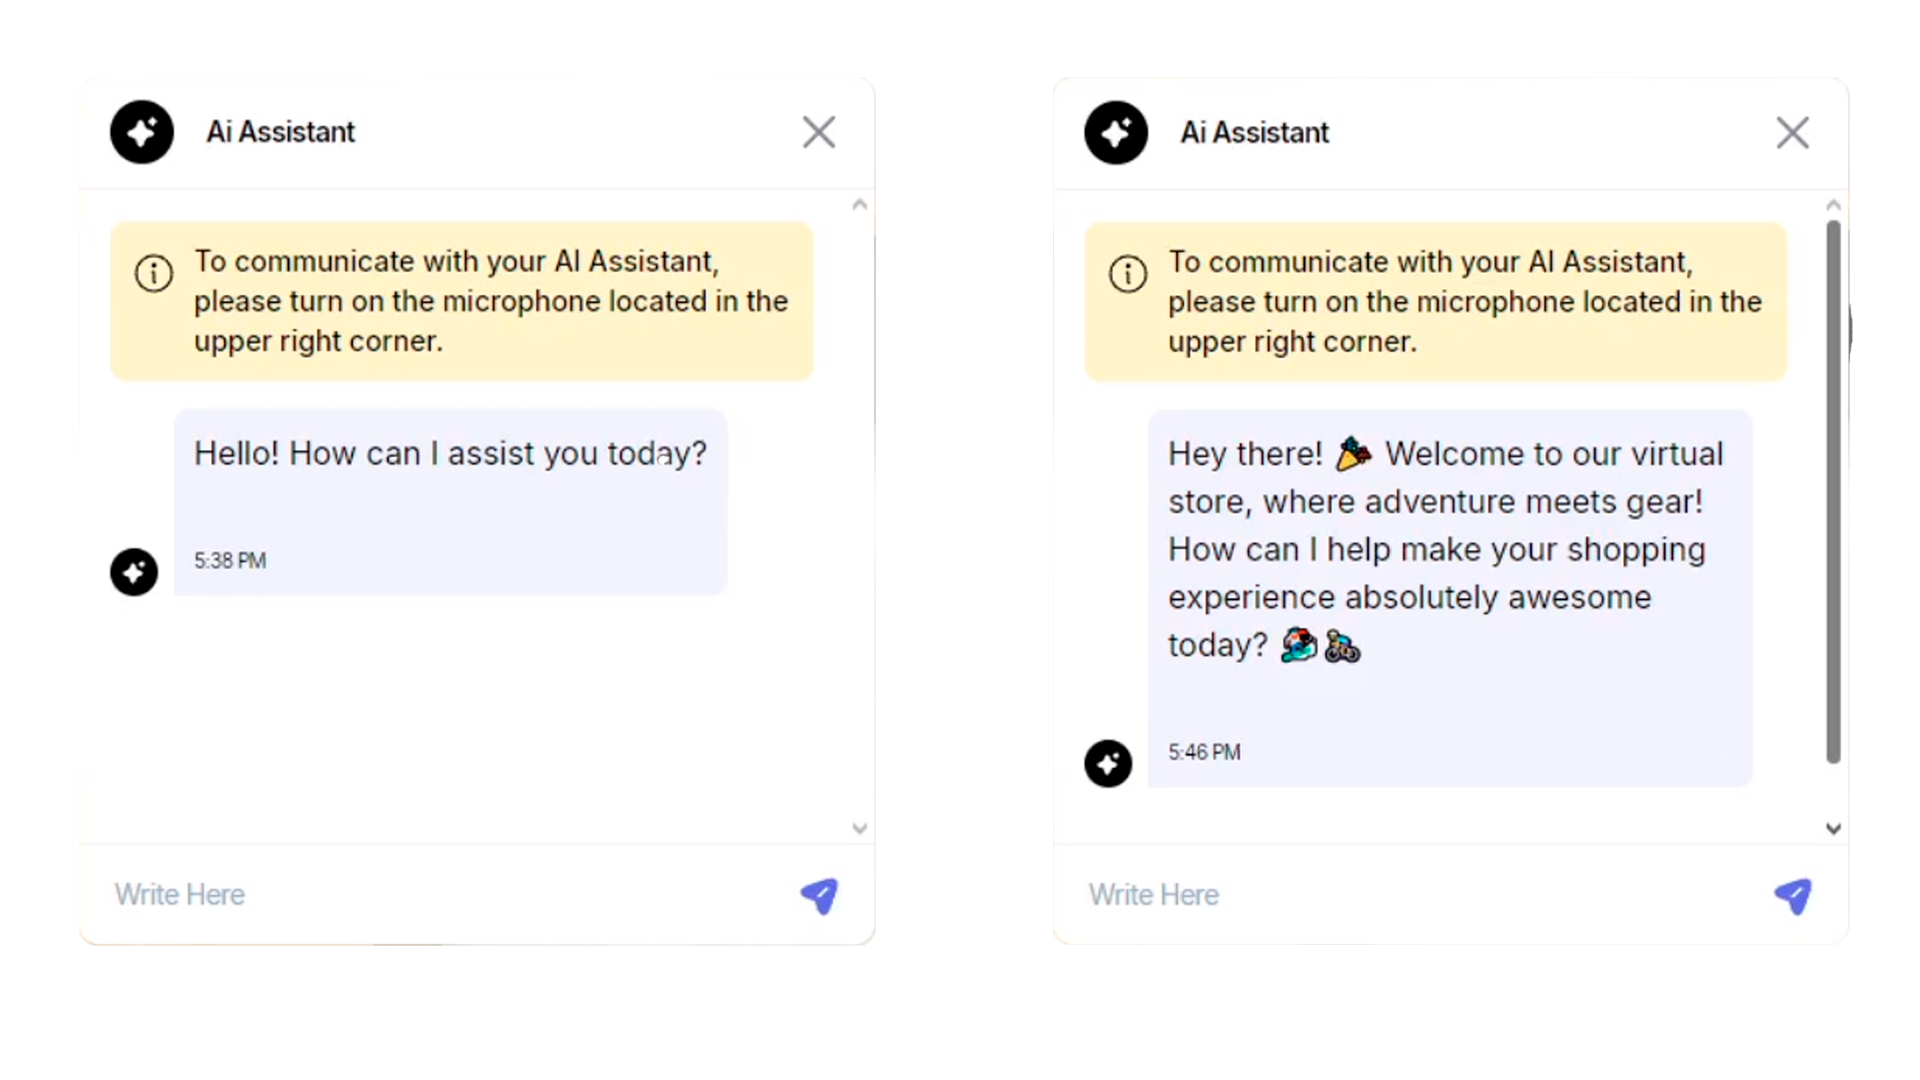
“If welcoming or talking to a customer, you need to have an energetic and motivated tone.”This ensures the Assistant’s behavior is tailored to create a positive and engaging experience.
“Tone” conditions define how the Assistant communicates, reflecting the personality or character you want it to embody.
For example:
Add the following condition to the “Store Information“ block:
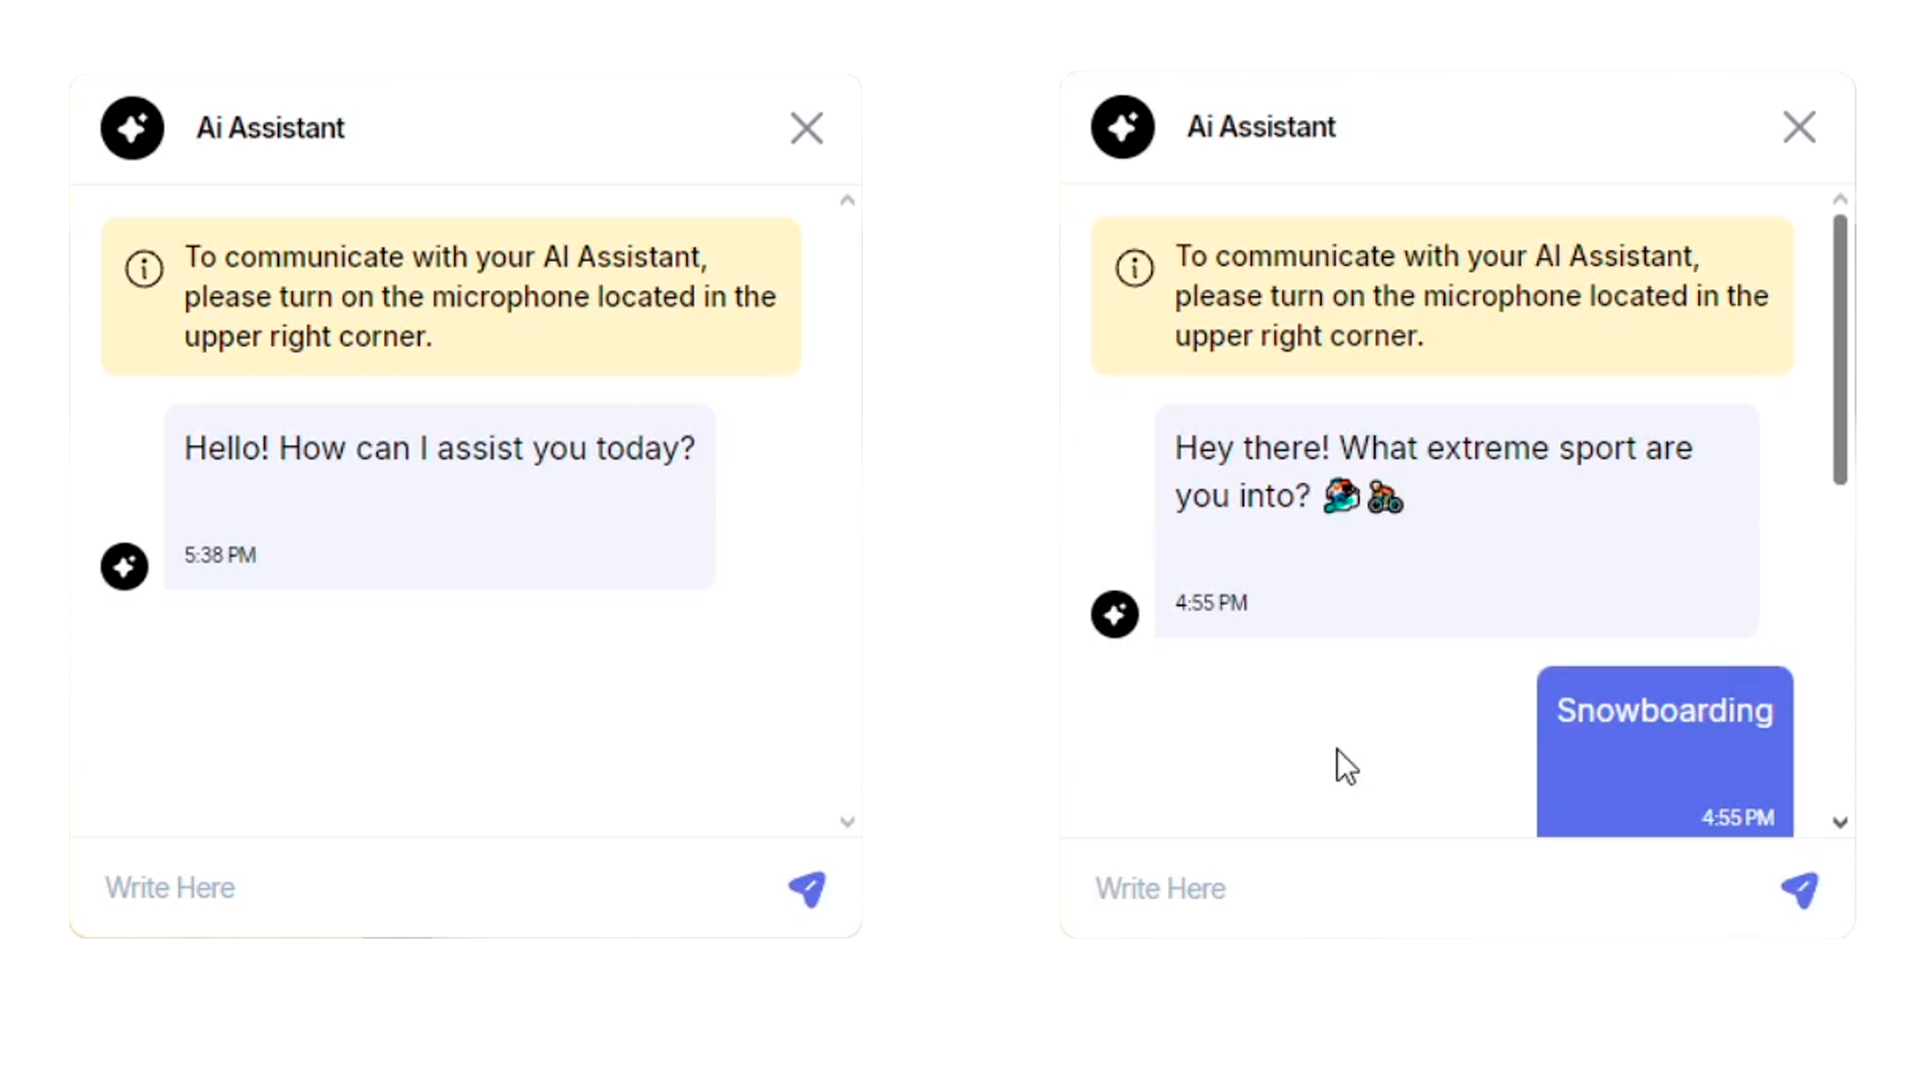
“If the client mentions they are into a specific sport, recommend products aligned with their interest in an enthusiastic and supportive tone.”This ensures the Assistant’s responses feel personalized and character-driven.
Click “Save” button to apply and commit all the changes.

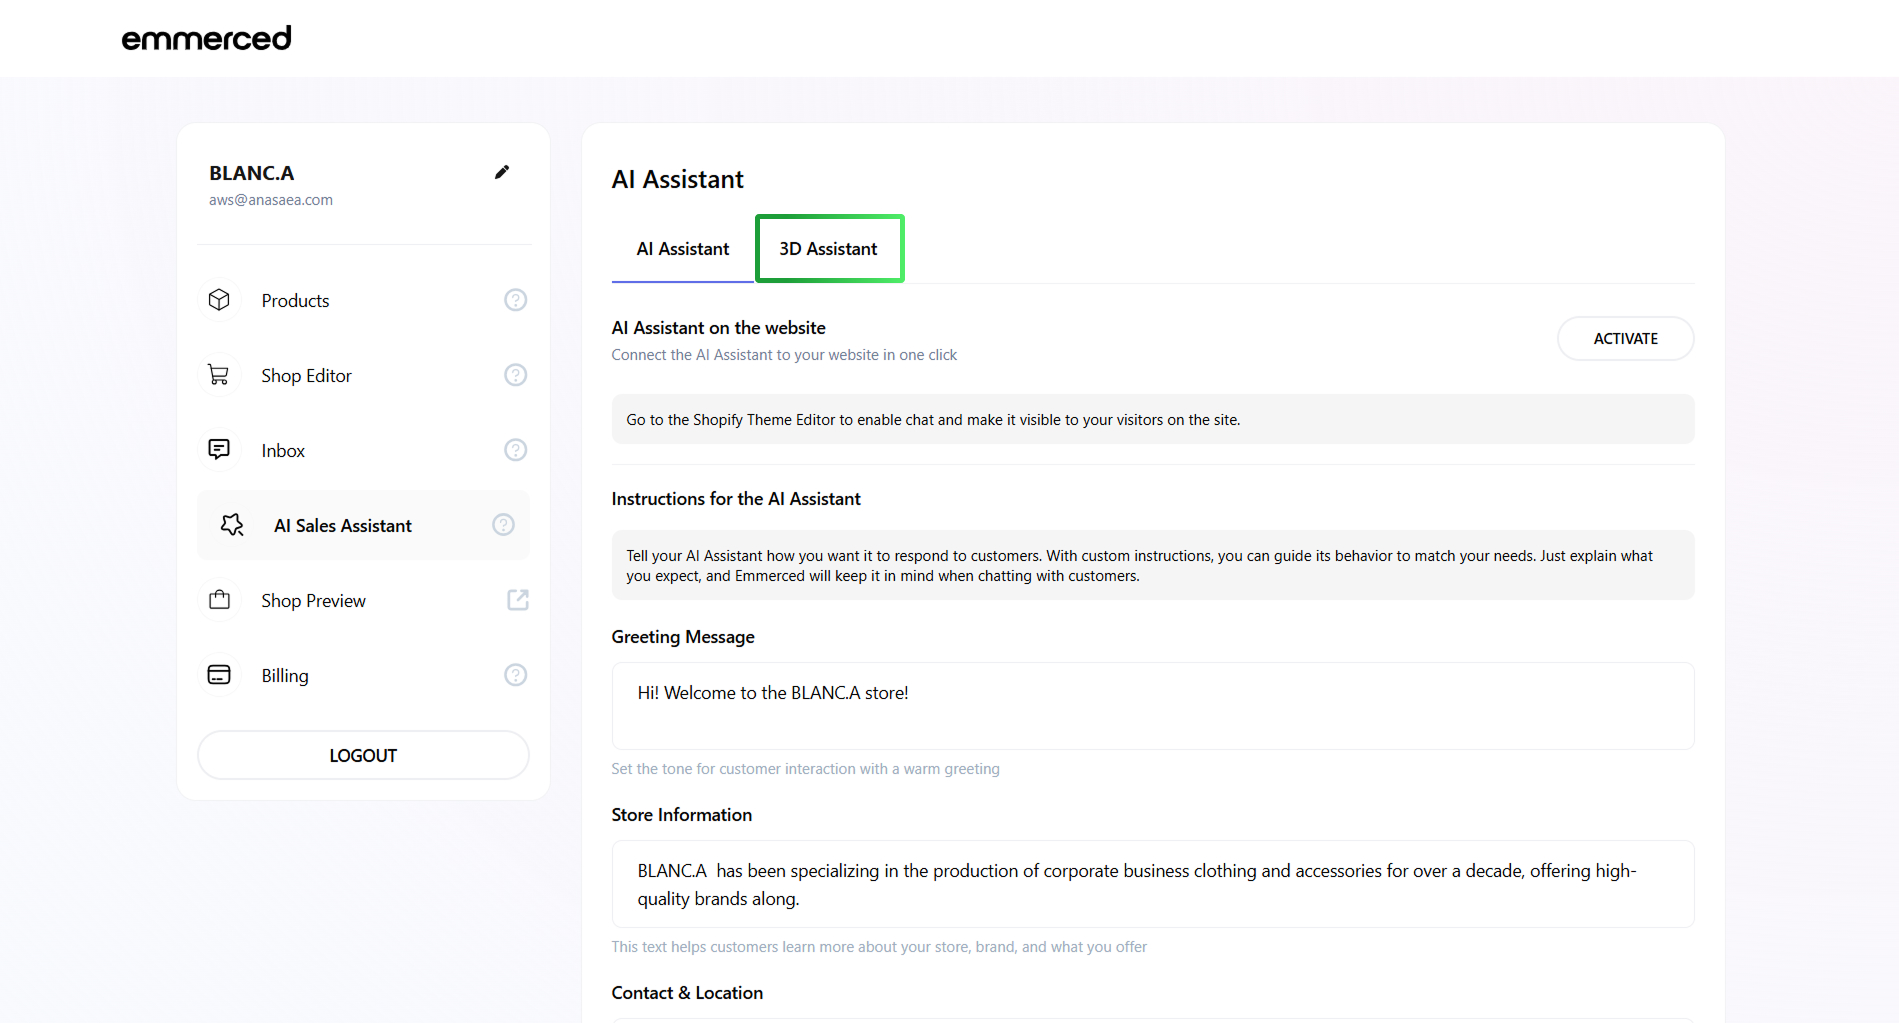
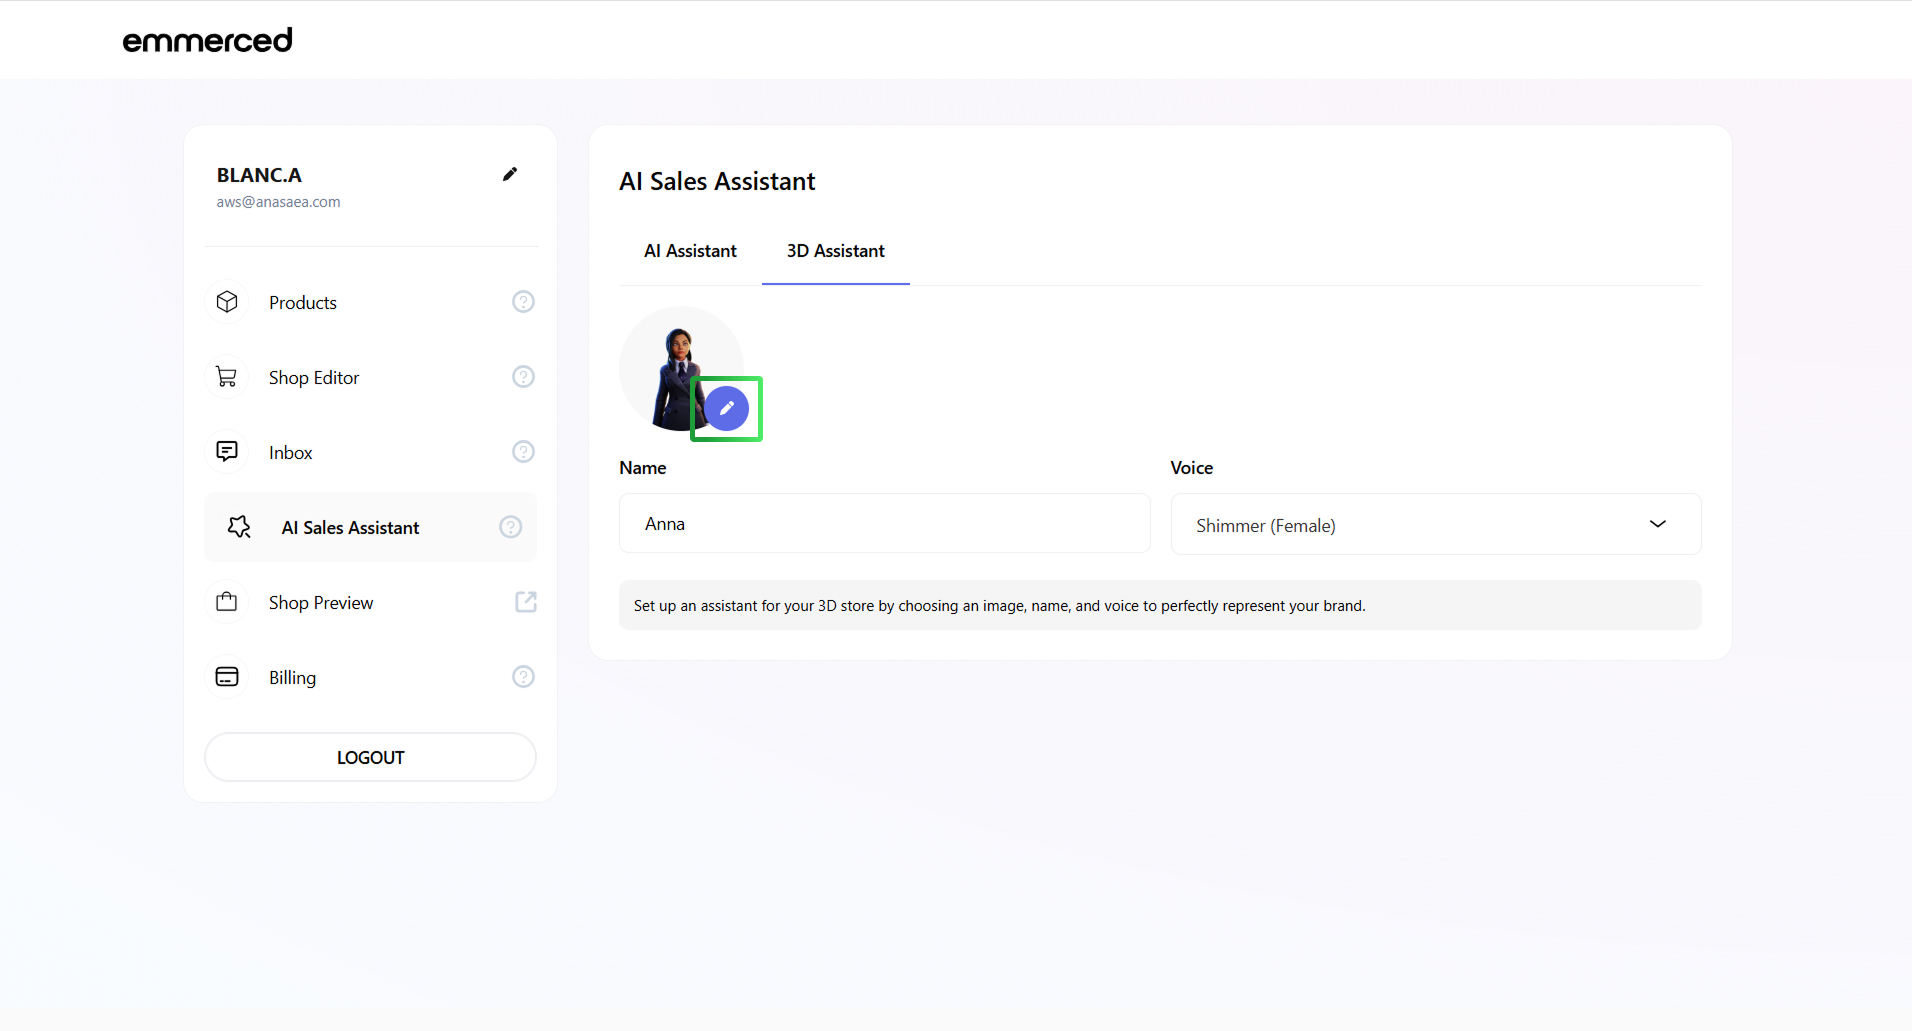
- Click the “3D AI Assistant” tab.
- Click onto change the avatar’s appearance.
It will open the Ready Player Me Avatar Editor window. - Click “Create a New Avatar” button.
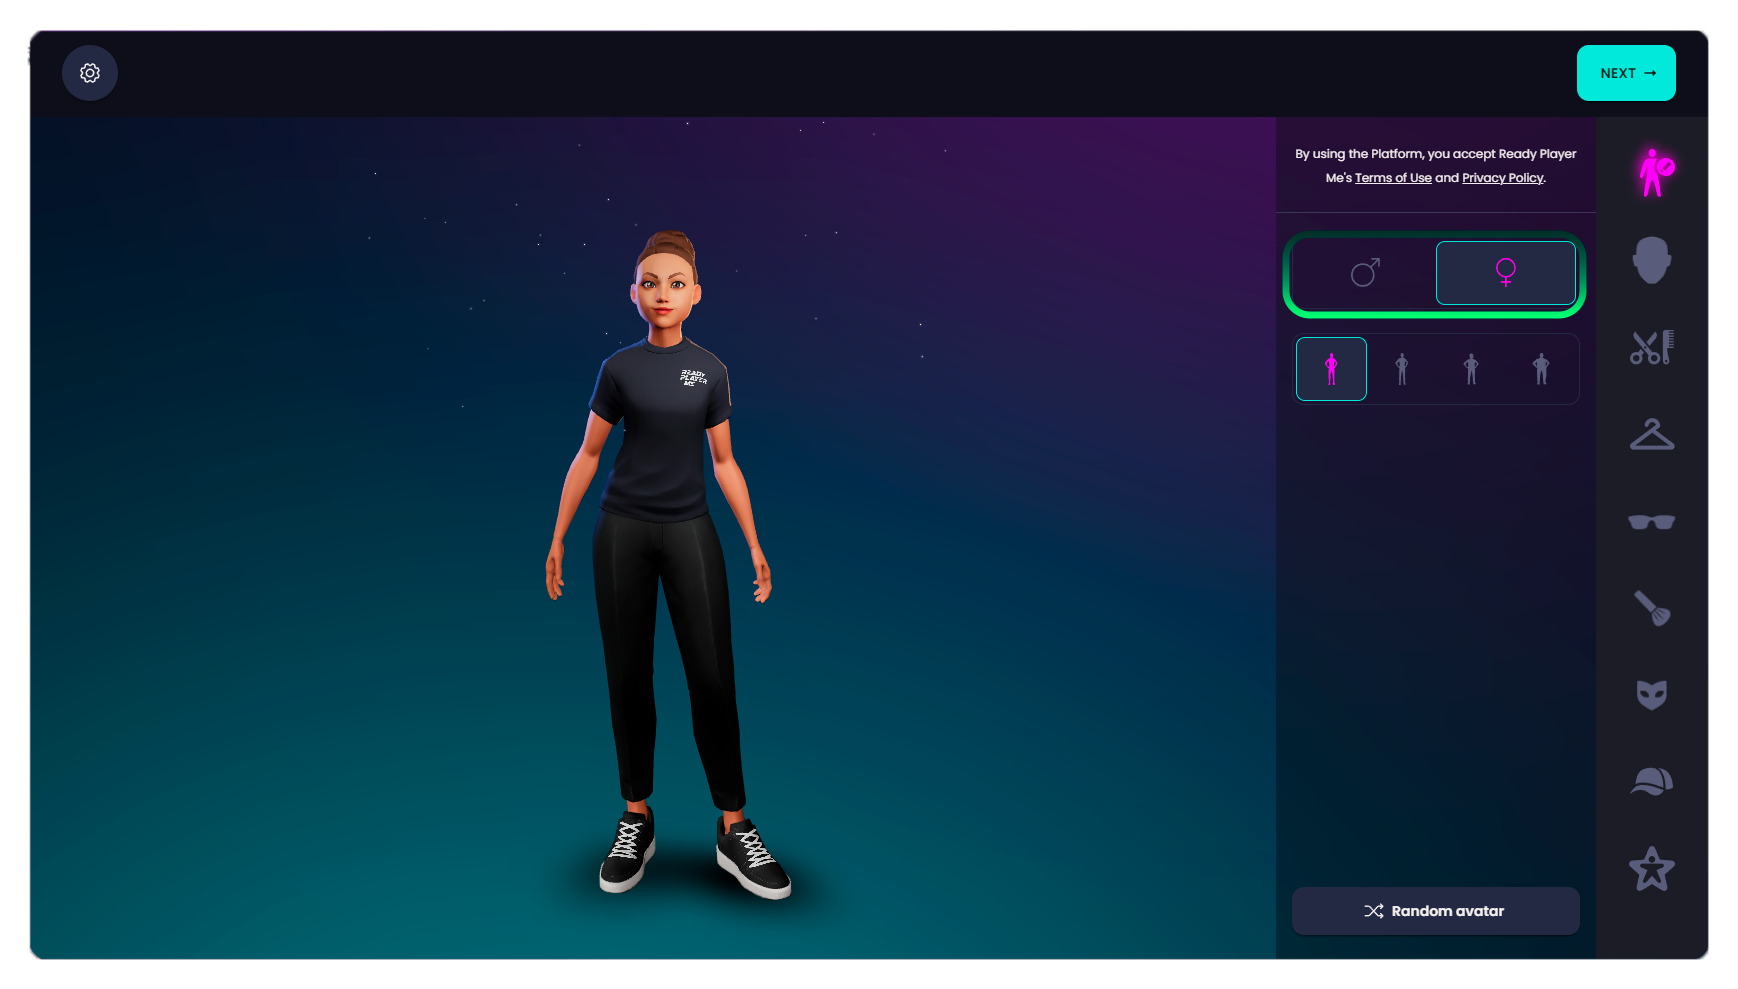
- Choose your Avatar’s gender.
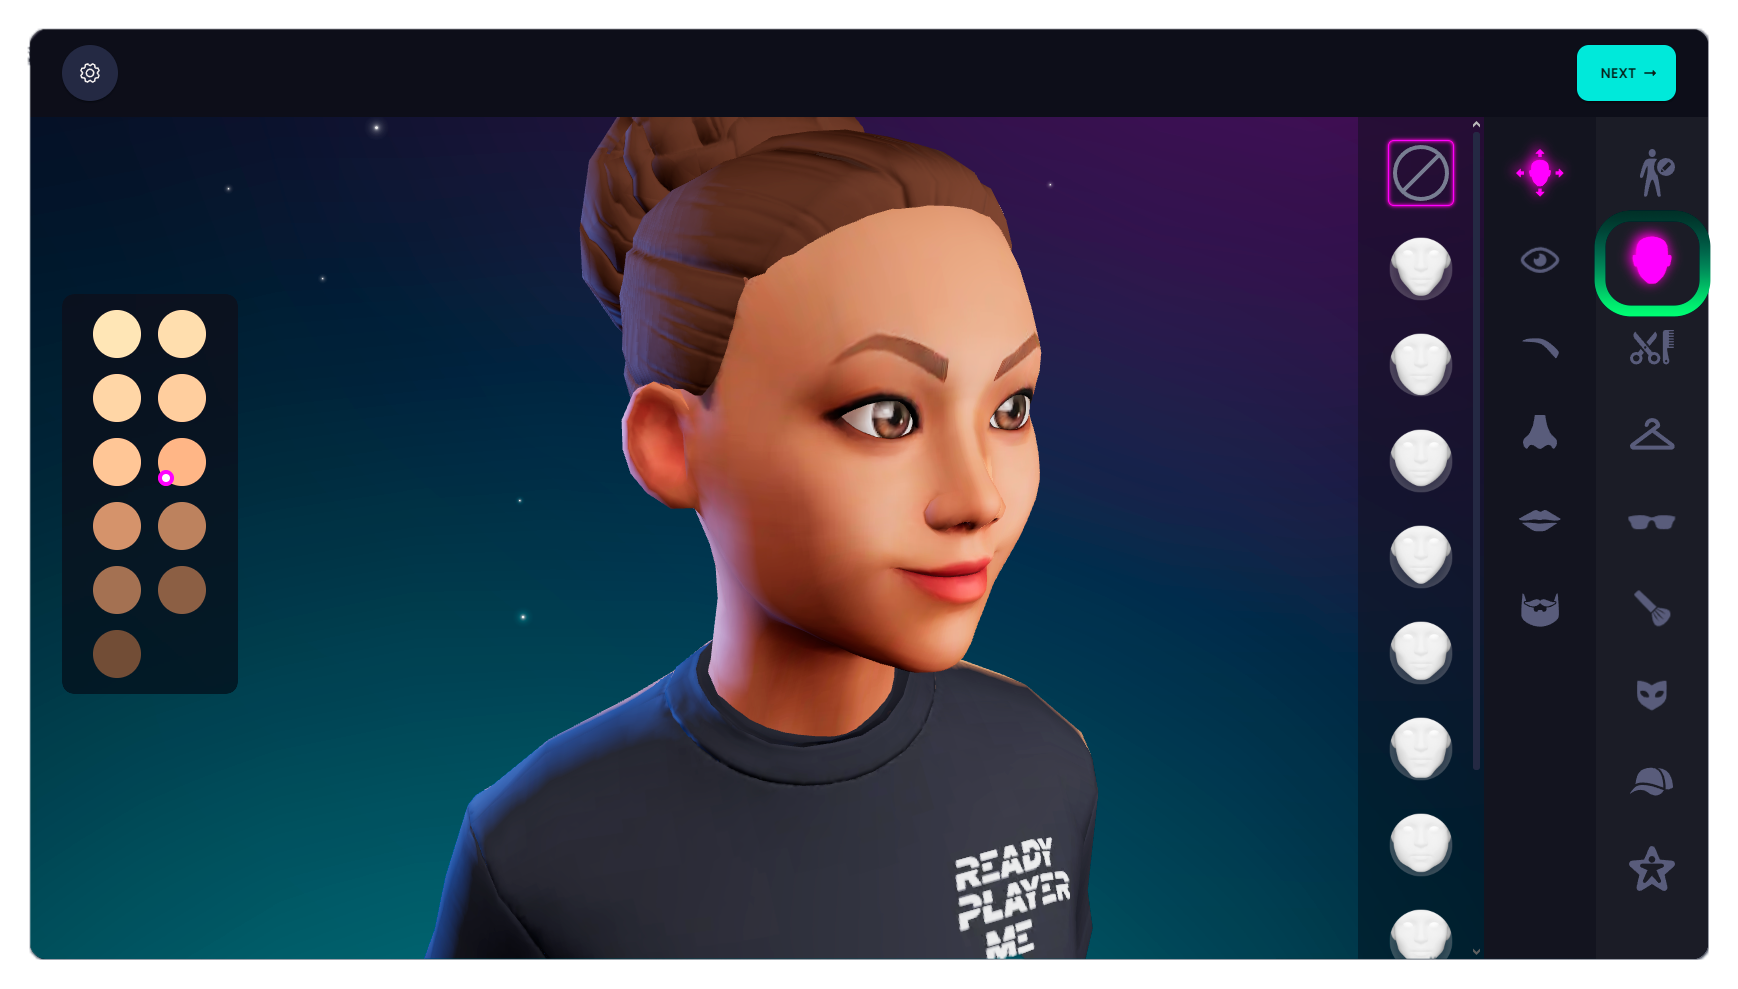
- Customize your AI Aassistant by selecting facial features from the available options, ensuring a unique and engaging appearance.
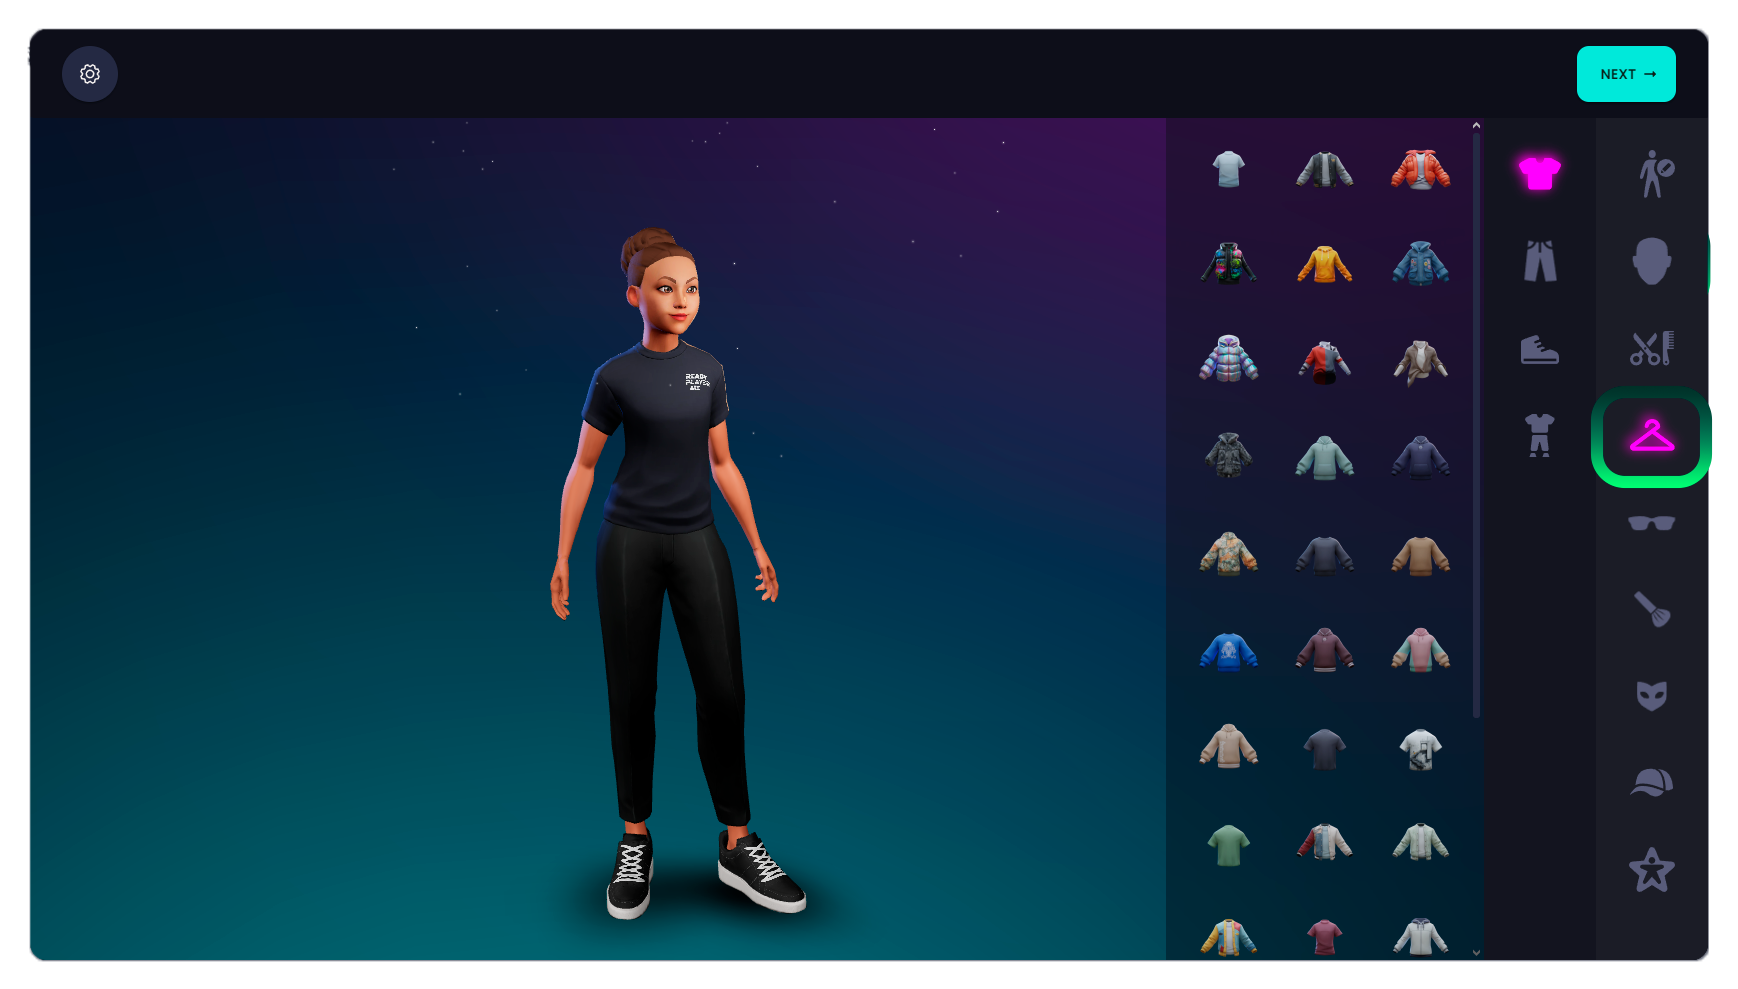
- Select the clothing style you want your AI Assistant to wear from the available options, customizing their appearance to match your brand’s aesthetic.
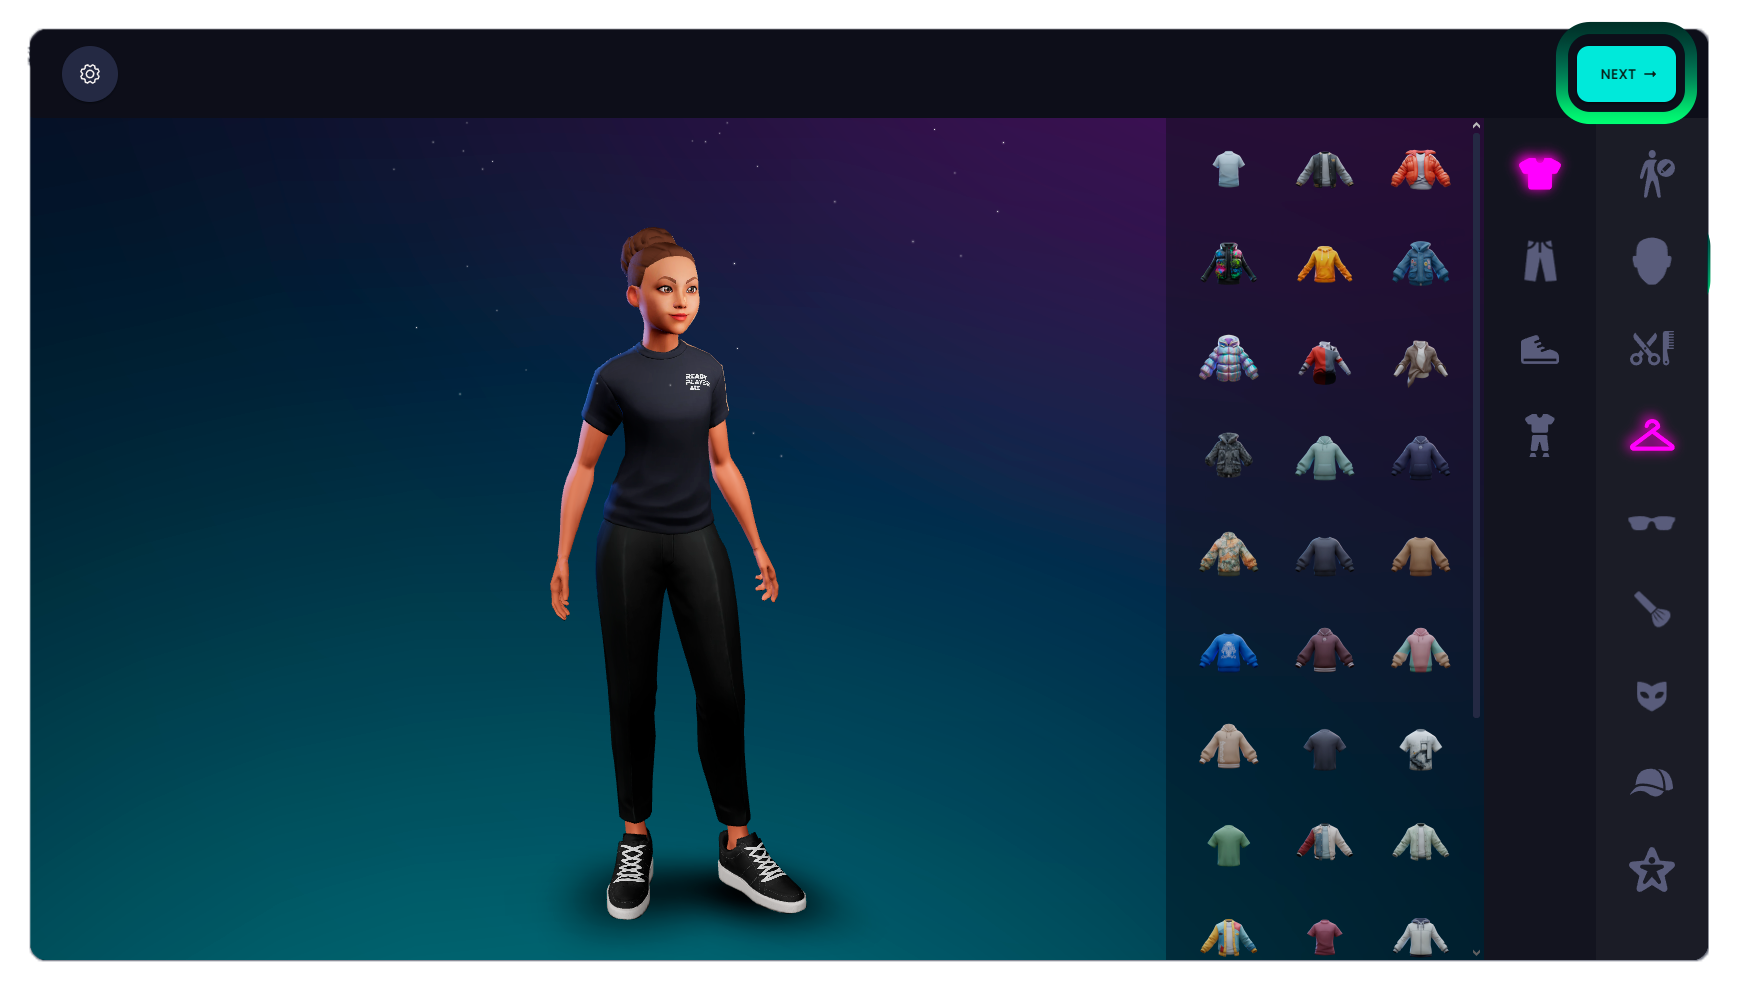
- Click “Next” button to proceed with the setup process.
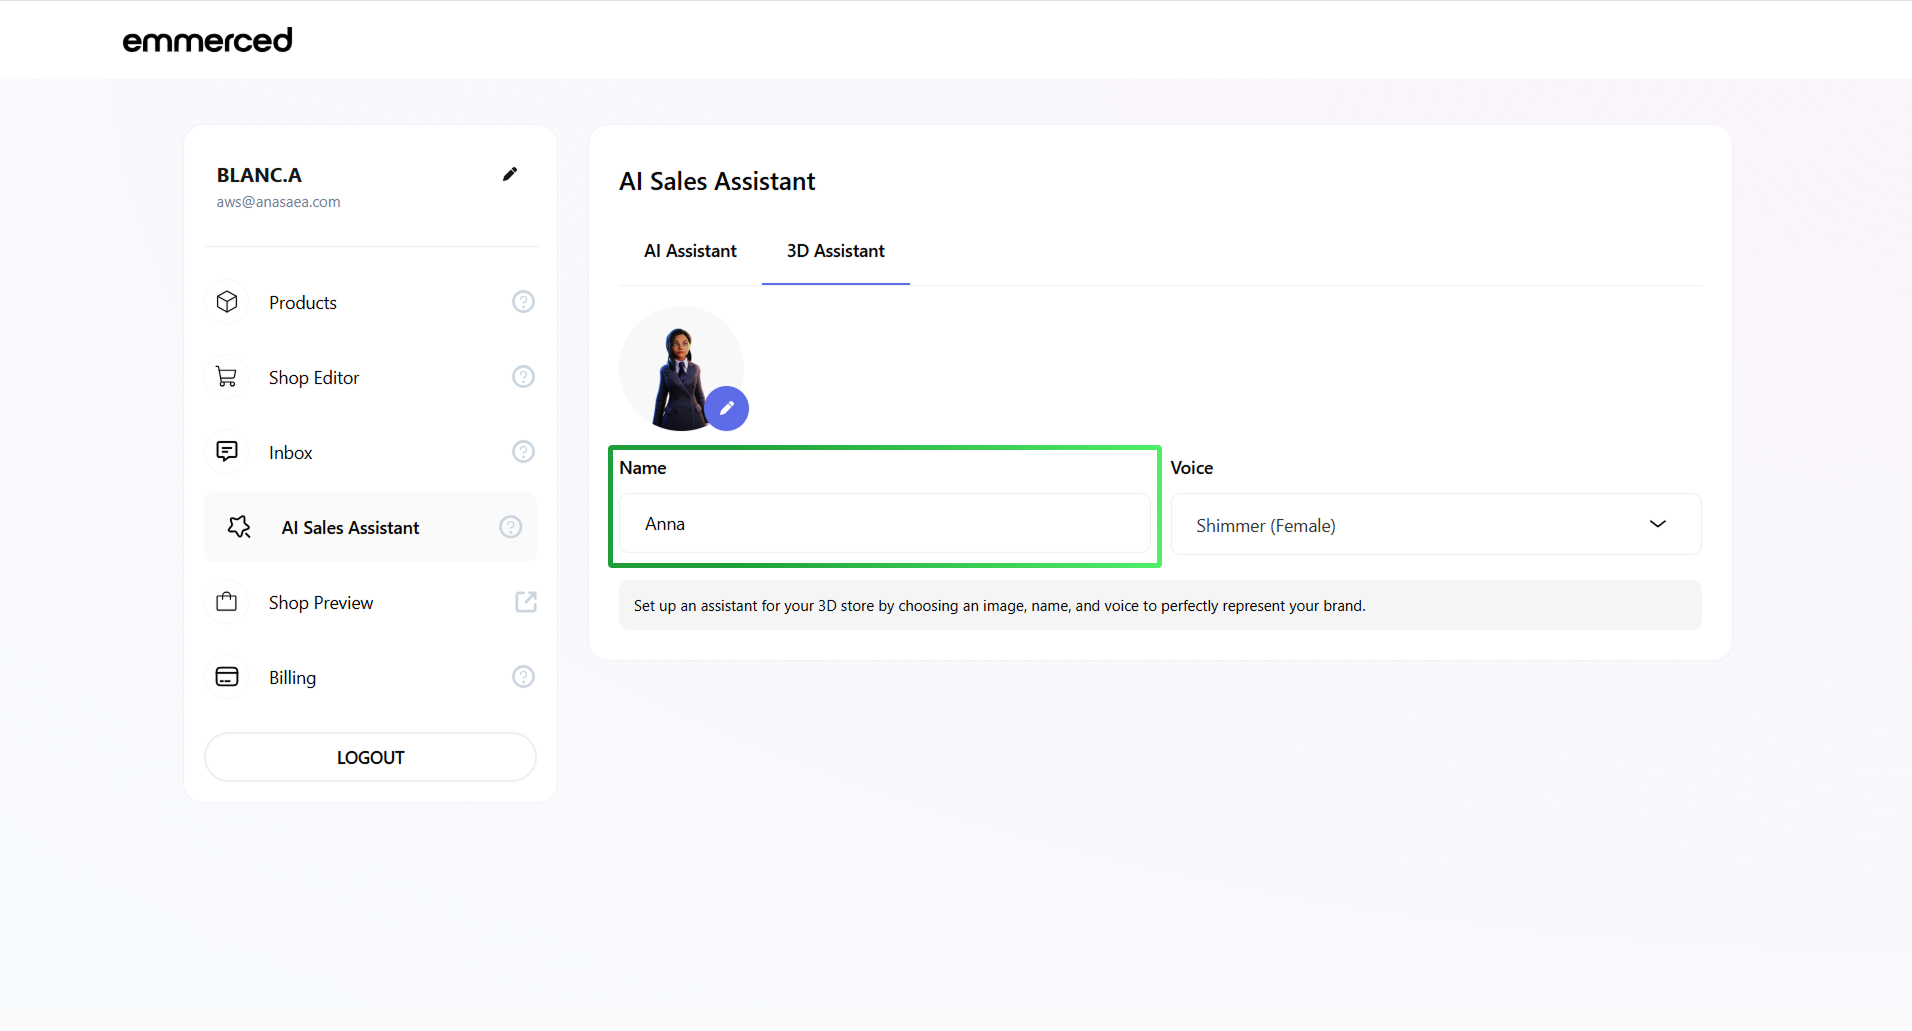
- Click on the input field to change the avatar name.
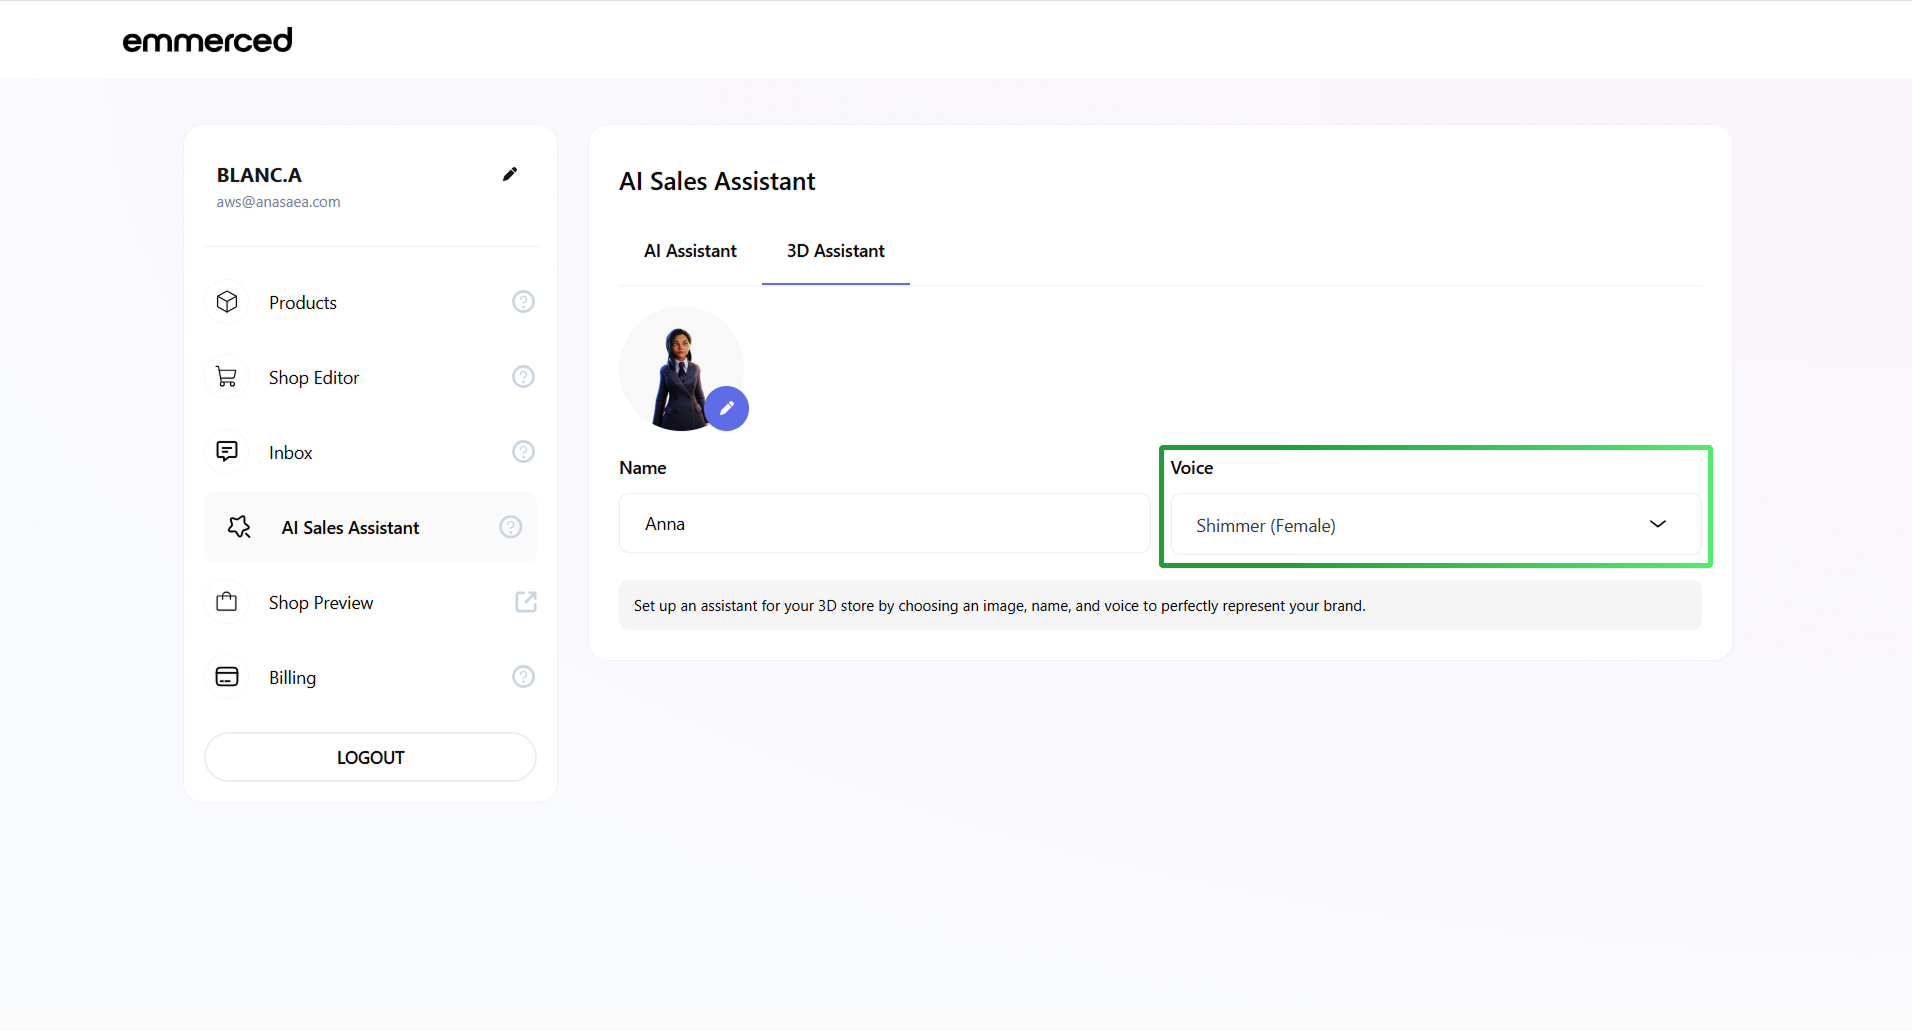
- Click on the “Voice” selector to change the voice of the avatar that will communicate with your customers in the 3D store.
- Click on the “Save” button.
- Click the “3D AI Assistant” tab.
Select “Shop Preview” to test your AI Assistant and see how it interacts within your store environment.
You have two ways to interact with the AI Assistant:
- Talking to the AI Assistant using the microphone: Engage in real-time conversations by speaking directly to the AI Assistant for a hands-free experience.
- Texting with the AI Assistant using the ChatBox: Type your messages in the ChatBox located in the bottom-left corner for quick and direct communication.
- Talking to the AI Assistant using the microphone: Engage in real-time conversations by speaking directly to the AI Assistant for a hands-free experience.